Overview
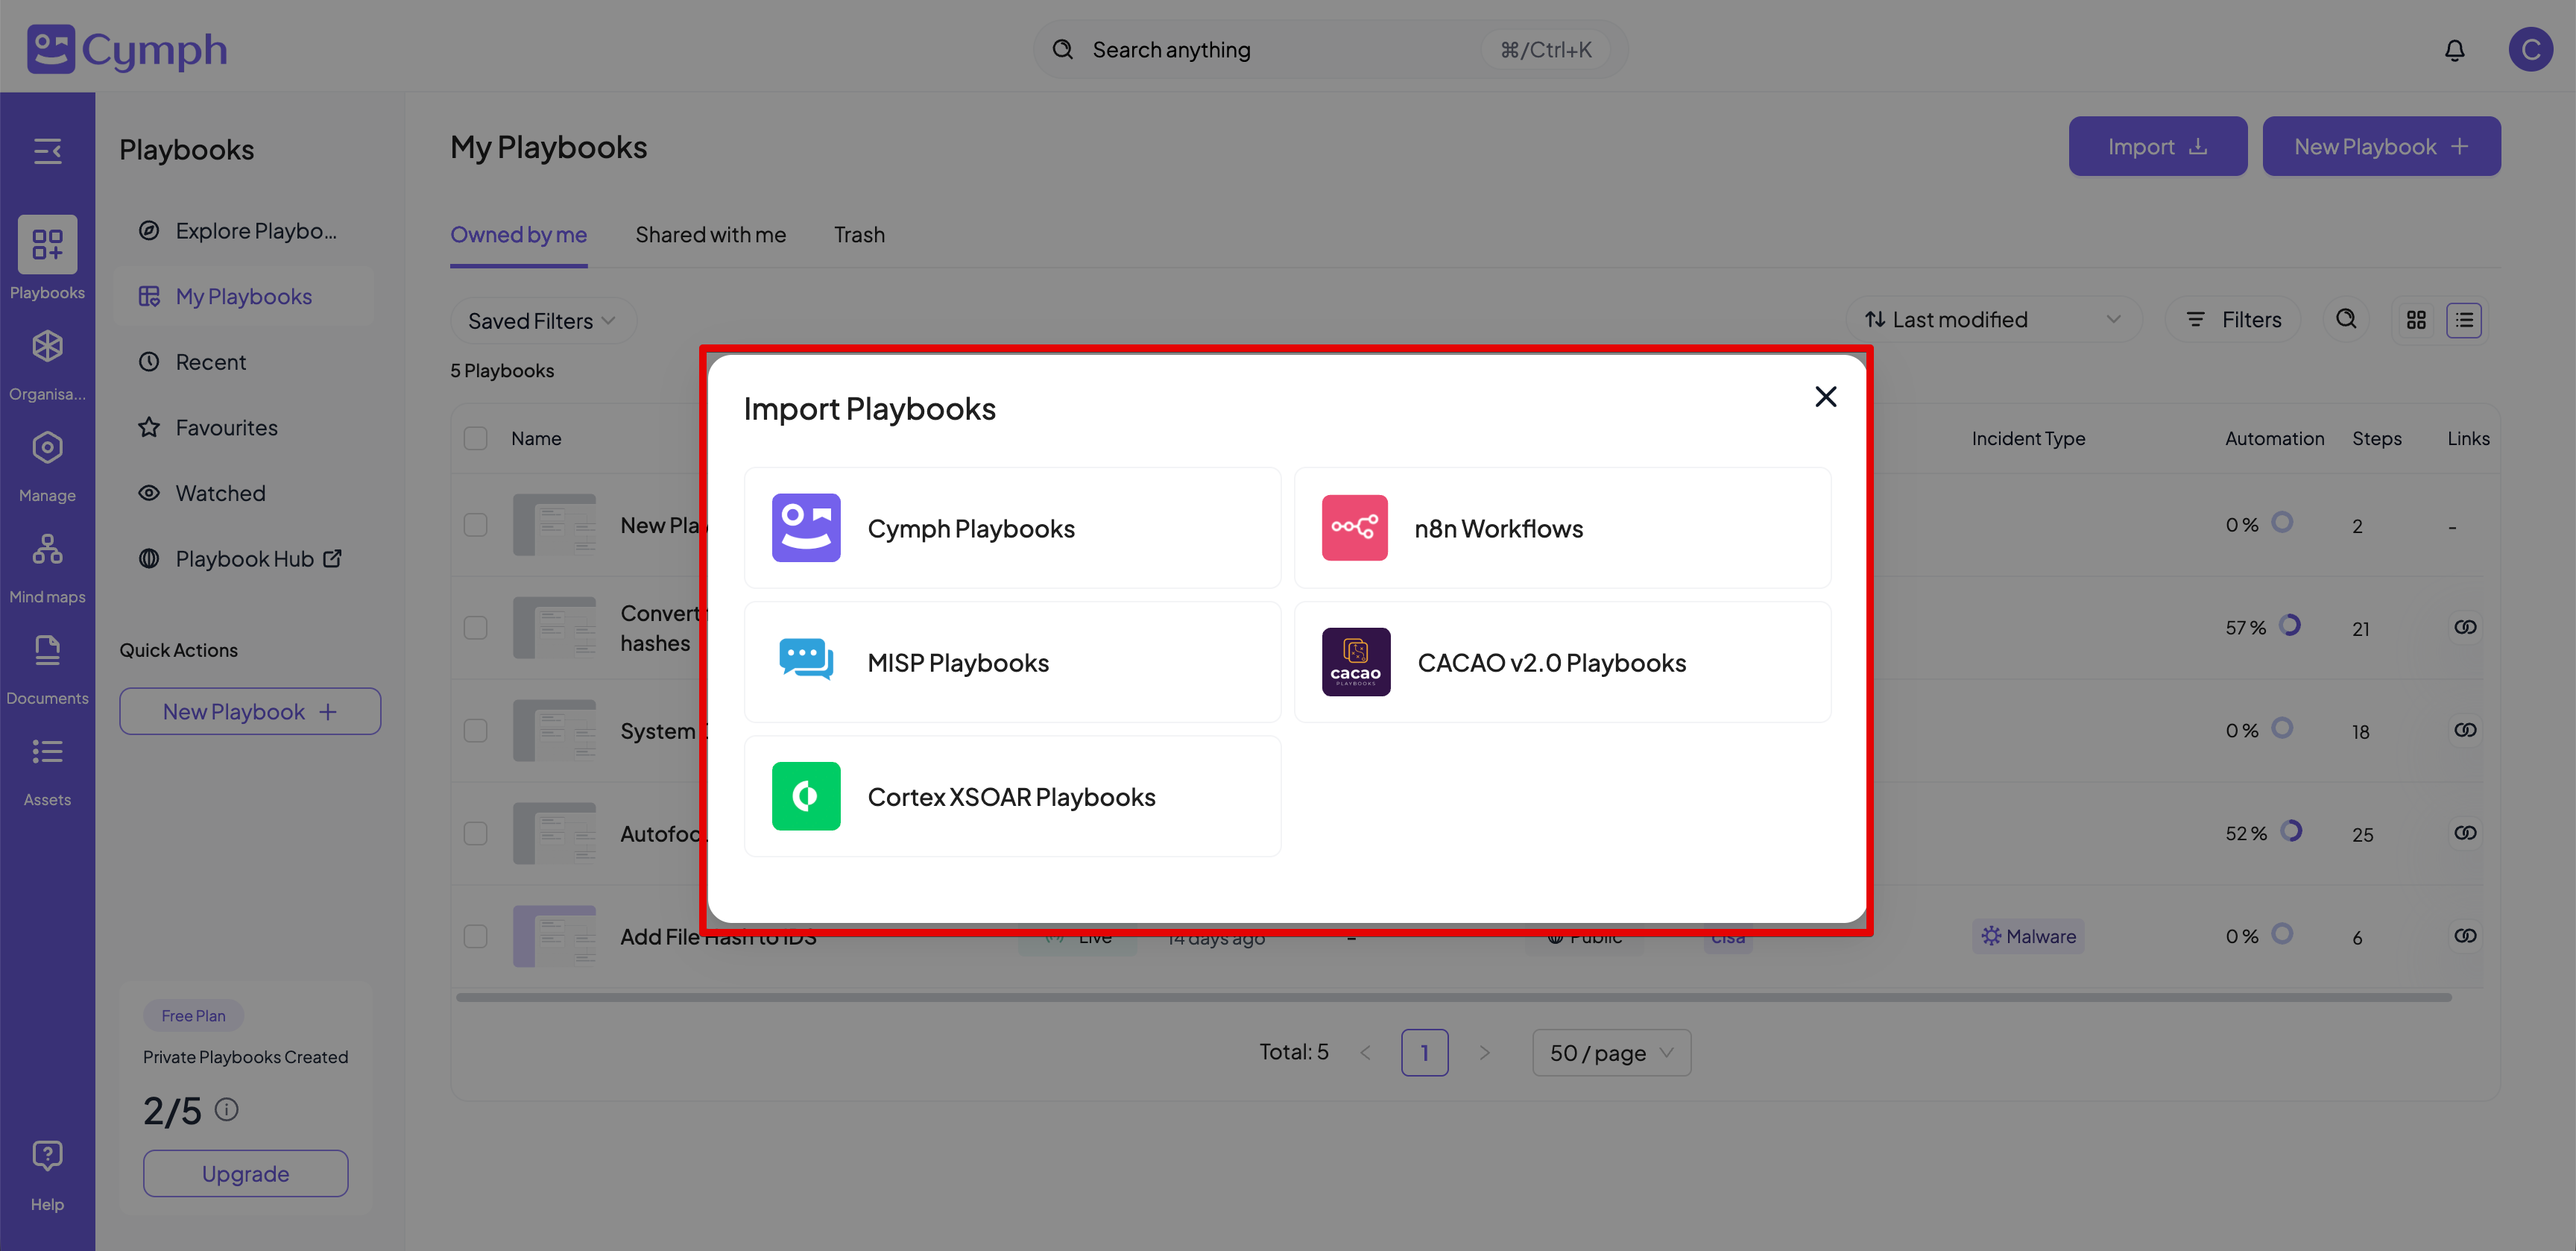
Cymph allows the seamless import of playbooks found in different formats and systems. The following import options are available:- Cymph playbooks - from files
- Cortex XSOAR playbooks - both from files and live system
- n8n workflows - both from files and live system
- MISP playbooks - from files
- CACAOv2 playbooks - from files
How to import a playbook
- Go to the Playbooks section
- Click on Library from the sidebar menu.
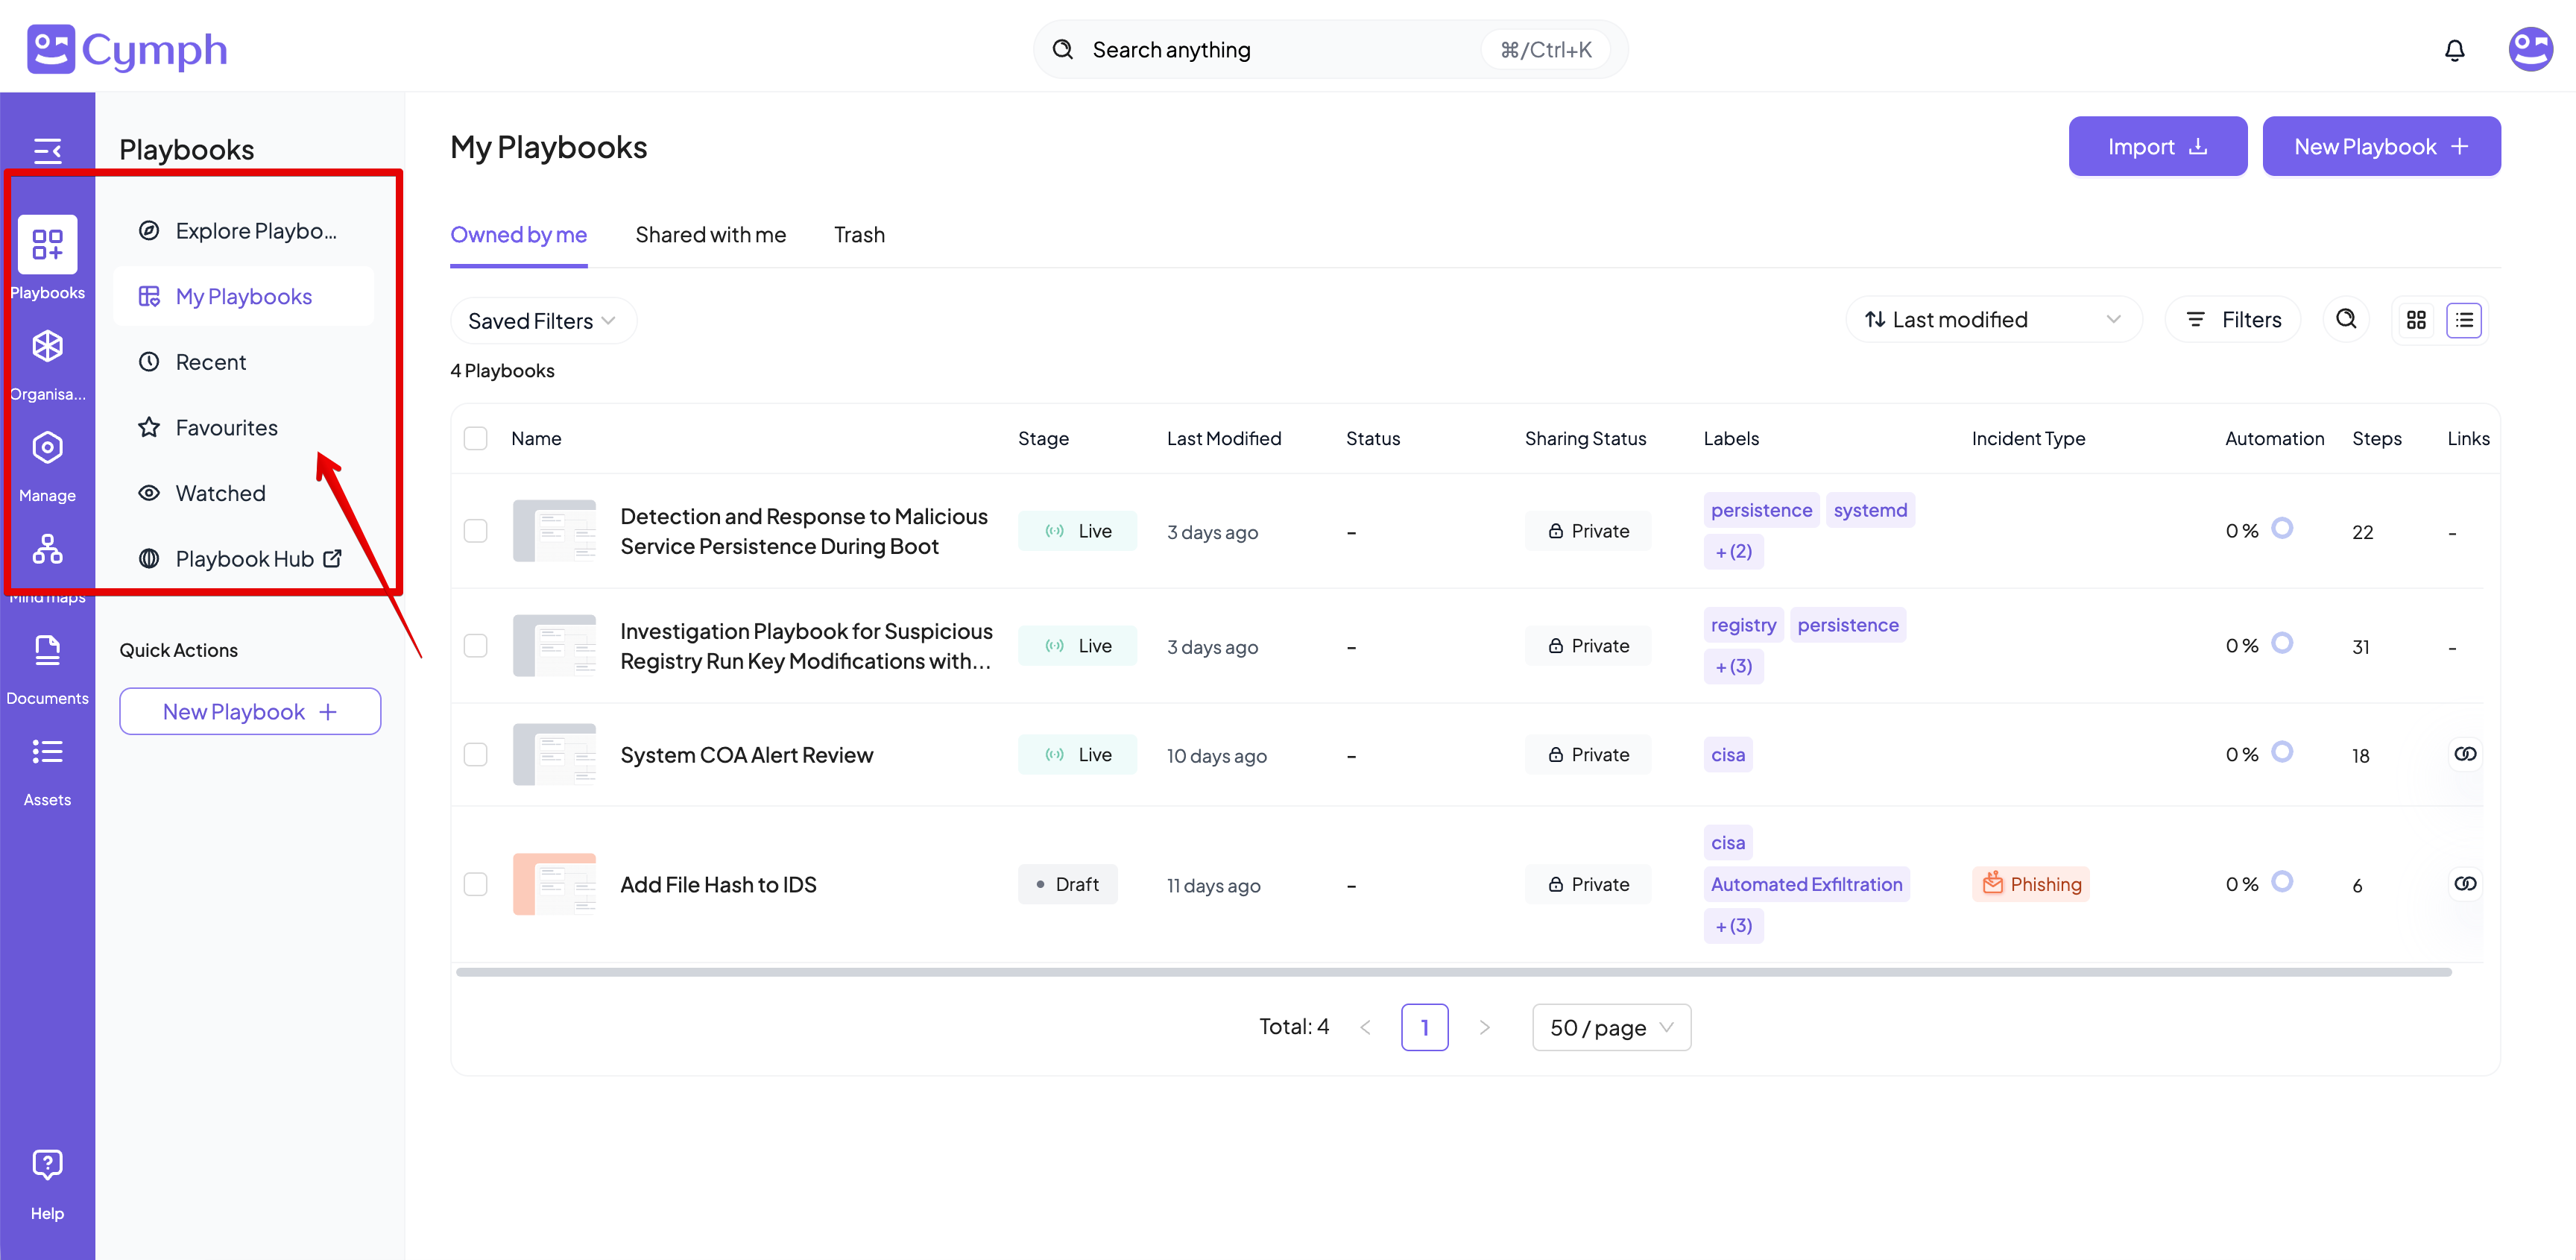
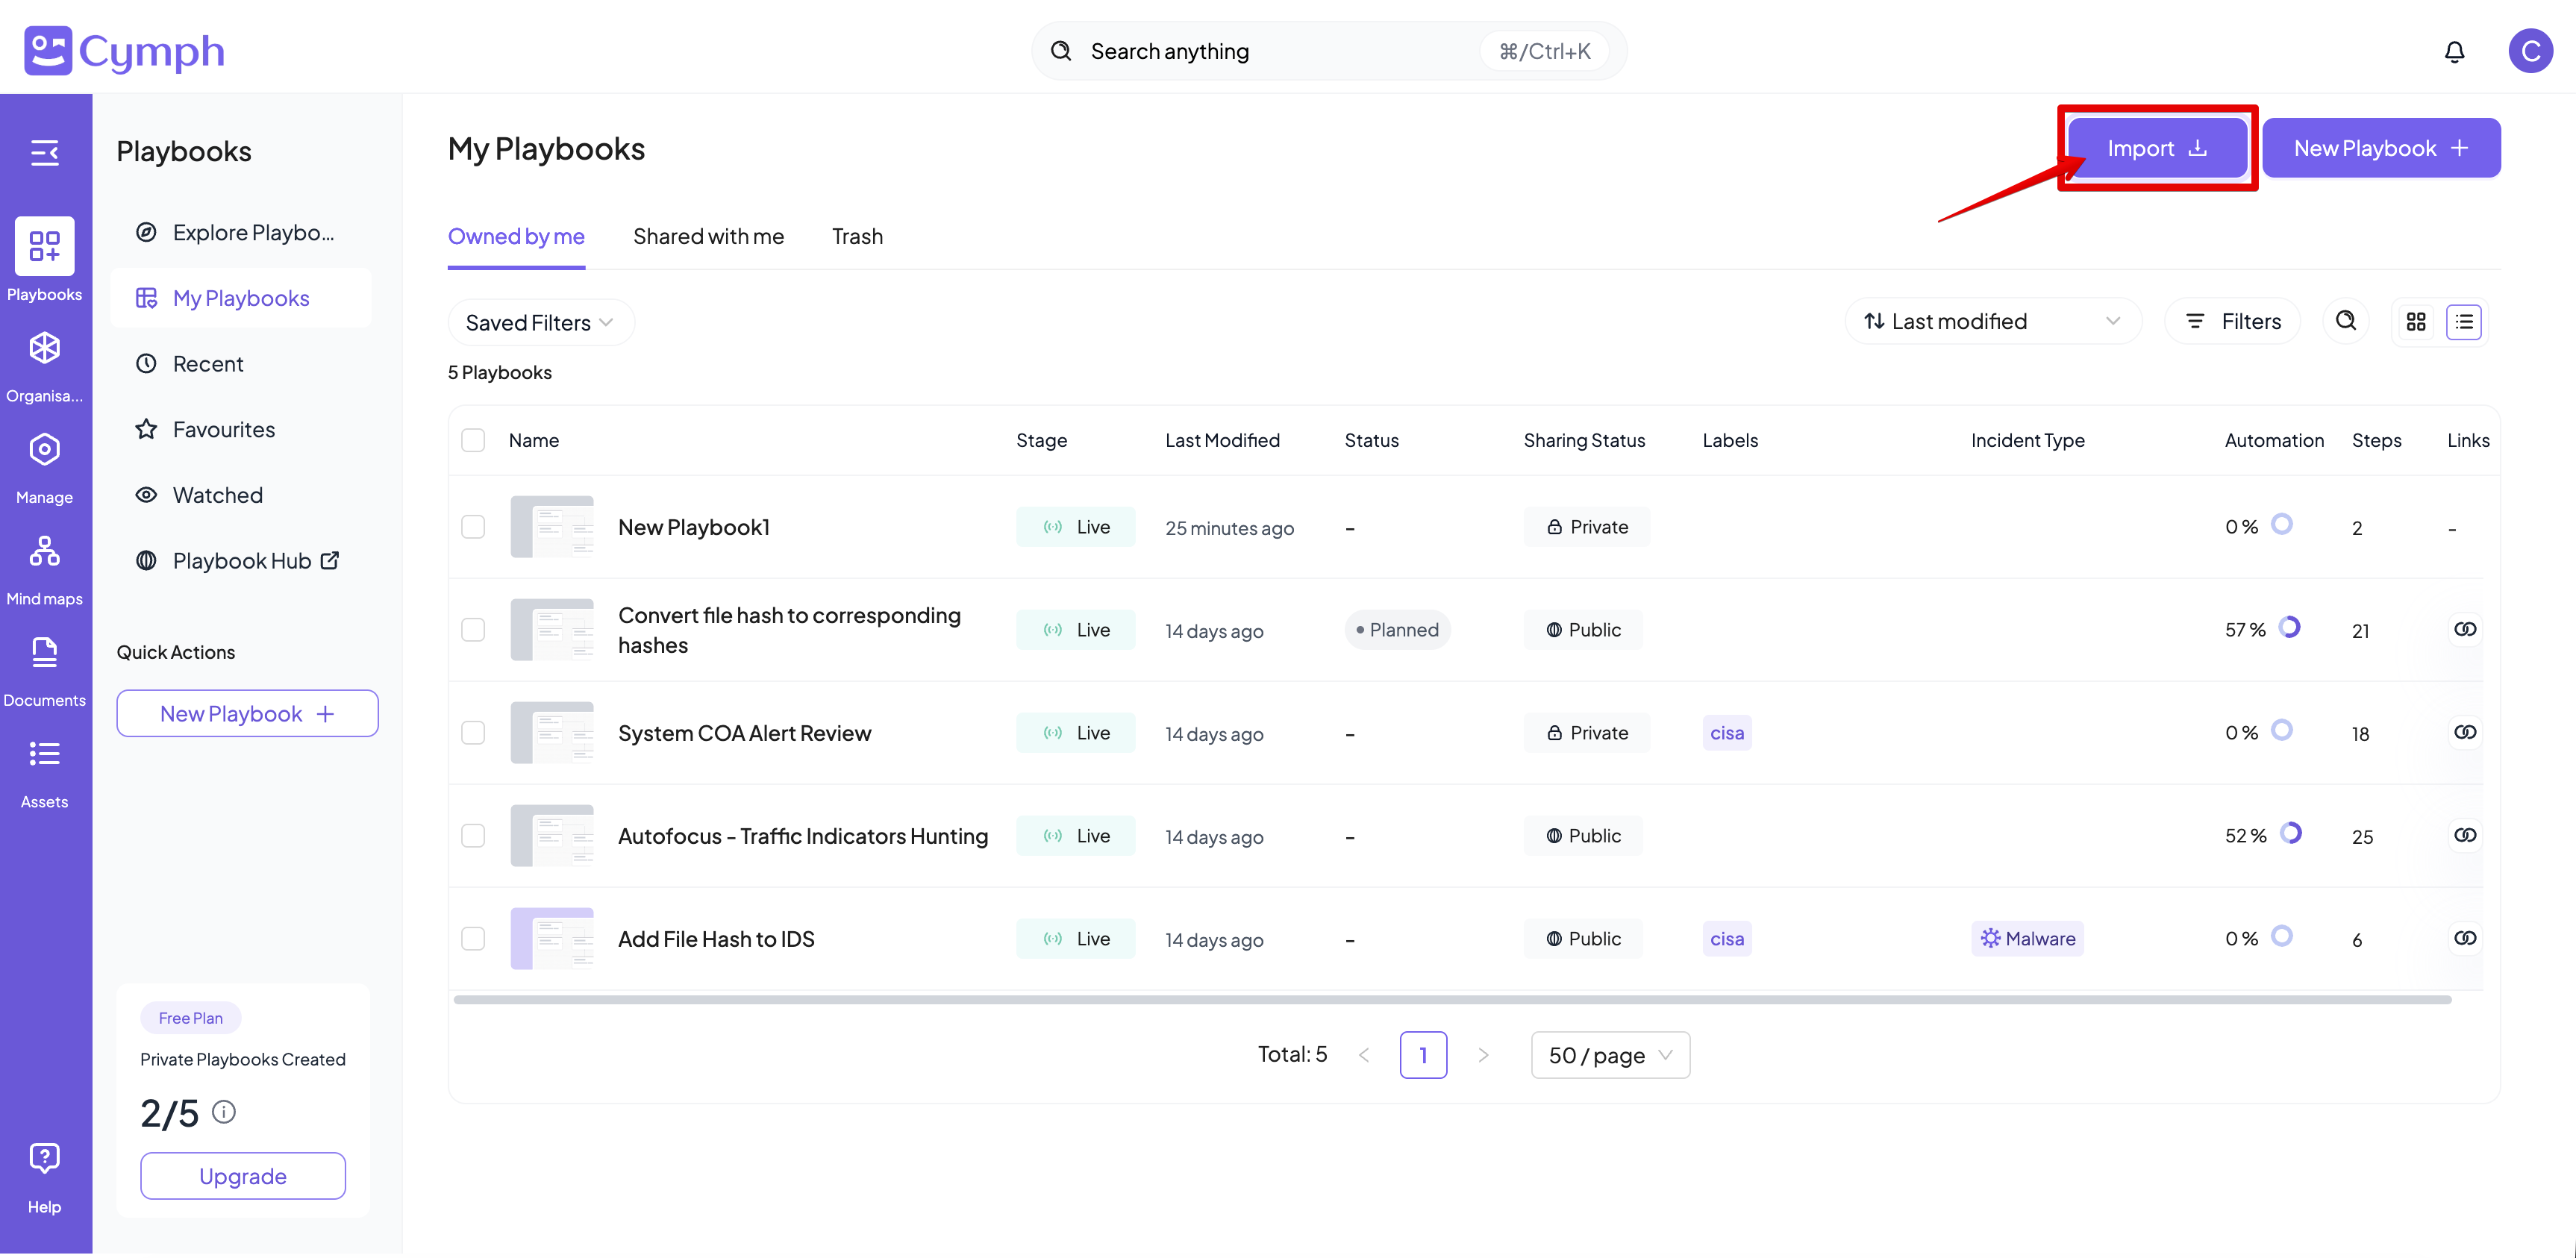
- Start the Import process
- Click on the Import button
- Select the type of playbook you want to import
Importing from files
Let us select to import Cymph playbooks as an example for importing from files.- Once we select Cymph playbooks from the type selection modal, the file import dialog will appear
- Select (or drag and drop) the files you want to import and then click on Validate

- In the validation phase, you will see summary information about all playbooks in total and for each imported playbook separately.
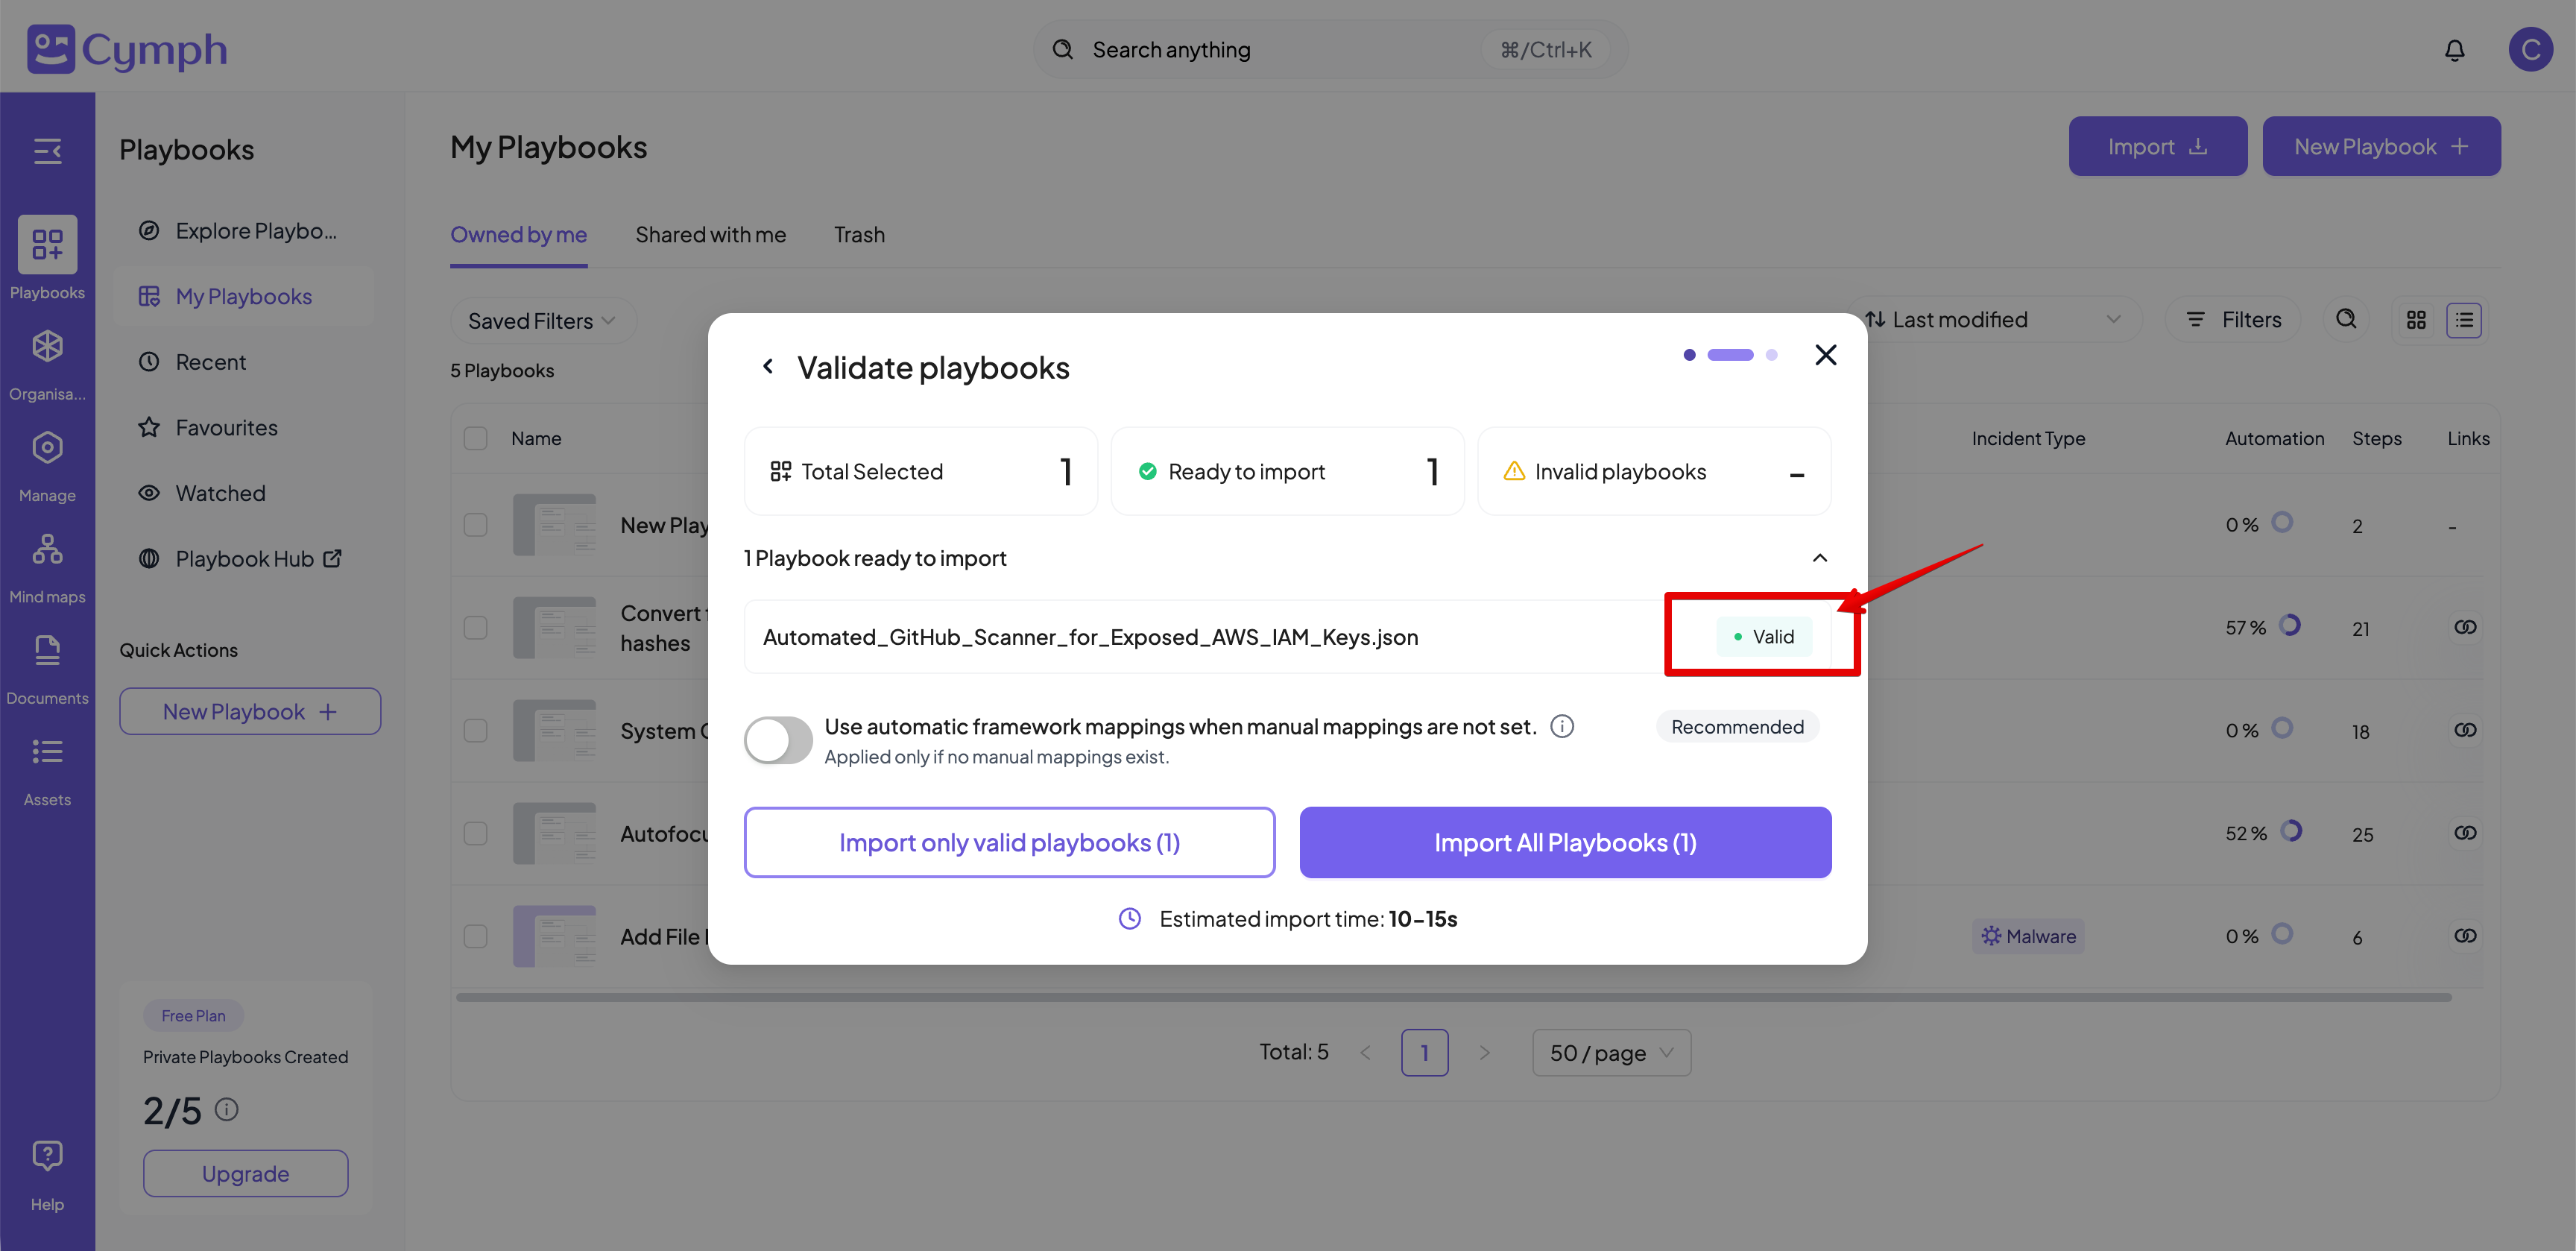
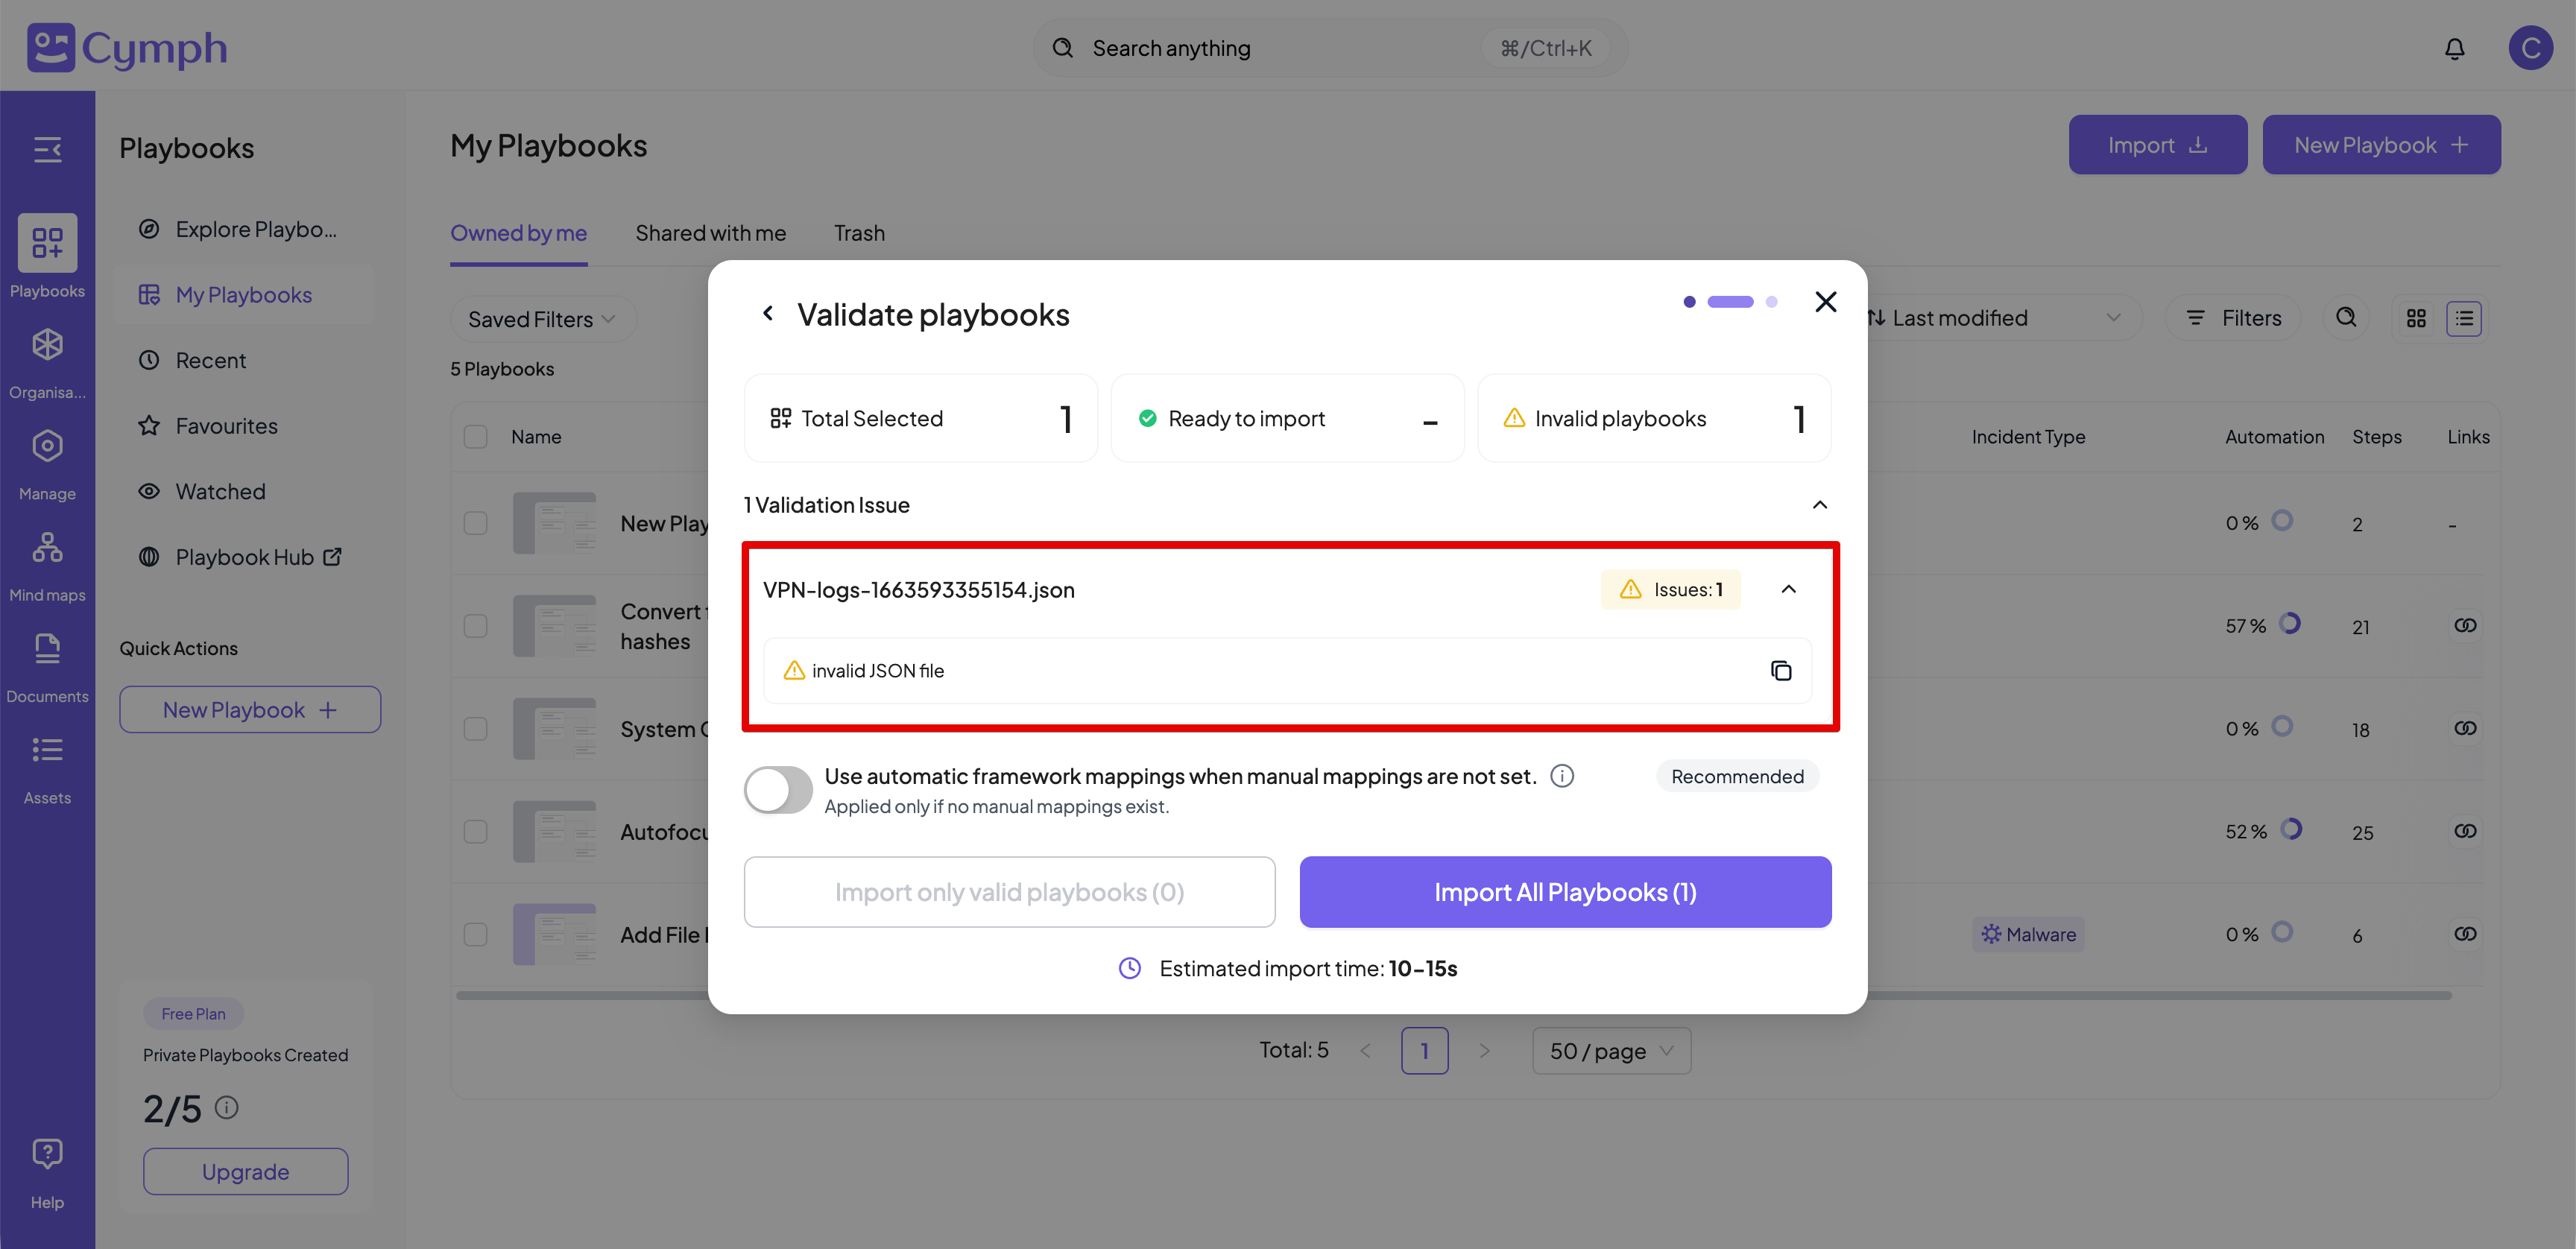
- You can enable the automatic framework mappings to map imported playbooks to the MITRE ATT&CK for Enterprise framework. If the playbooks are already tagged, the existing tags will be used instead.
- Once you are ready, you can import all valid playbooks
- A dialog box will appear to show the import progress. Once the import is complete, you can navigate to your playbooks via the Open My Playbooks button
Importing from a live system
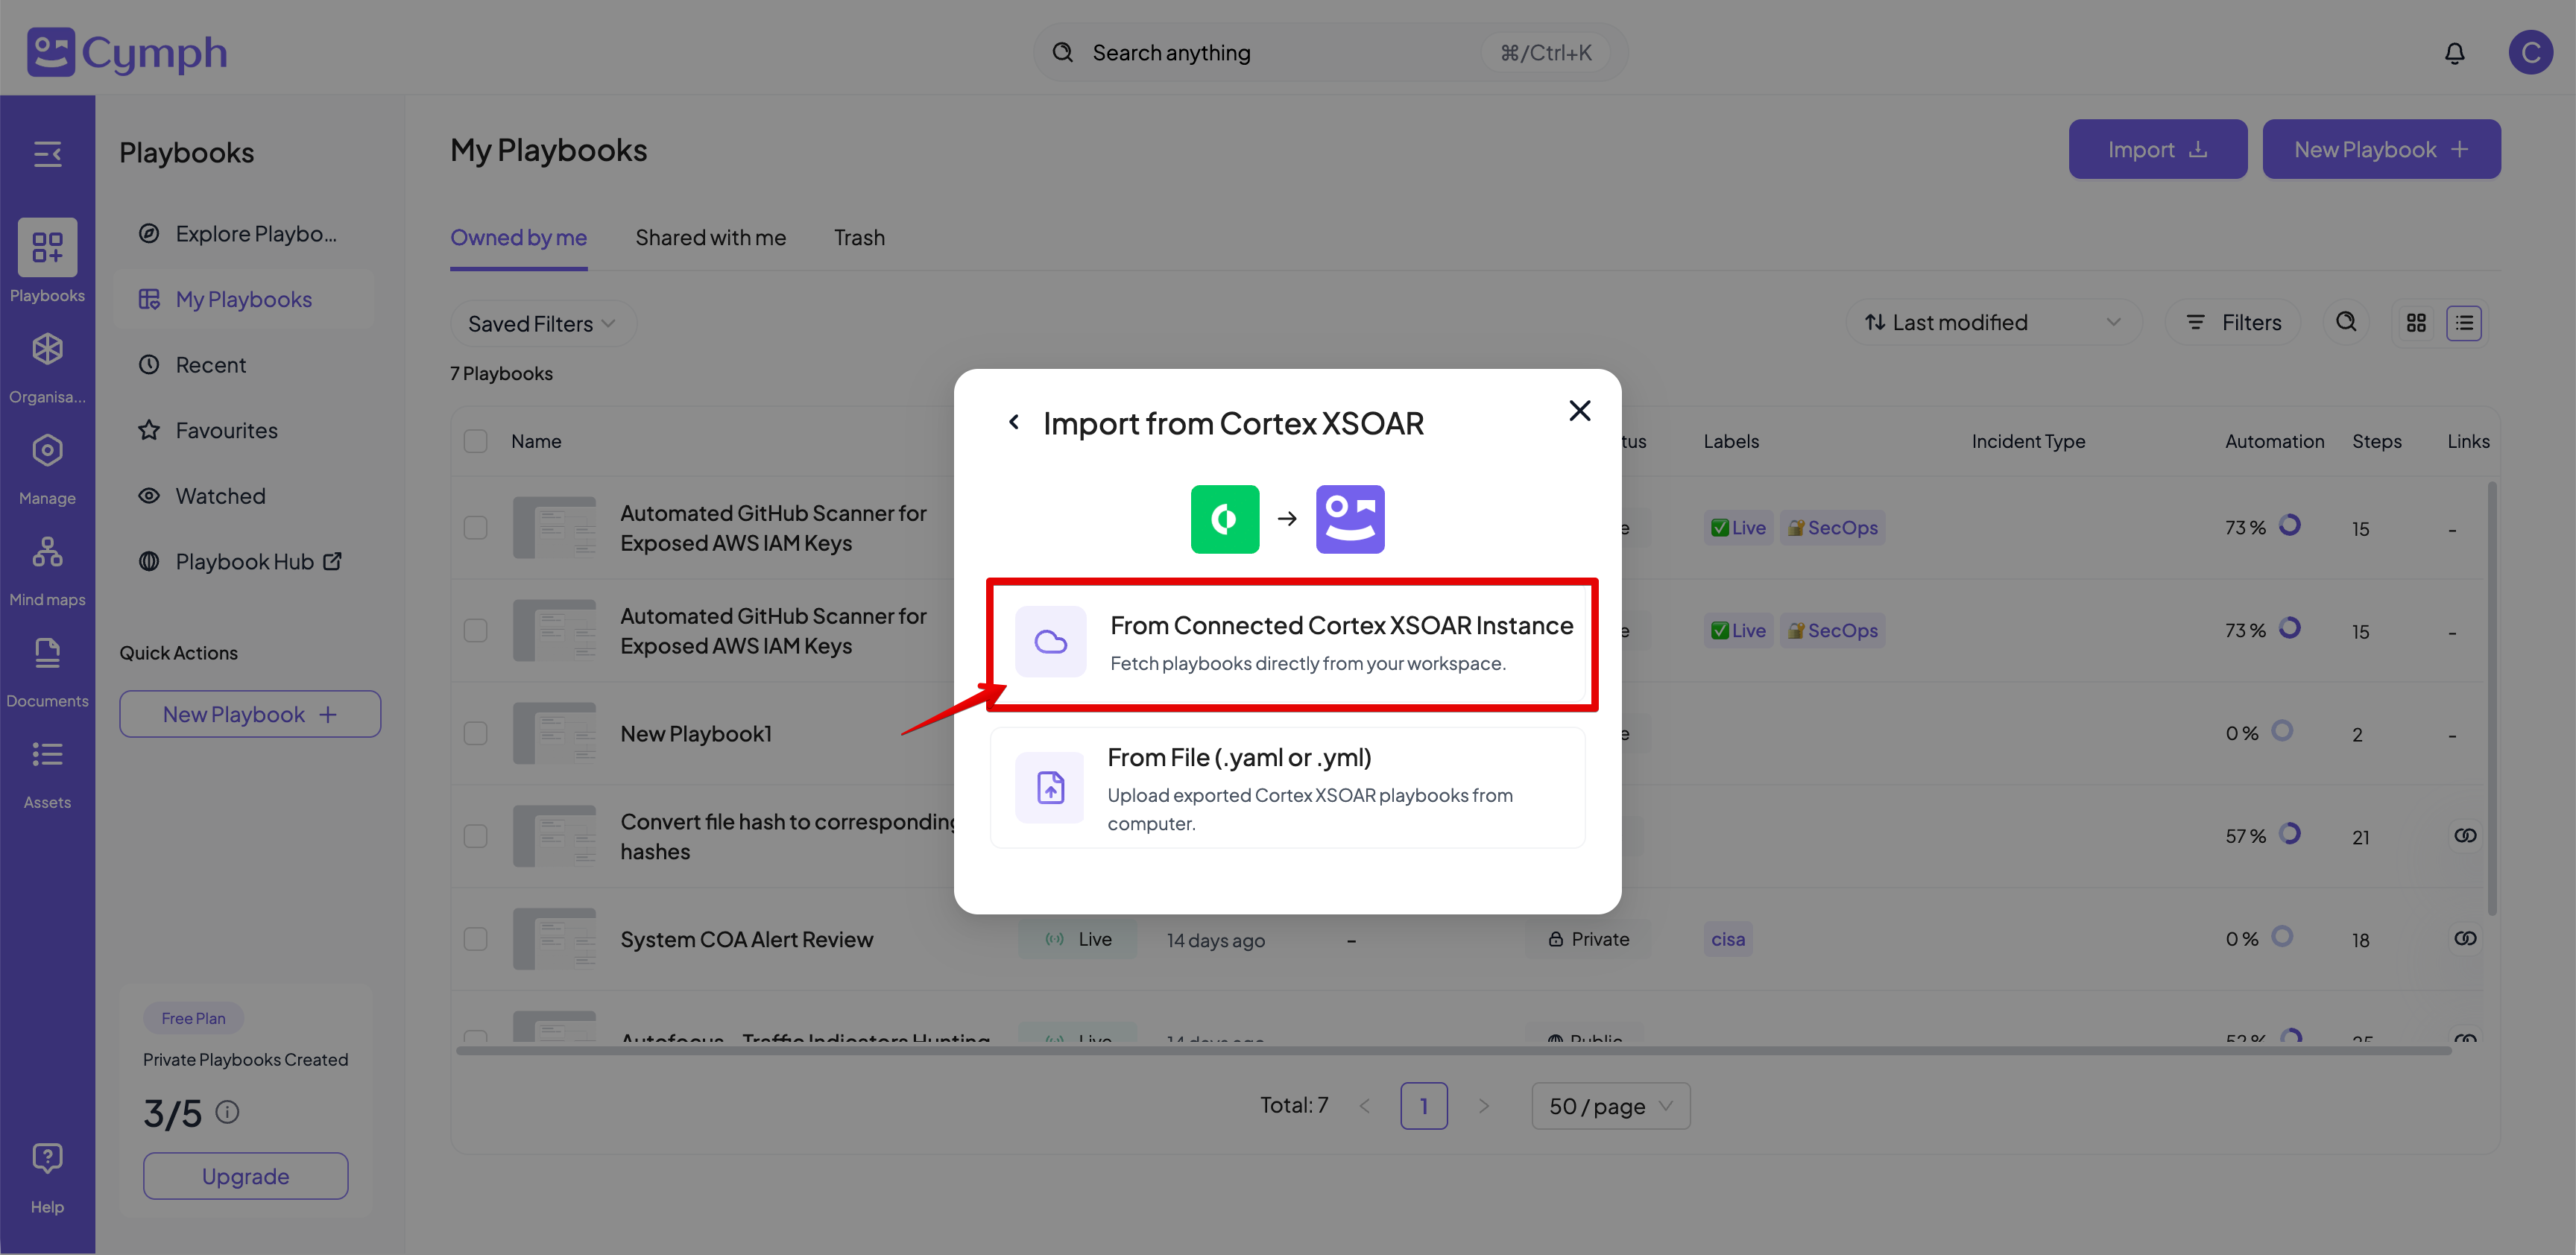
For certain types, like Cortex XSOAR and n8n, you can also import from a live system. As a pre-requisite, a working integration must exist. In this section, we will use a live Cortex XSOAR system as an example.- Select Cortex XSOAR Playbooks from the import dialog
- From the followup dialog, select From Connected Cortex XSOAR Instance
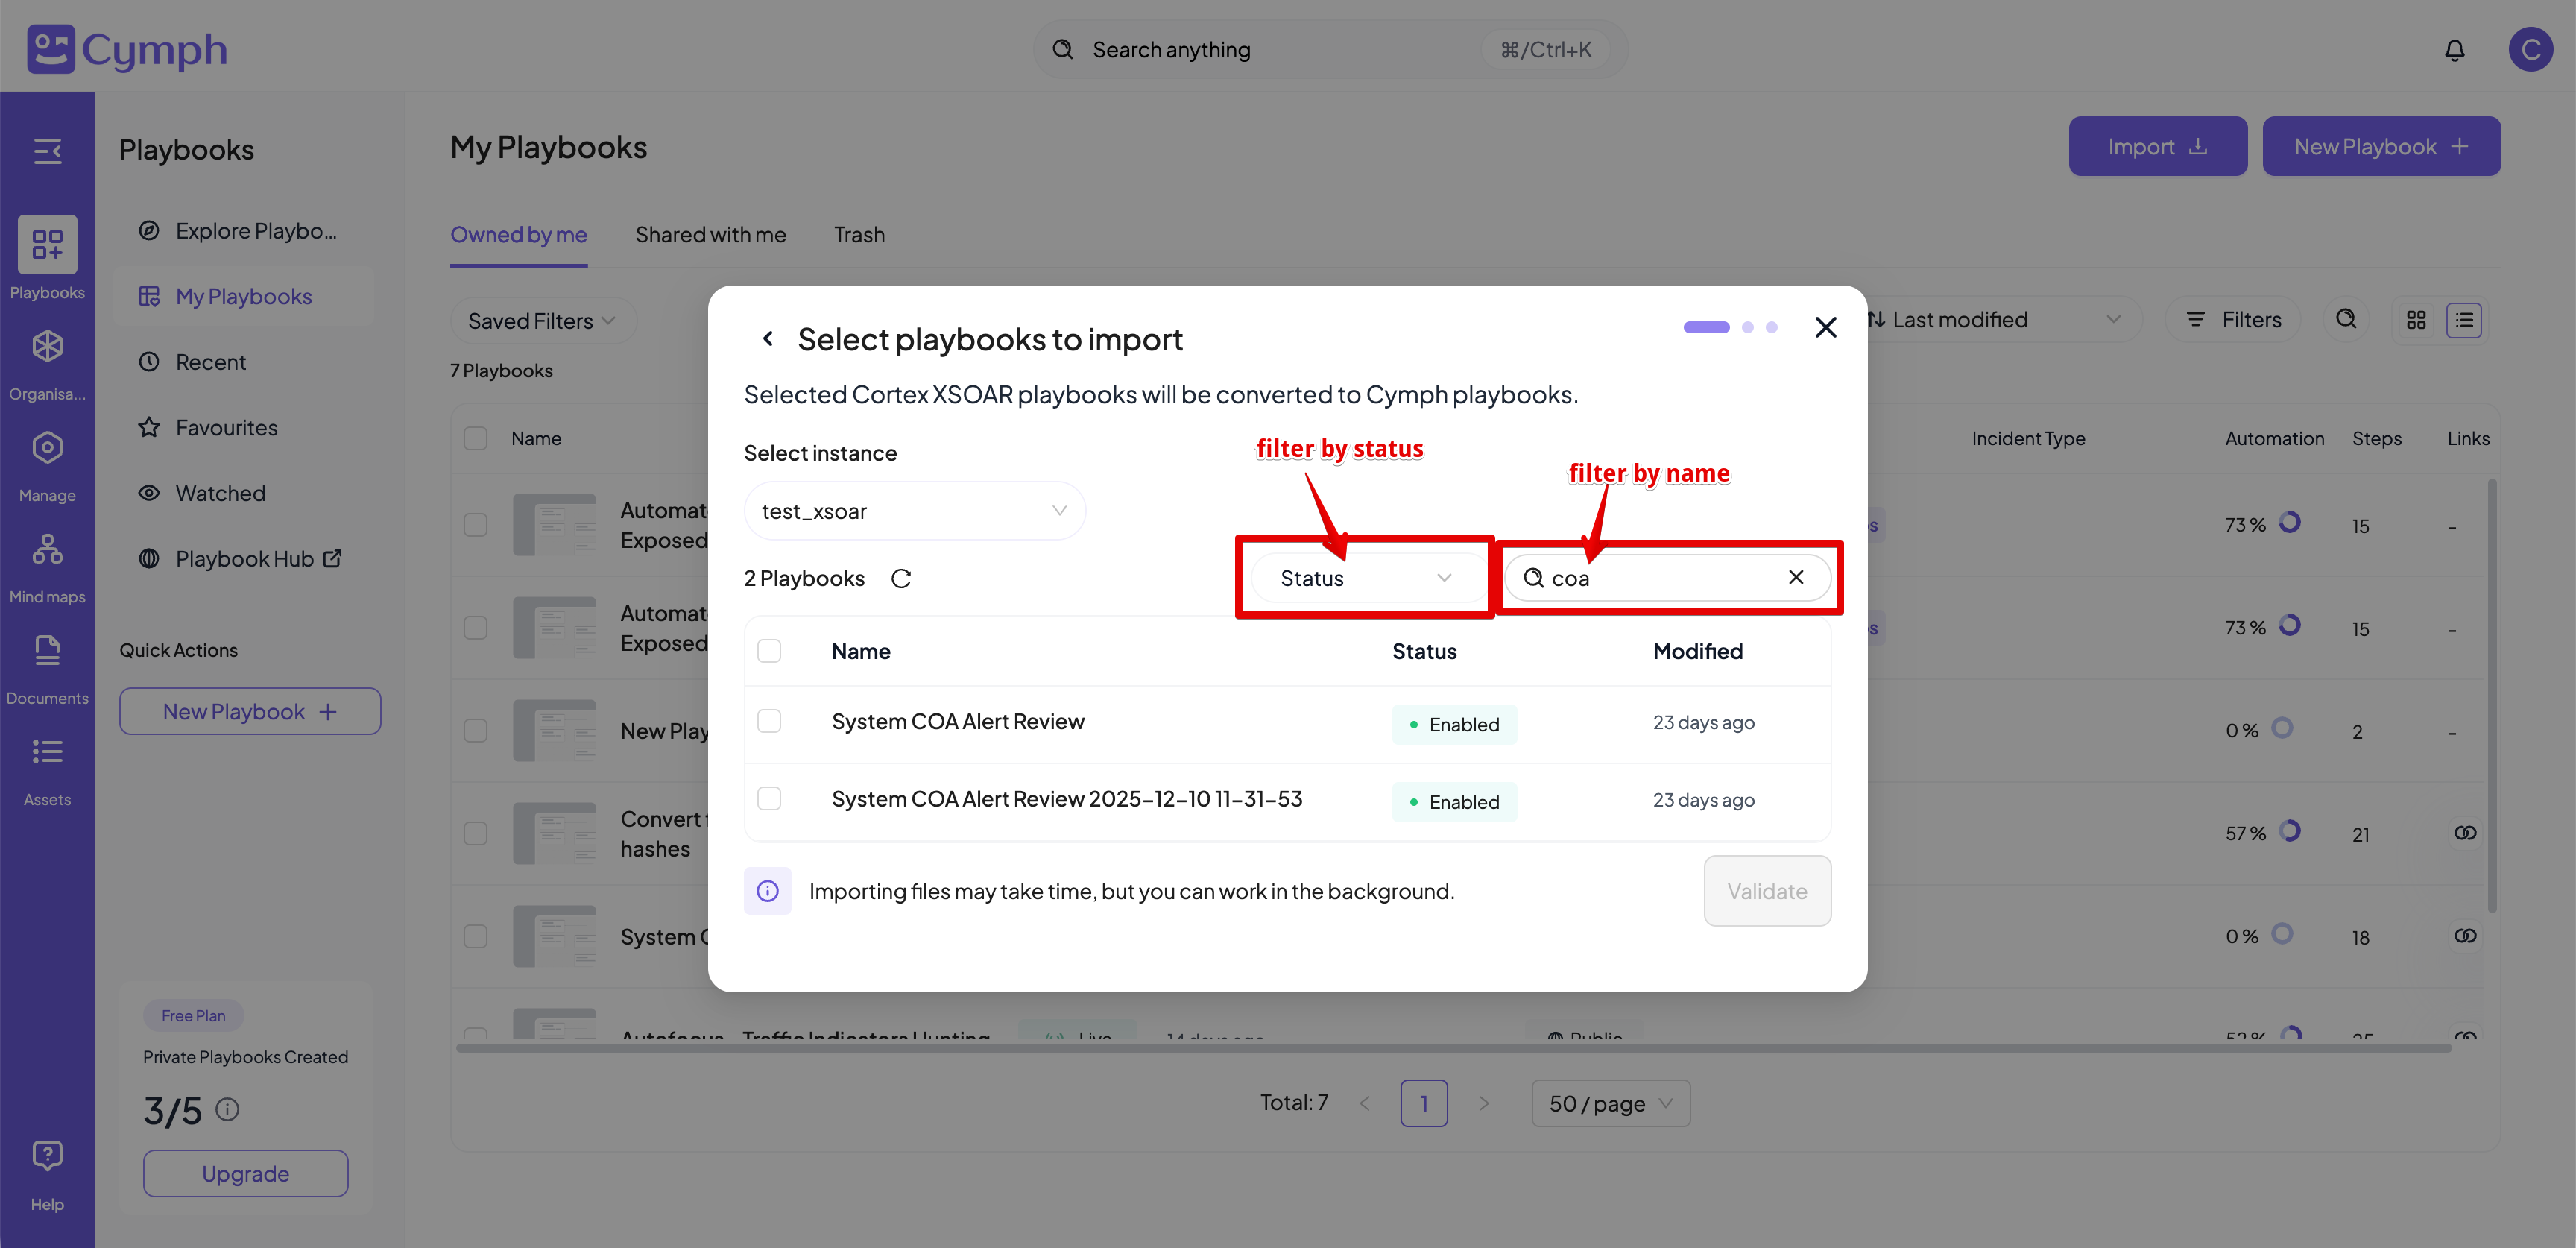
- A list of playbooks found in the live system will be displayed.
- By default, the latest integration will be used as the default target. If multiple integrations exists, select them from the dropdown menu
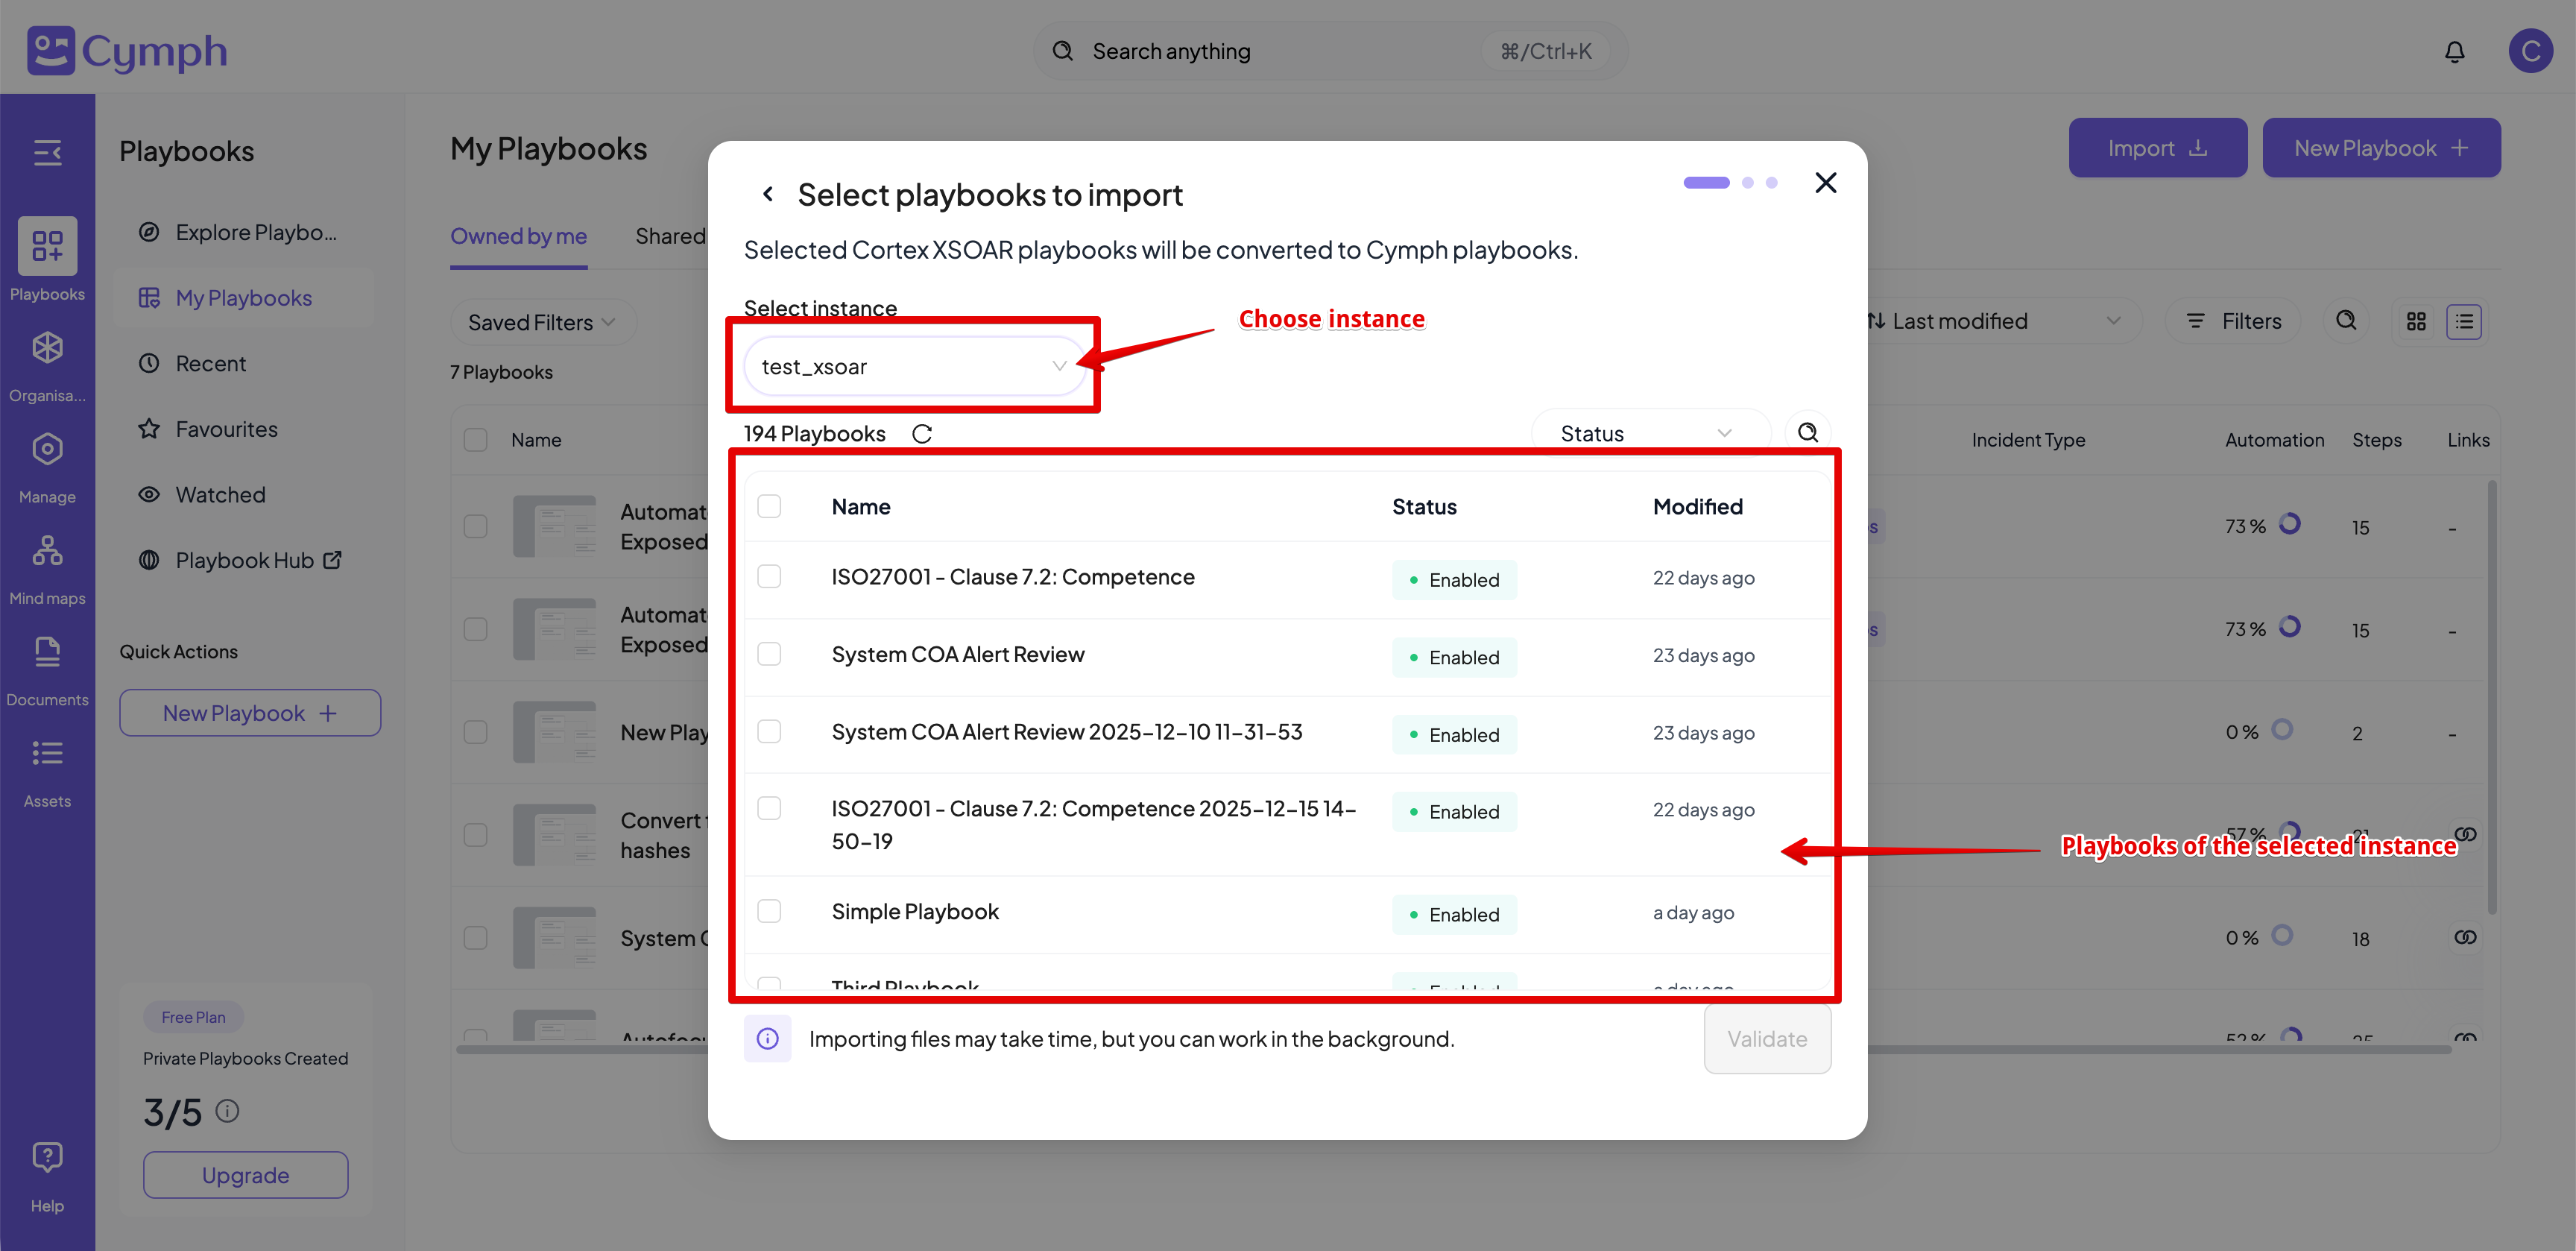
- Select the playbooks you want to import. You can quickly filter out the displayed playbooks based on the playbook status and playbook name
- Click the Validate button to start the validation step.
- The validation step is exactly the same as the one described above for file imports