Overview
The Organisation page provides a view of the Active and Invited members. The Members table that gives you an overview of all members (both active and invited) in your organisation: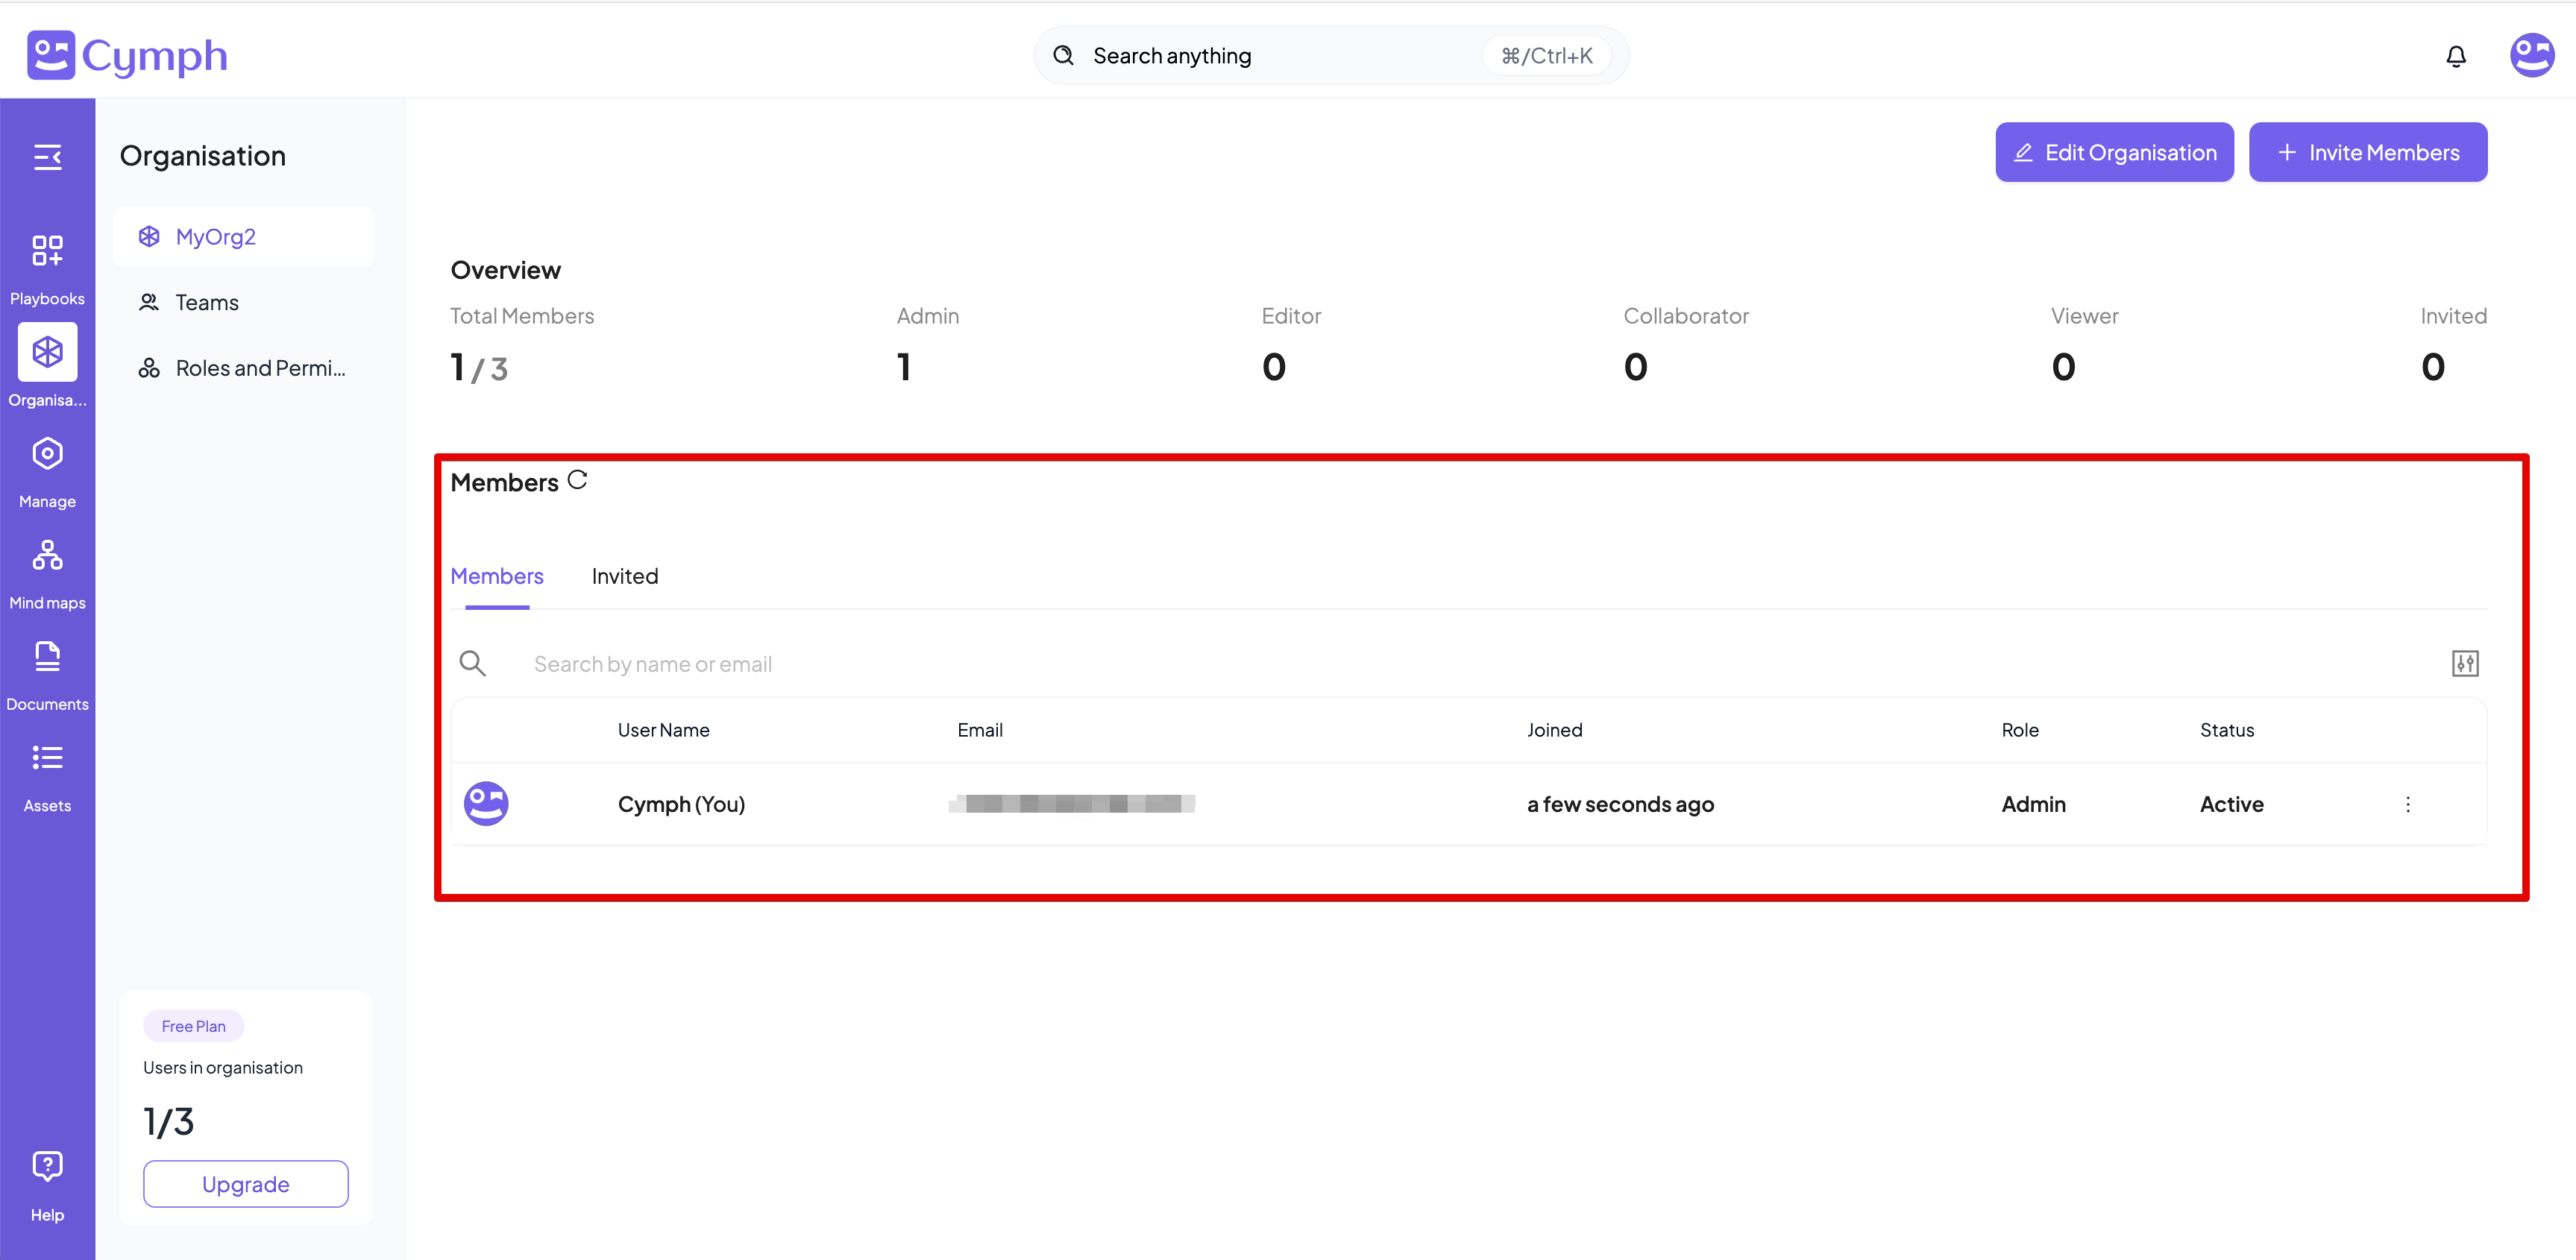
- Avatar: the member’s avatar, if uploaded, else their initials.
- User Name: the name and surname of the member, as declared during their registration process. This column is empty for invited members.
- Email: the email address of the member.
- Joined: the time elapsed since the member joined your organisation. This column is empty for invited members, since they have not yet joined.
- Role: their role in your organisation.
- Status: “Active” if they have joined your organisation, “Invited” if they have been invited and their response is pending.
- An action column: Actions appear by clicking the triple dot icon
⫶
Managing active members
How to change the role of a member
- Go to your Organisation page.
- From the main dashboard, navigate to the Organisation page.
- Click the arrow next to the user’s role.
- A dropdown menu will appear with all the available roles (Admin, Editor, Collaborator, Viewer).

- Select the desired role for the member.
- The corresponding member’s role will change and the Members table will be refreshed to reflect the changes.
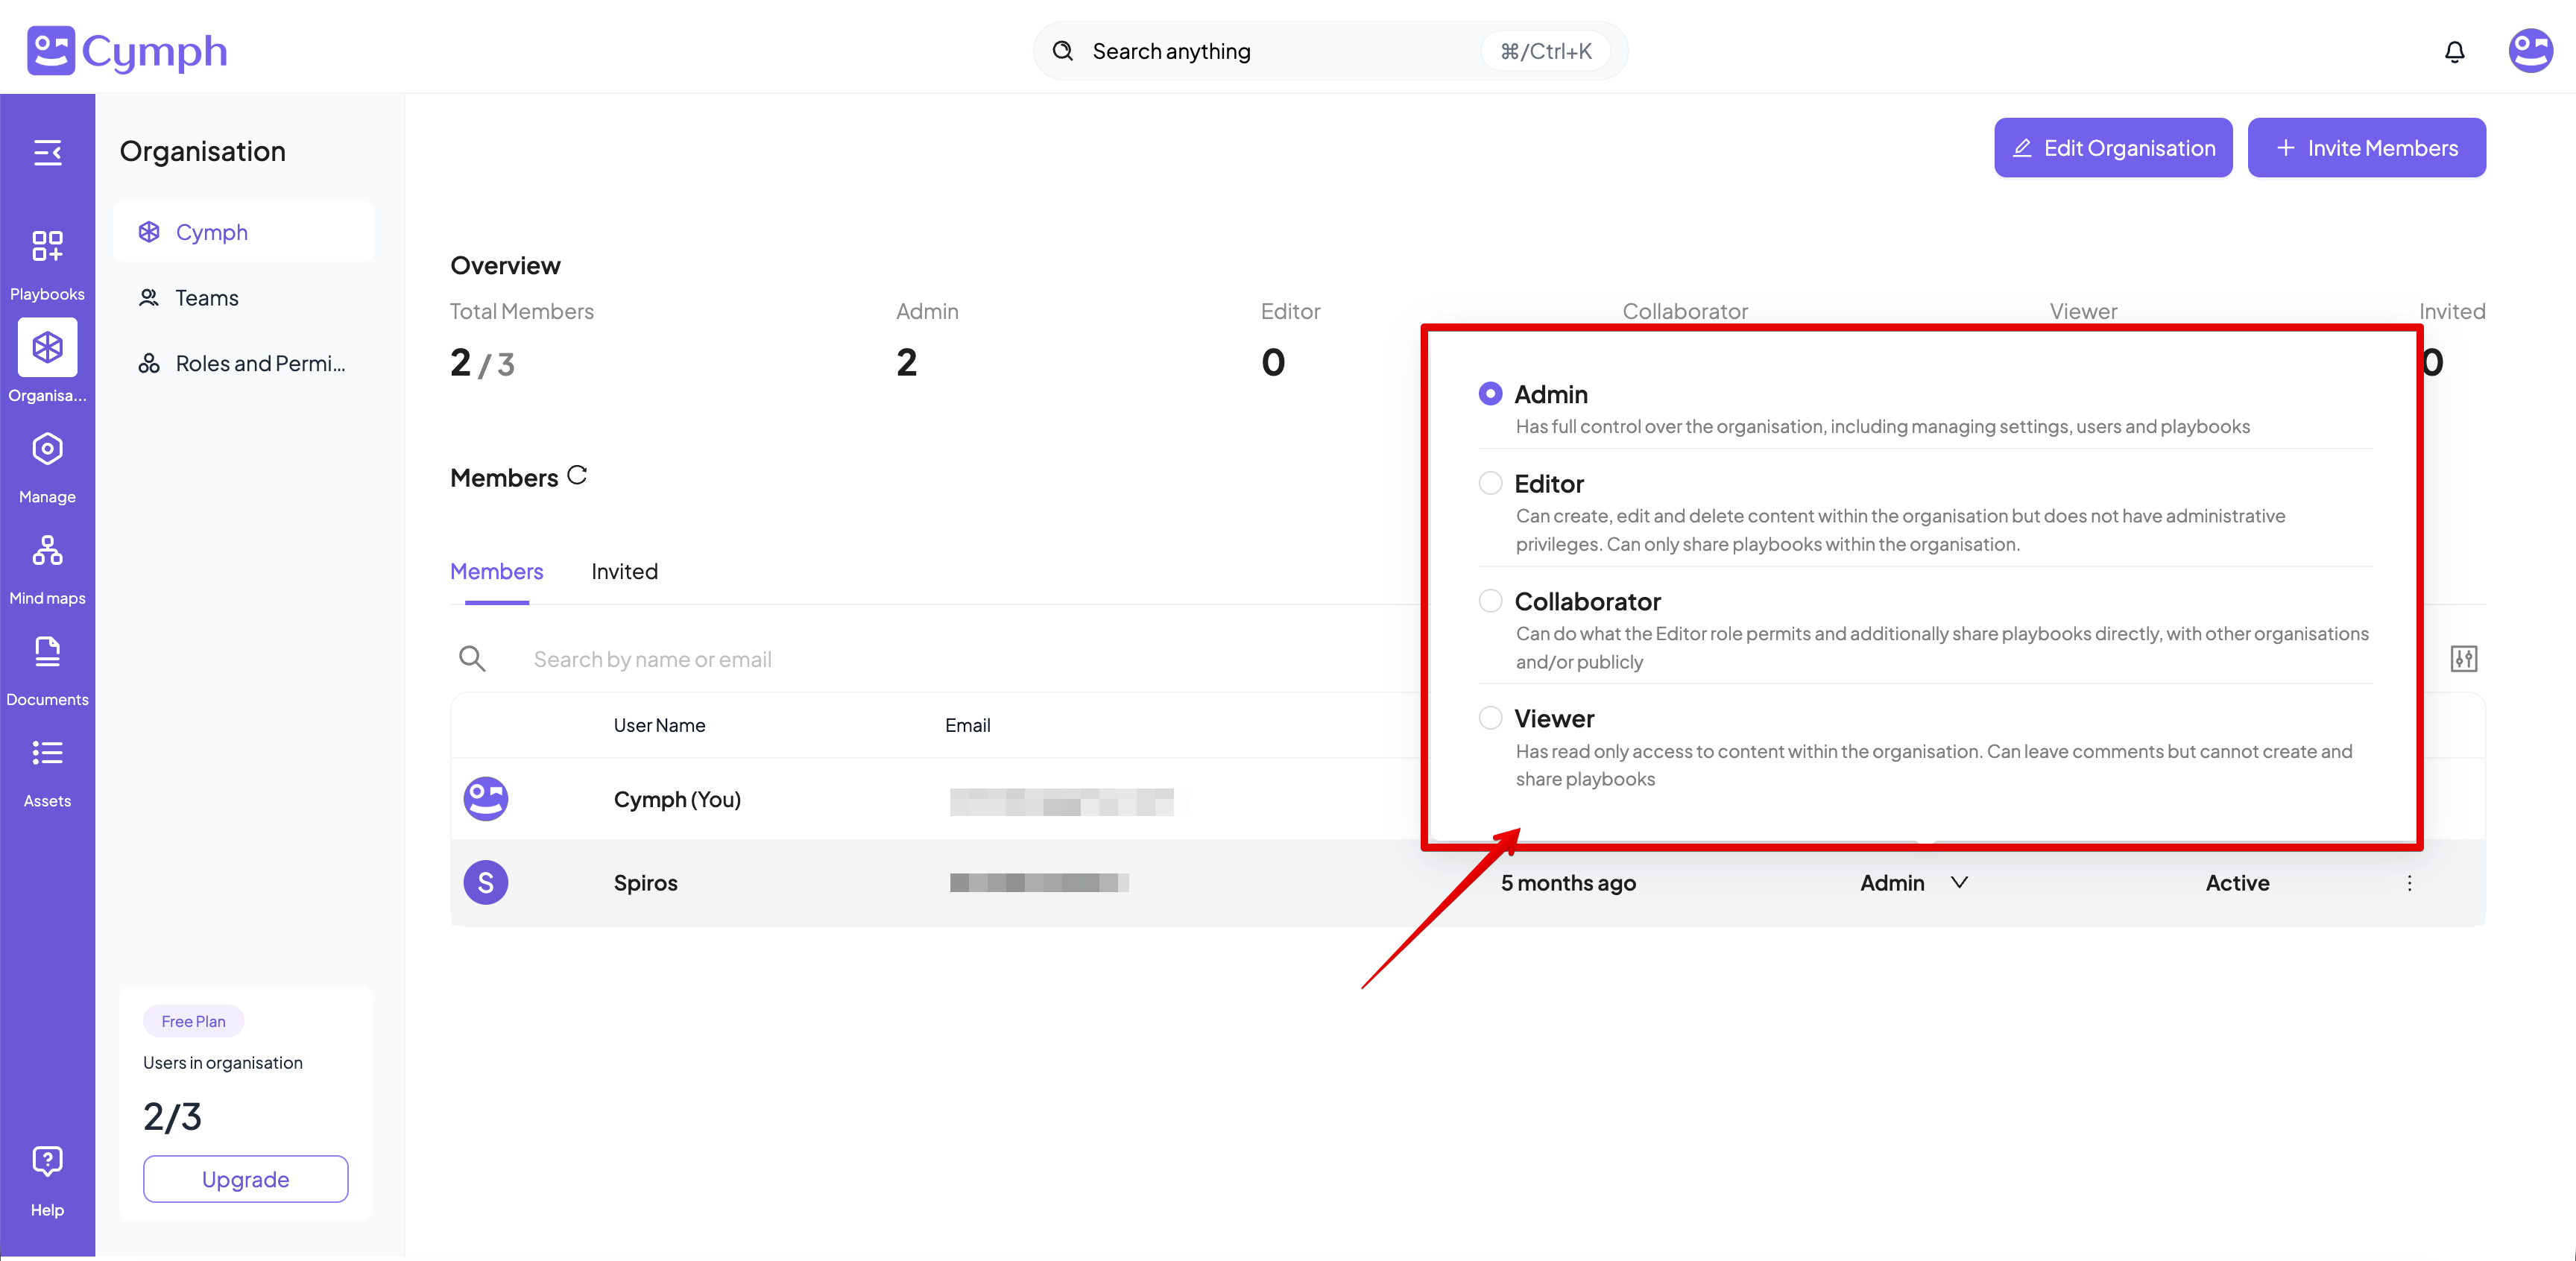
Note: Only members with the Admin role can change the role of other members. Admin users cannot change their own role.
How to edit a member
- Go to your Organisation page.
- From the navigation menu, go to the Organisation page.
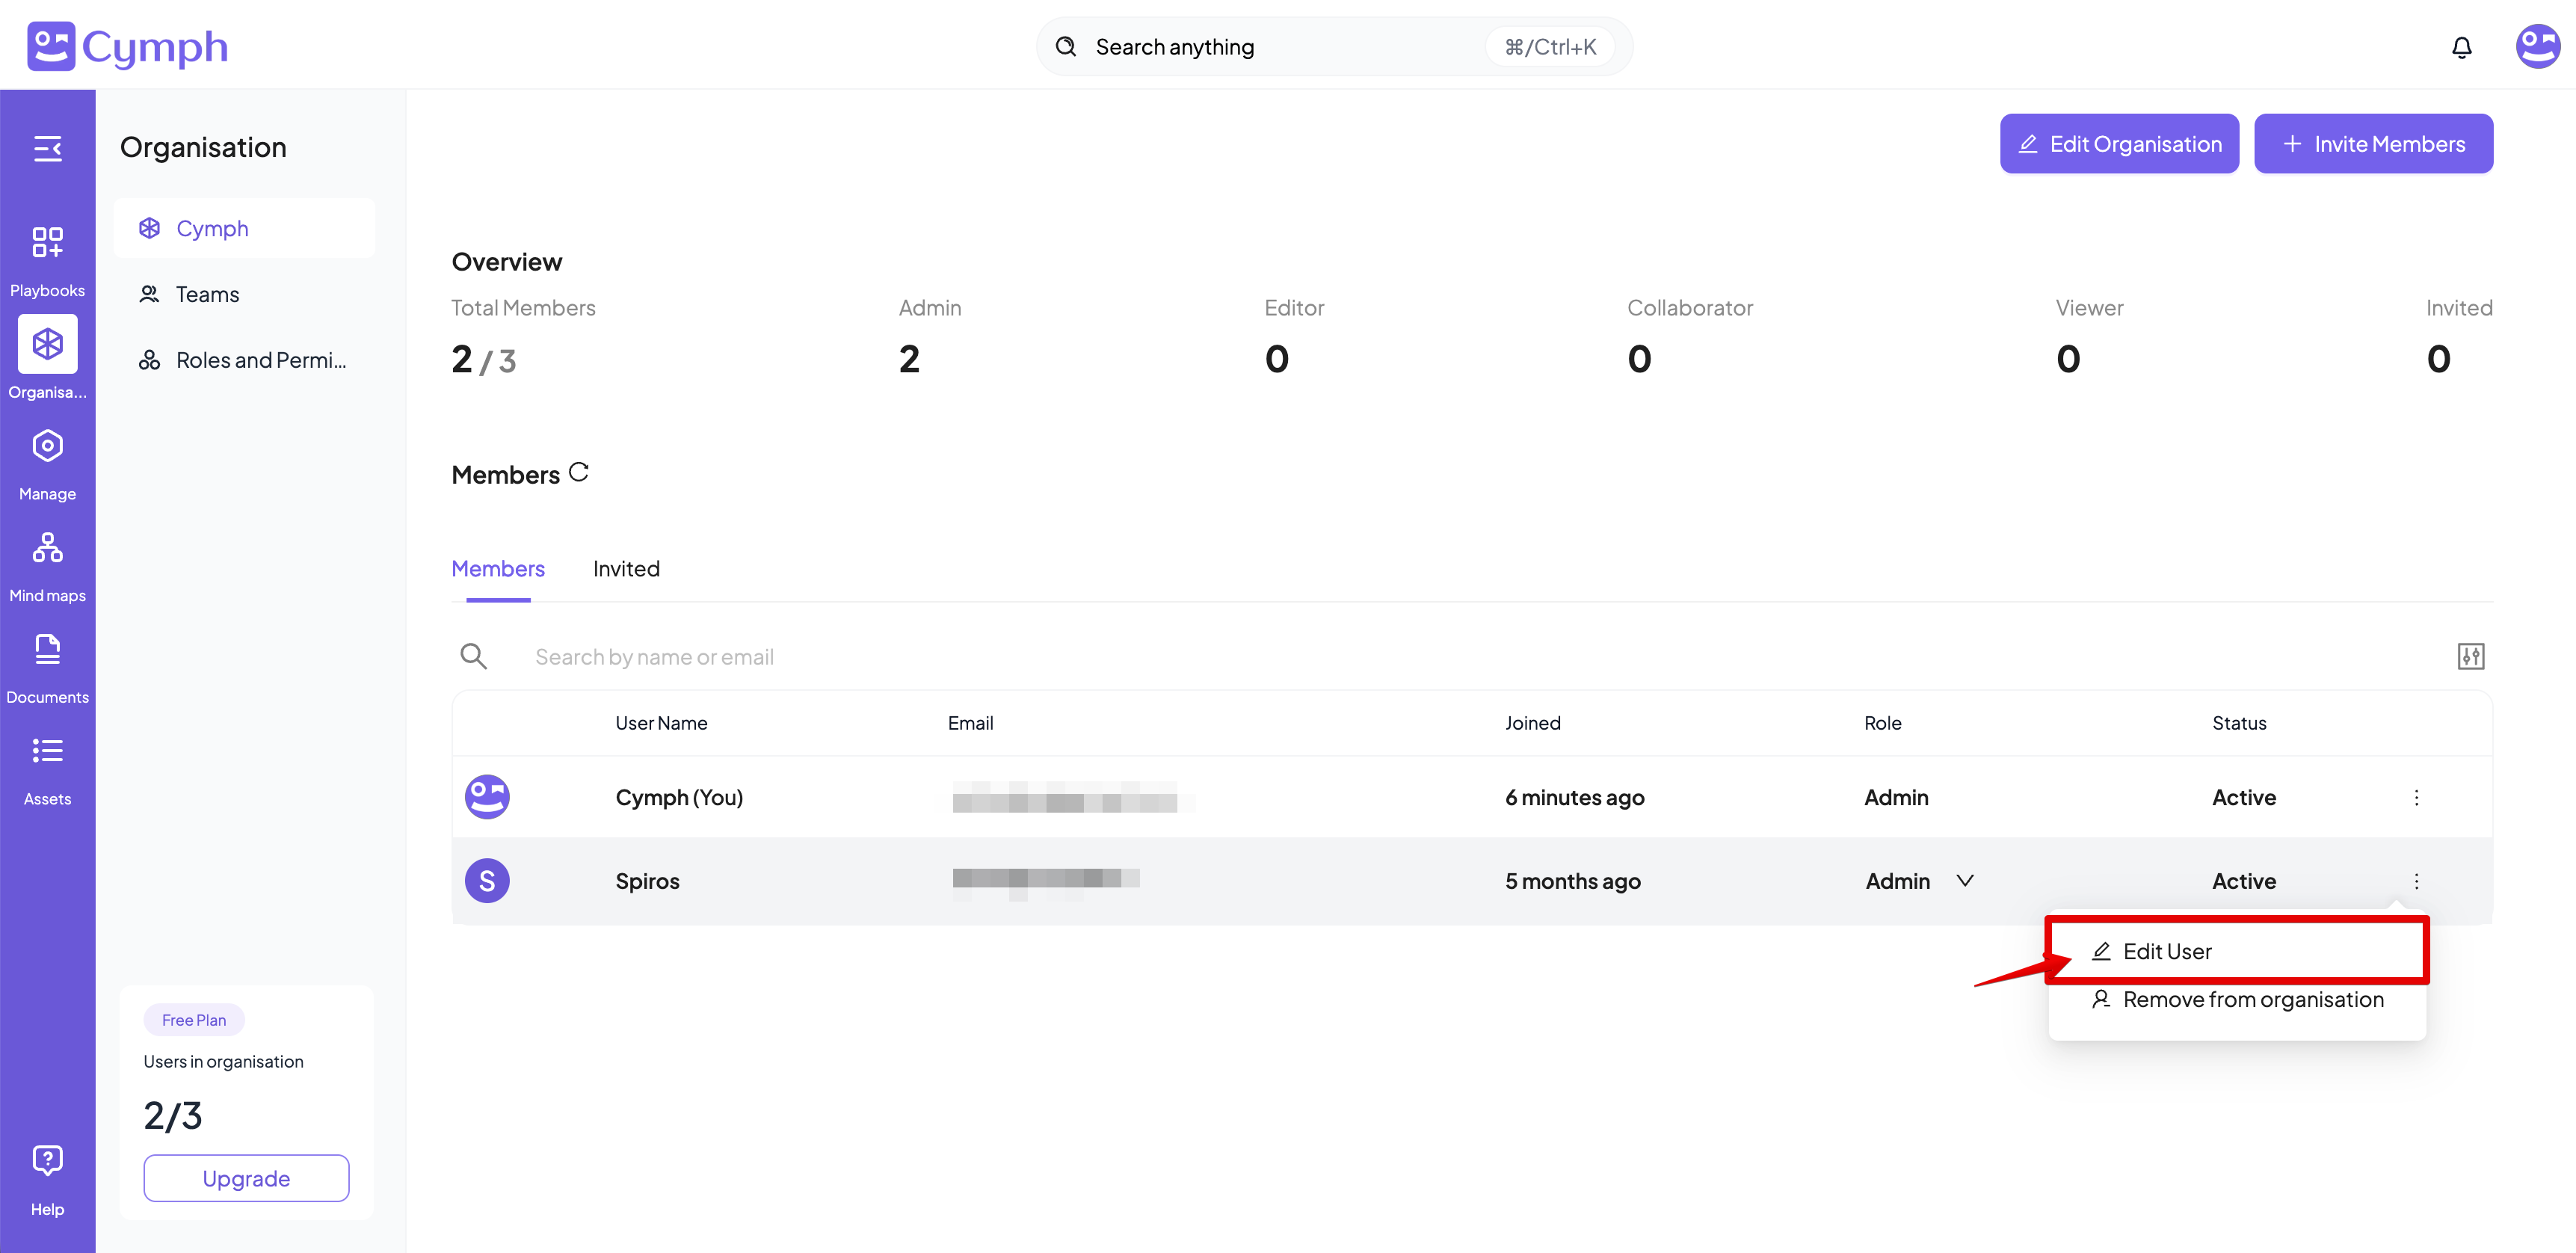
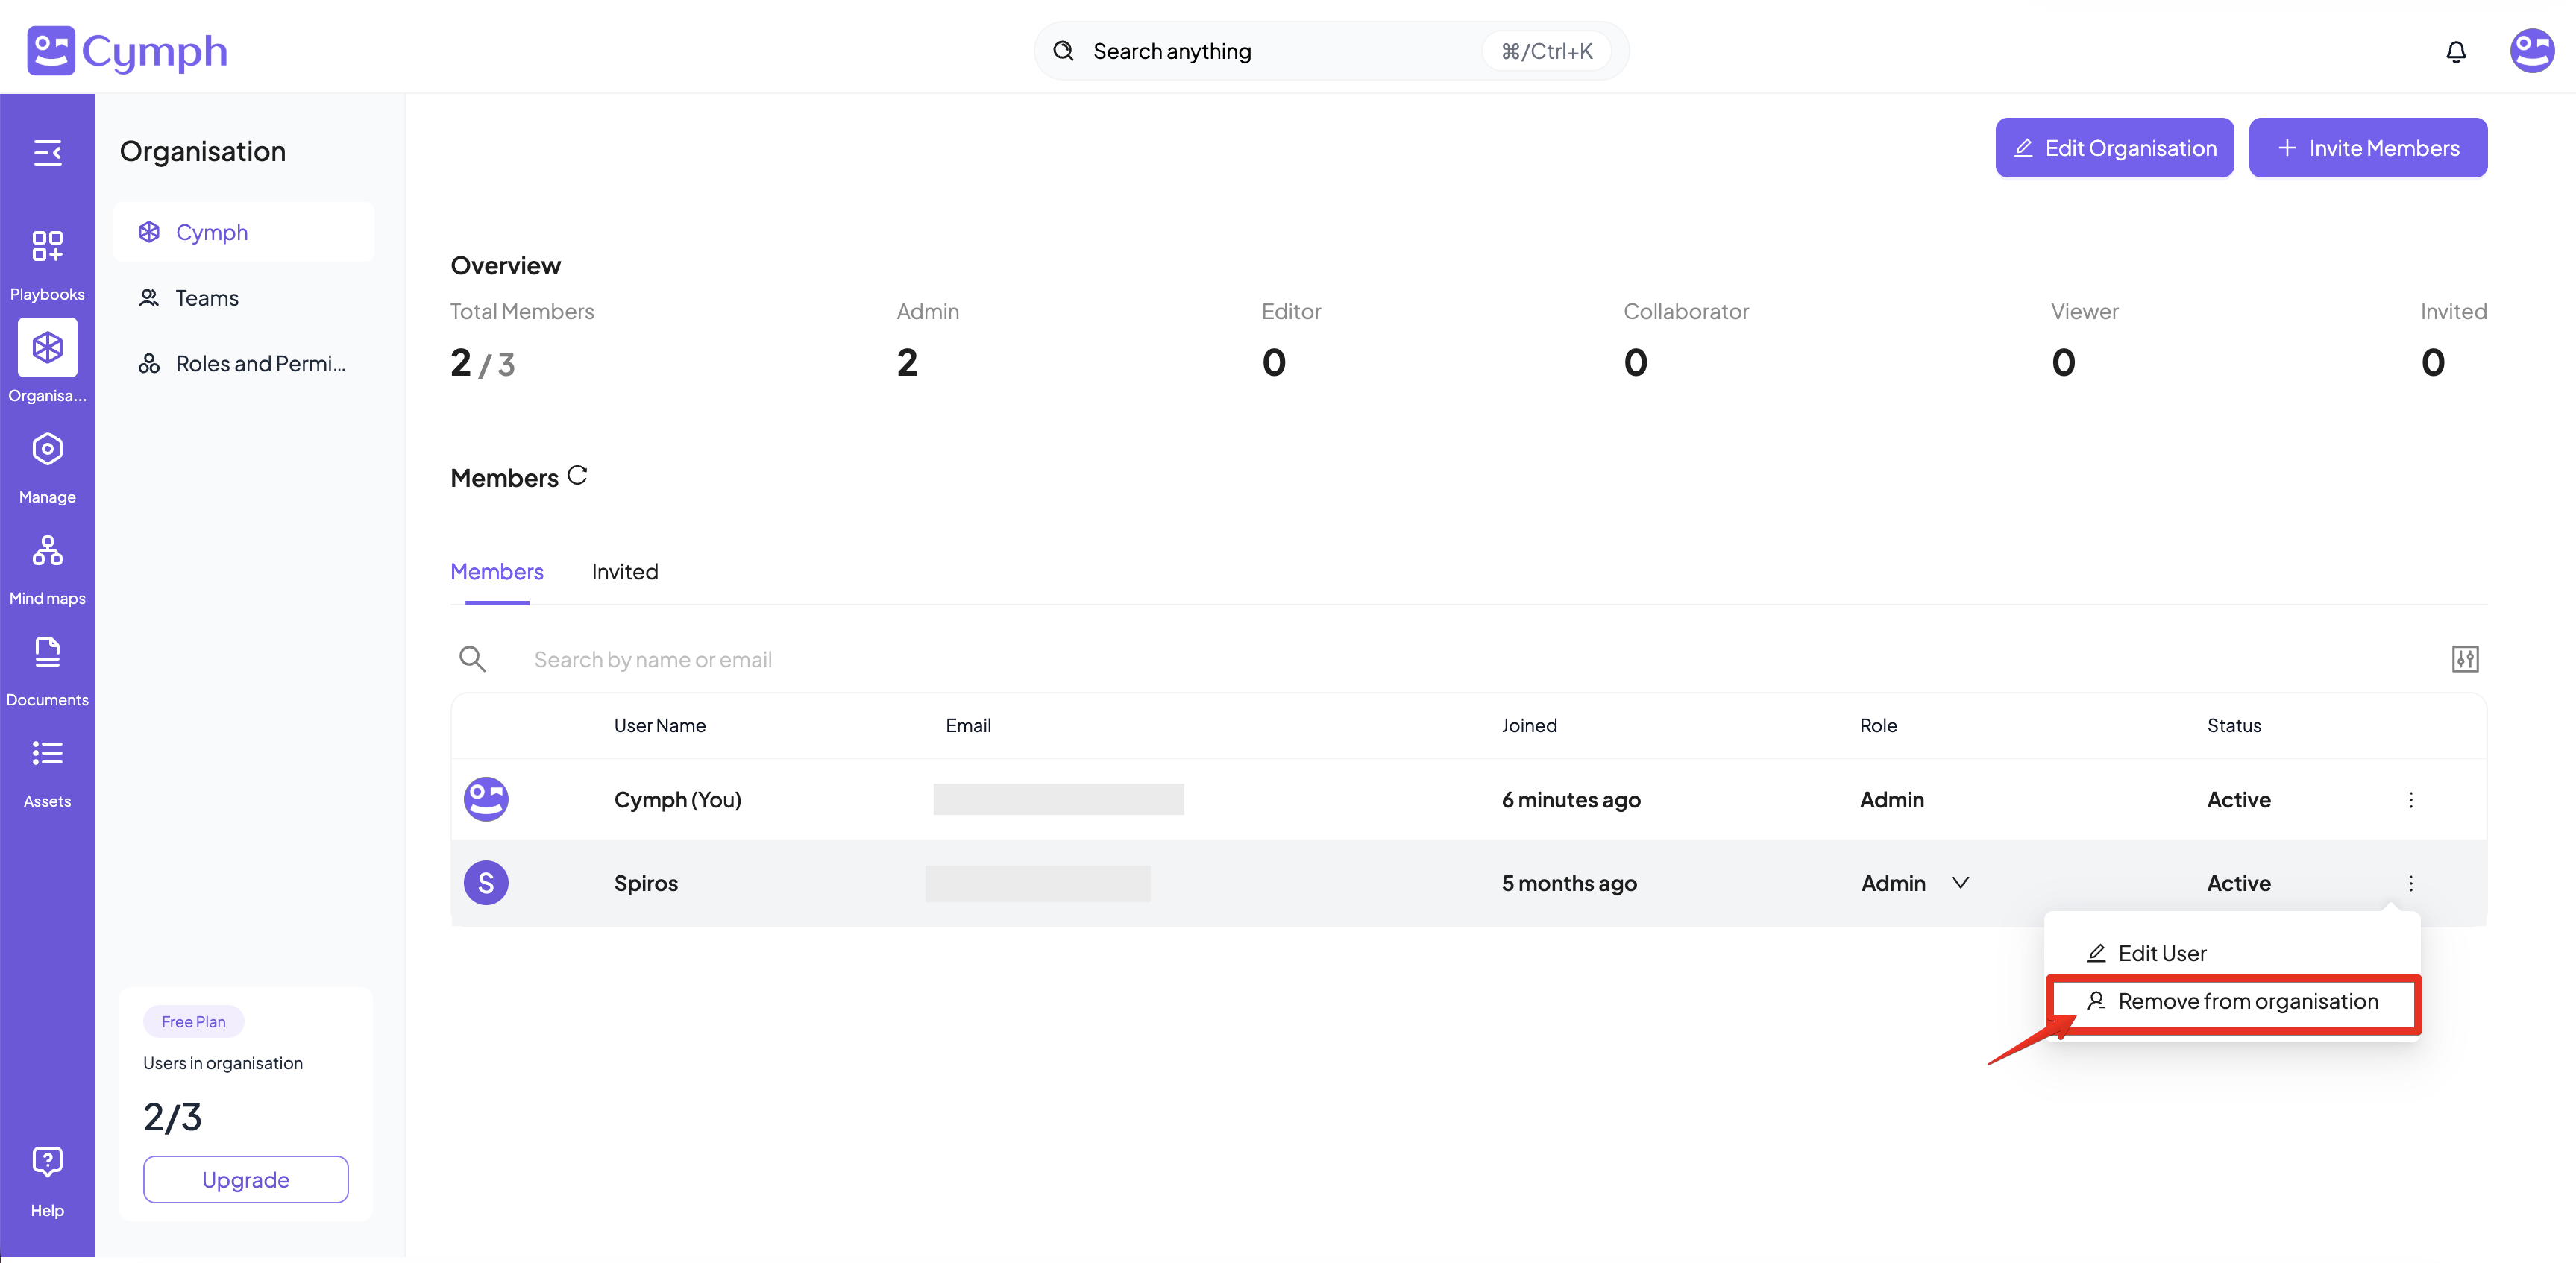
- Click the triple dot icon
⫶in the action column of the member you want to edit- A dropdown menu will appear containing the actions that can be performed (Edit User, Remove from organisation).
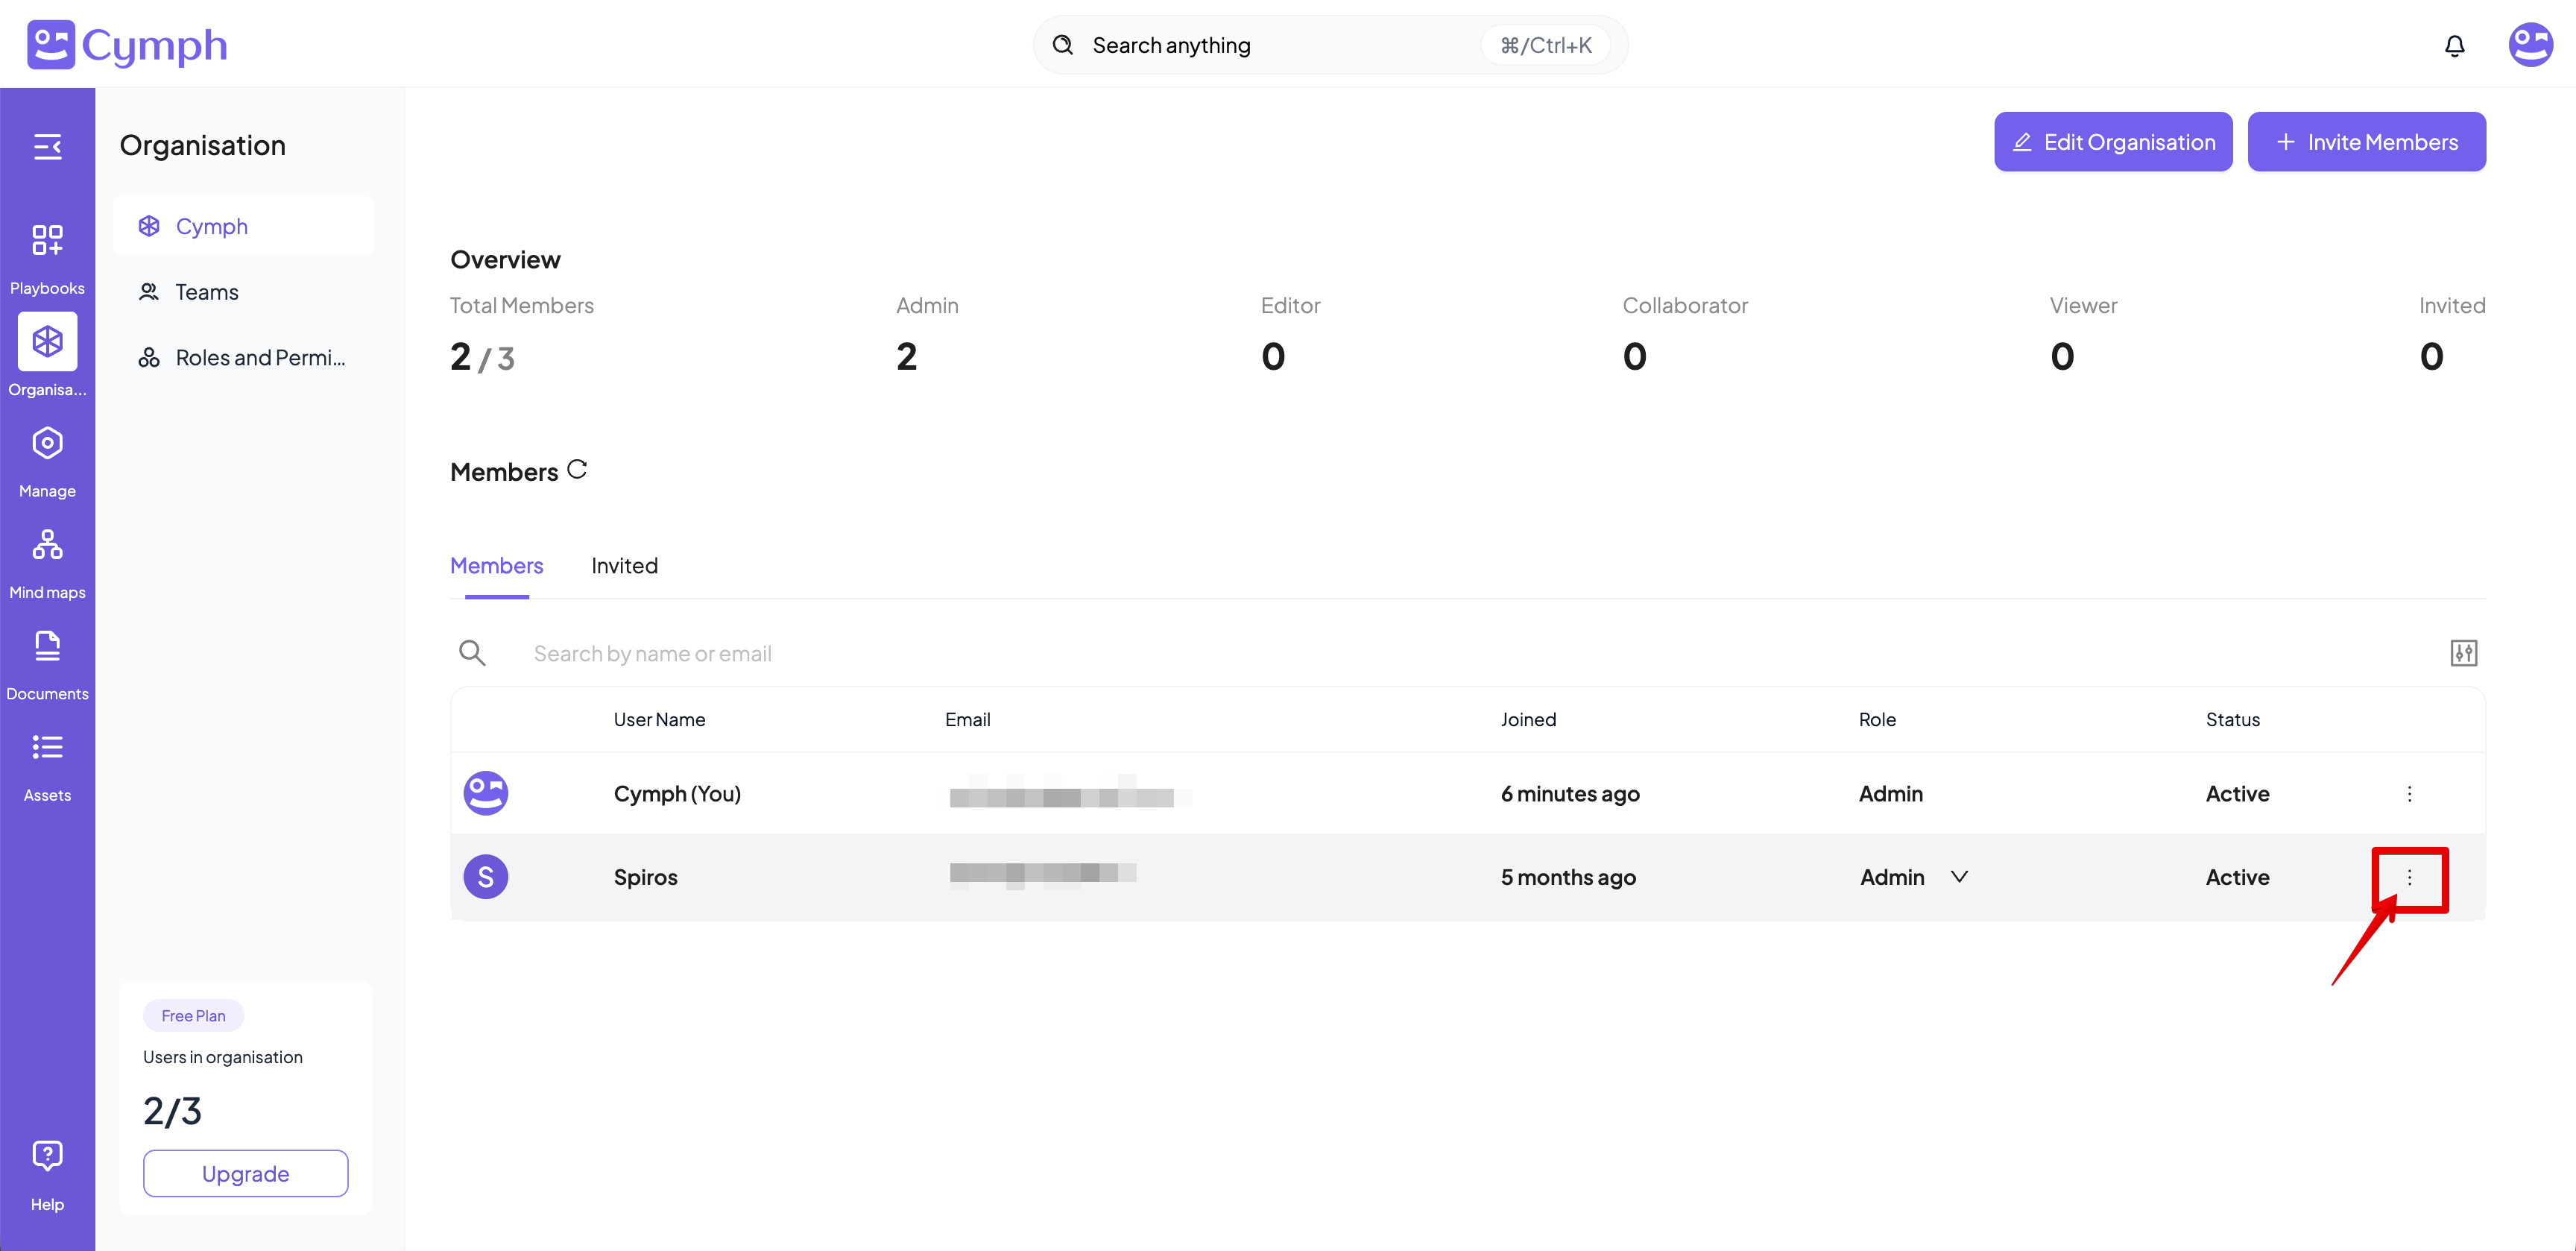
- Click the Edit User option.
- The Edit User panel will appear.
- Change the visibility status of the user (optional).
- Click the visibility toggle next to “Visible to others”.
- Grey toggle means the user is invisible, purple toggle means they are visible. Visible users are searchable by all Cymph users in the platform.
- Ask user to reset their password (optional).
- Click Ask user to reset their password.
- A notification will appear on the user notification centre to ask them to reset their password.
Note: Only members with the Admin role can edit the role of other members.
How to remove a member from the organisation
- Go to your Organisation page.
- From the main dashboard, navigate to the Organisation page.
- Click the **triple dot icon **
⫶in the action column of the user you want to edit. - Click the Remove from organisation option .
- A confirmation dialog will appear.
- Confirm the removal of the user.
- Click Remove User to remove the user from the organisation.
- The user will be removed from the organisation and will no longer appear in the Members table.
- Only members with the Admin role can remove other members.
- All the playbooks created by the users while they were members of the organisation will be transferred to the administrator of the organisation.
- An administrator cannot remove themselves from the organisation.
Managing invited users
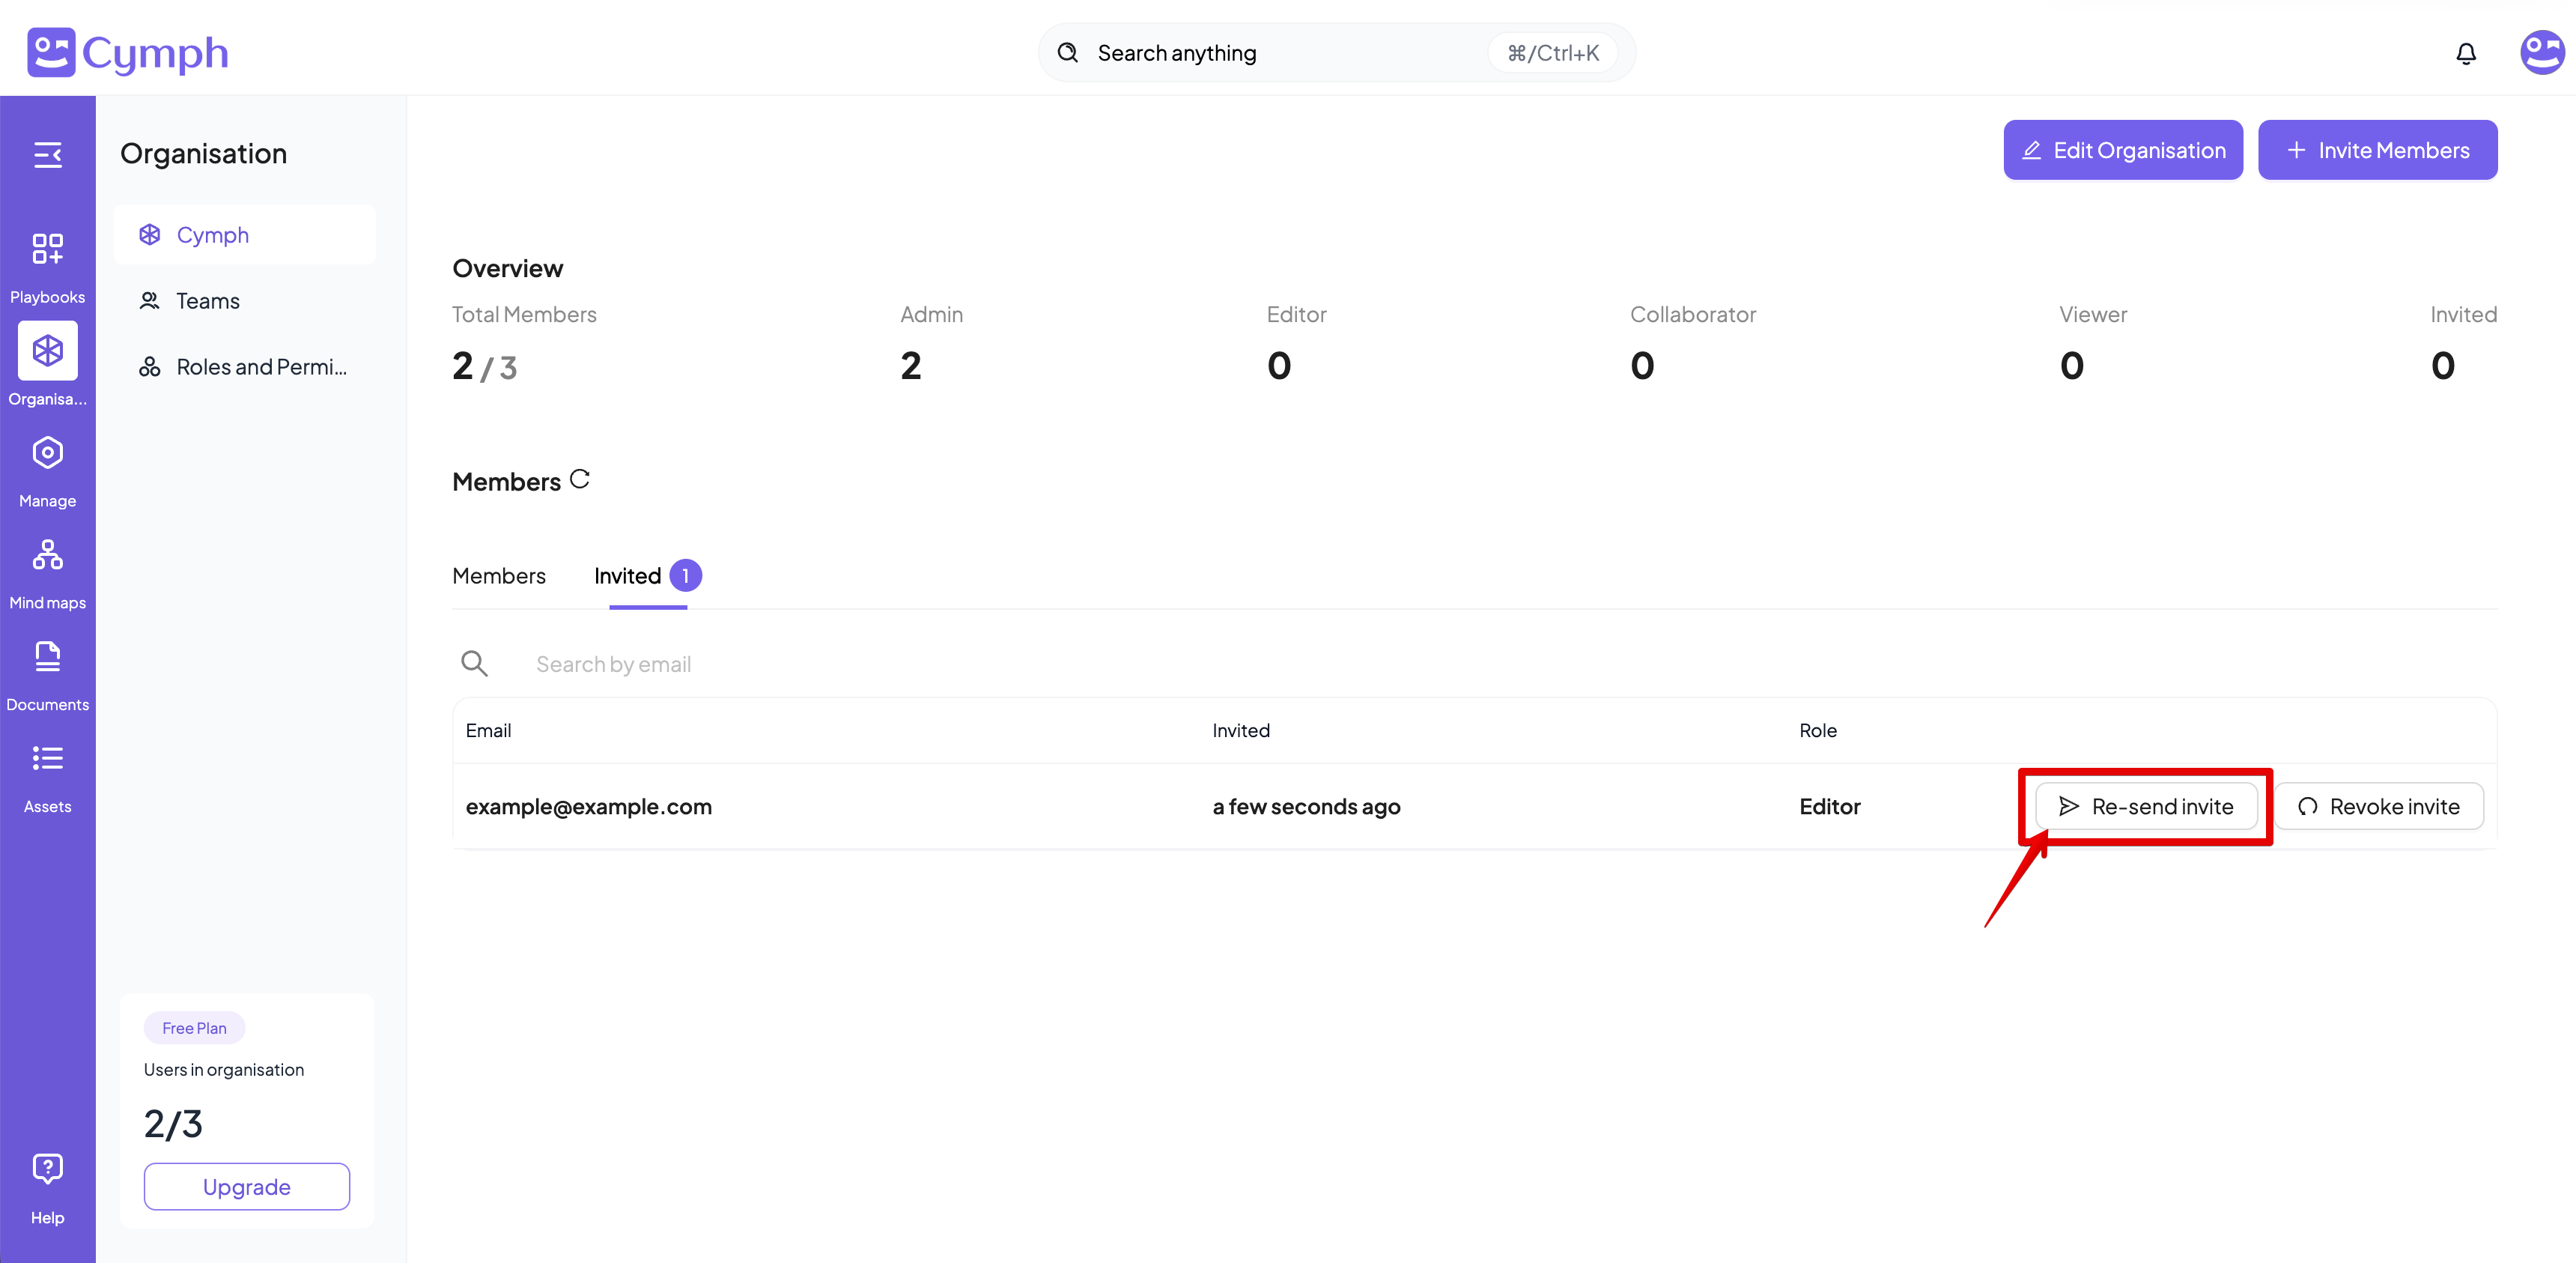
Users that have been invited to your organisation but have not yet responded to your invite will appear in **Invited **table.How to re-send an invite
- Go to your Organisation page.
- Click on the Invited table
-
Click the Re-send invite option.
- The invitation email will be re-sent to the provided e-mail address.
How to revoke an invite
- Go to your Organisation page.
- From the main dashboard, navigate to the Organisation page.
- Go the Invited tab
- Click Revoke invite option.
- A confirmation dialog will appear.
- Confirm the revocation.
- Click OK to revoke the invitation.
- The invitation will be revoked and the invited user will no longer appear in the members table.
Note: Only users with the Admin role can re-send or revoke invites