Presets allow you to customise frameworks to your organisational environment and requirements. In this guide, we are going to show you how to create and manage a preset based on the MITRE ATT&CK for Enterprise framework. A similar process is followed for other frameworks.
How to create a preset
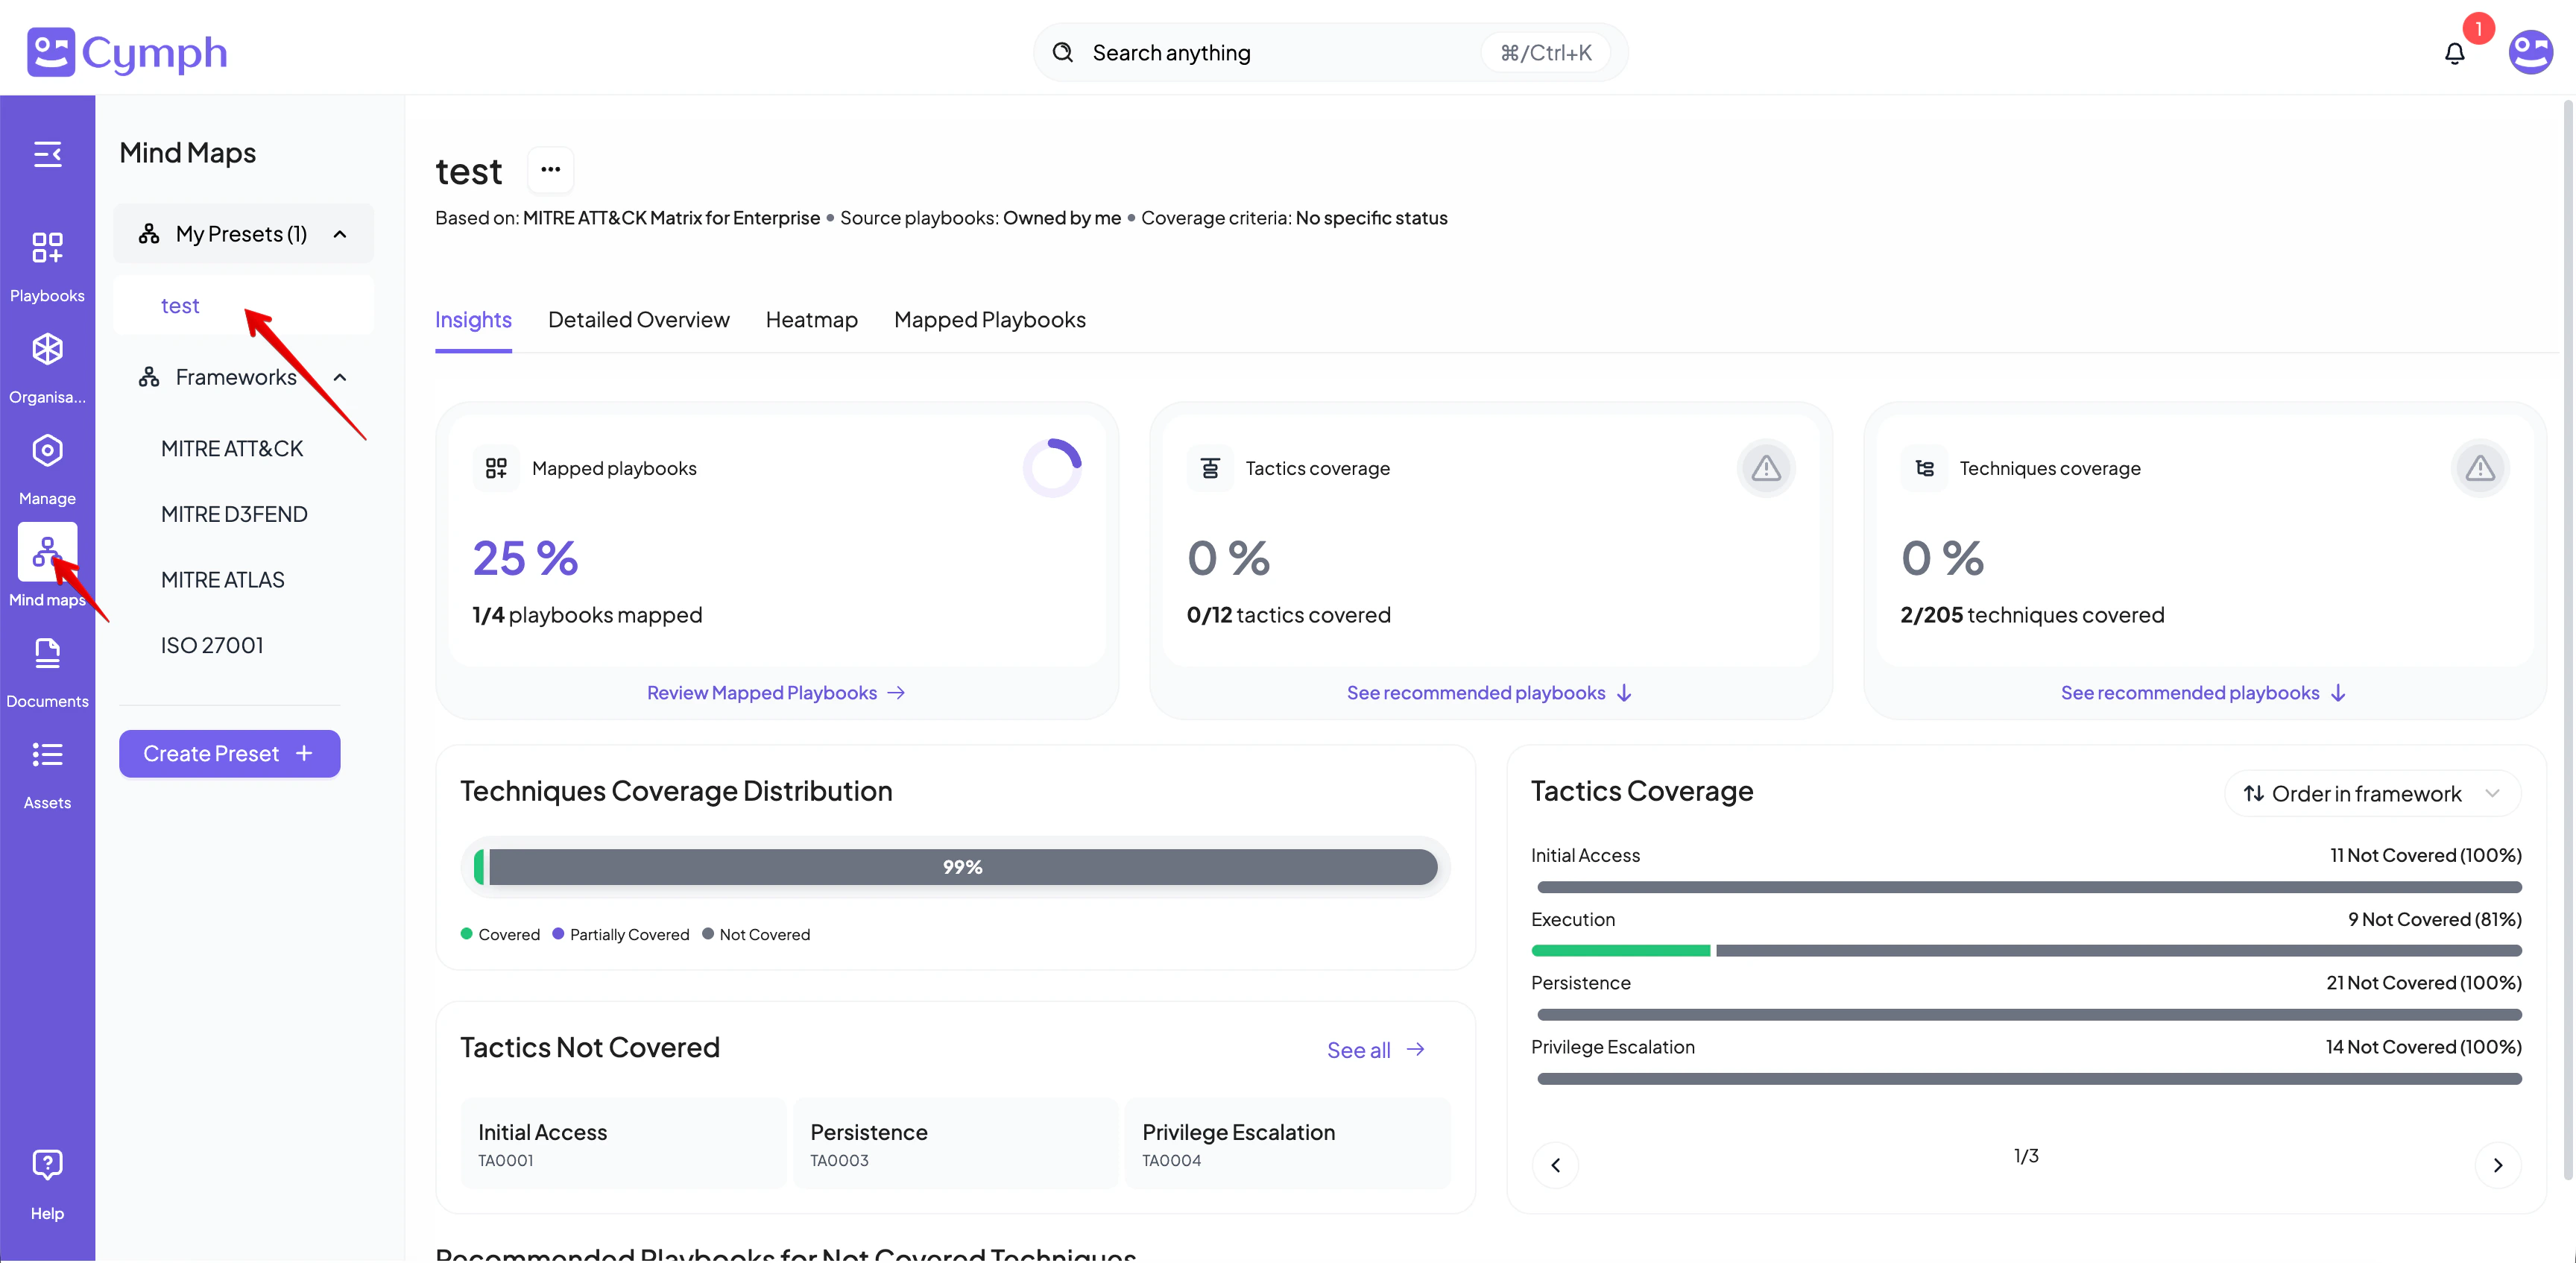
- Go to the Mindmaps section
- Click on Mind maps from the navigation menu
- Create a preset
- Click on Create Preset quick action from the navigation sidebar
- The preset creation wizard will start

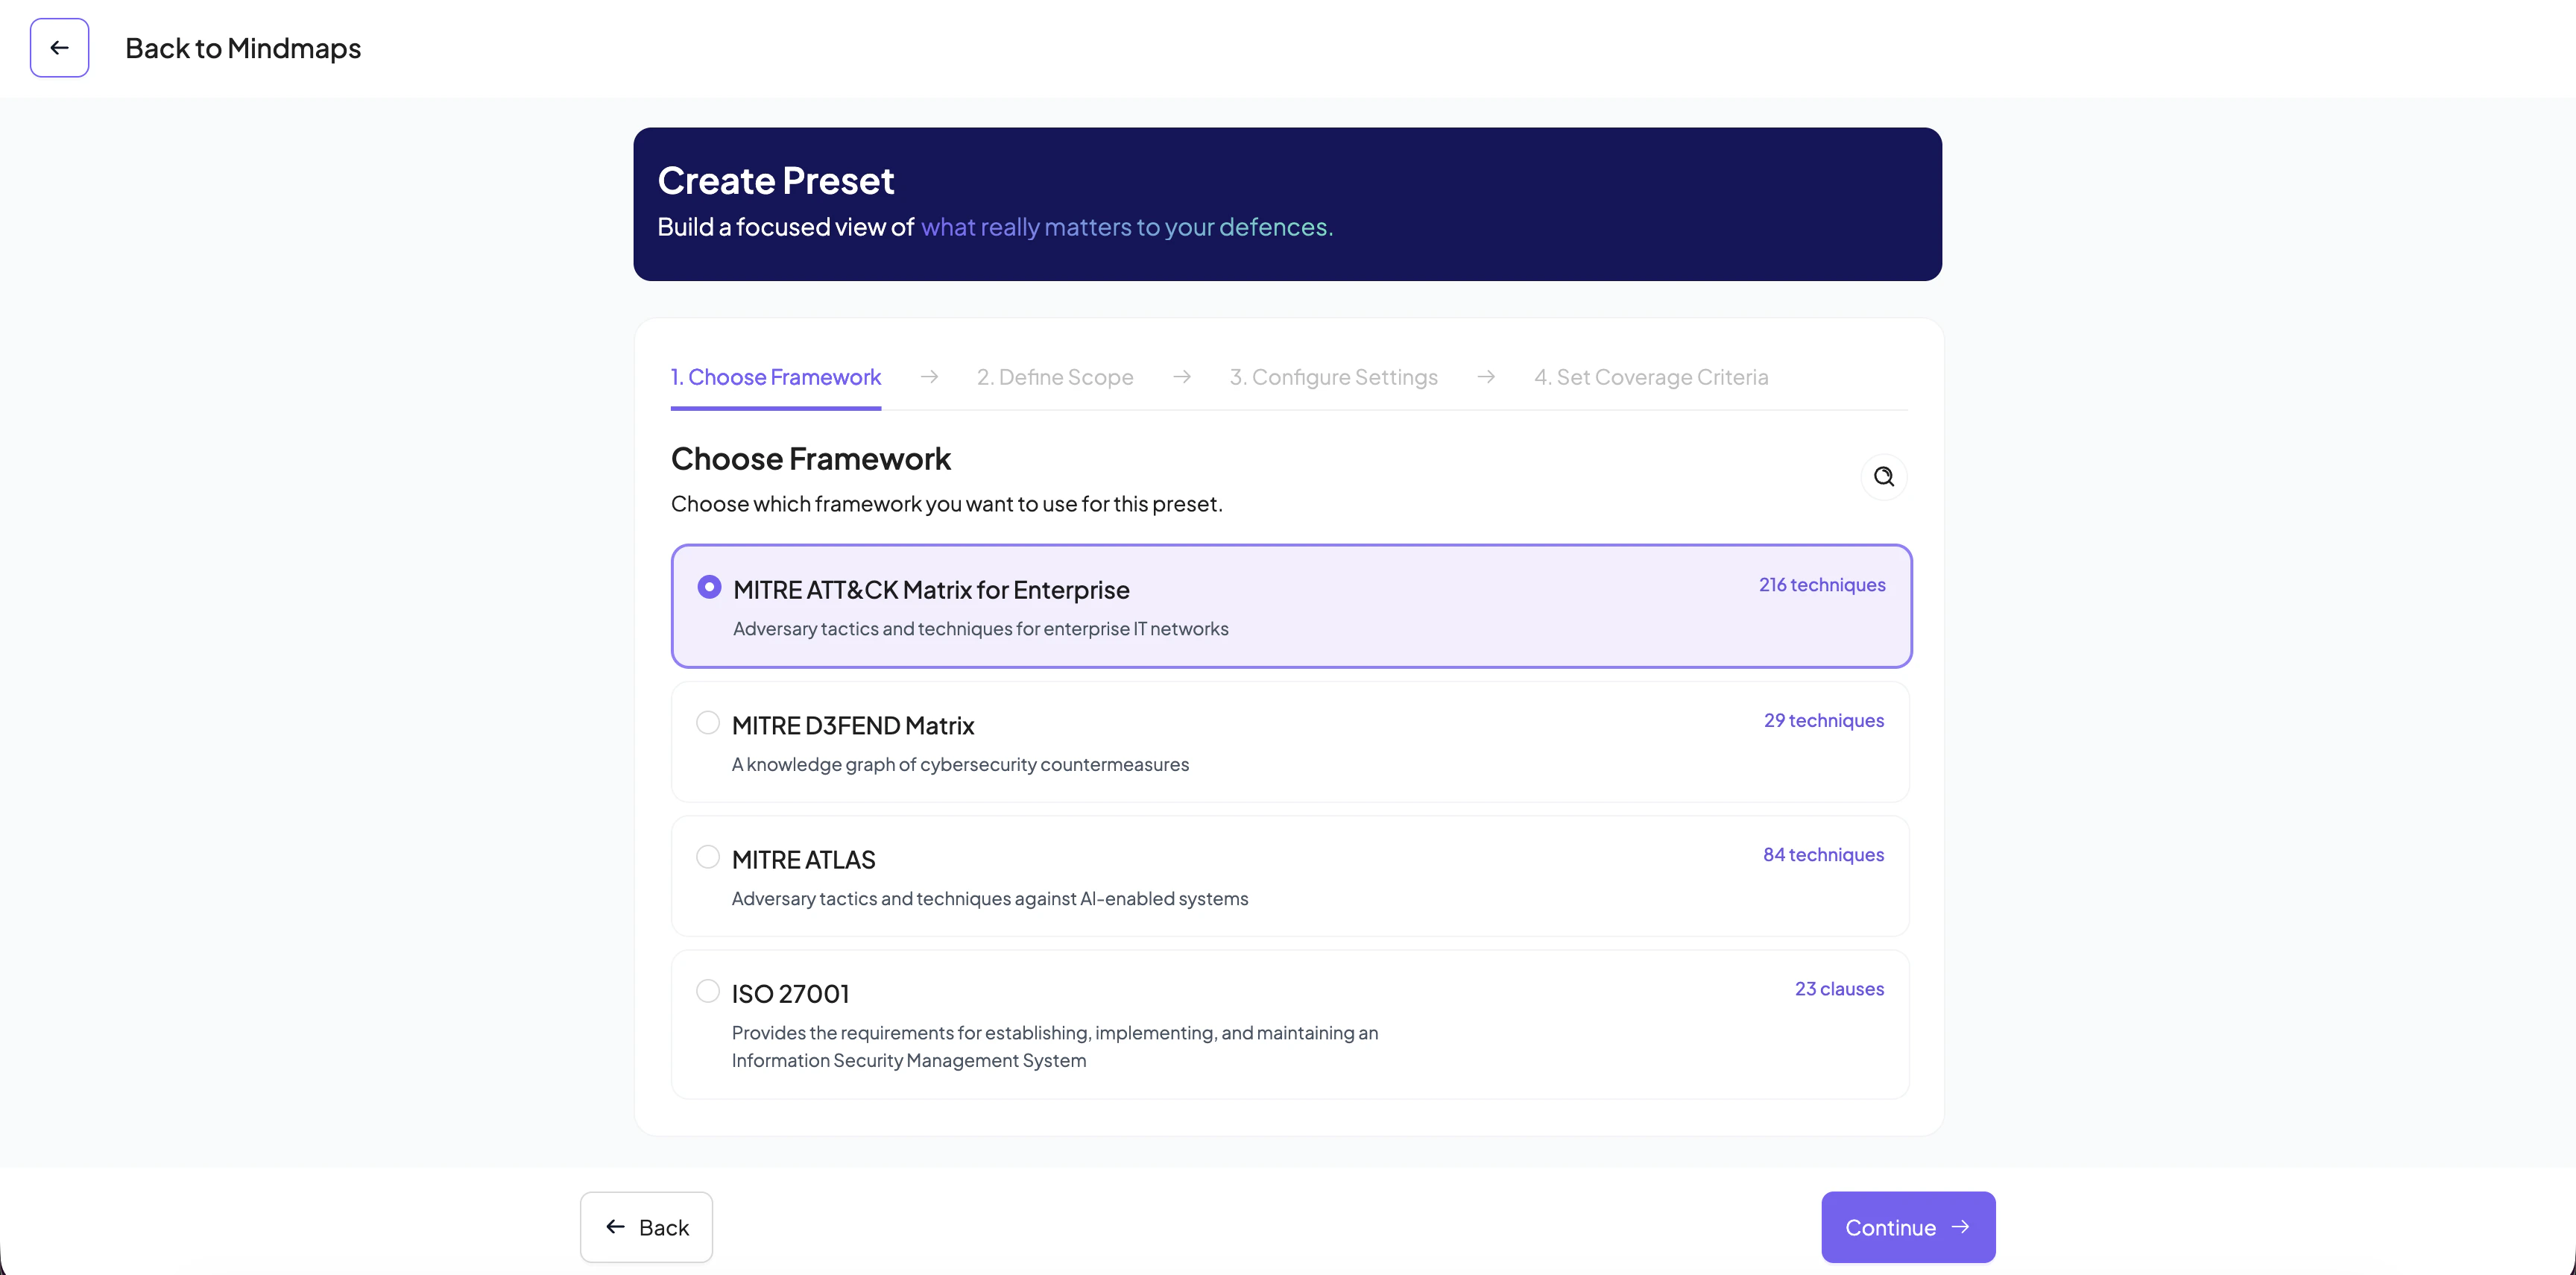
Step 1: Choose a framework
Select a framework of interest. Currently, we support MITRE ATT&CK for Enterprise, MITRE D3FEND, MITRE ATLAS and ISO27001.
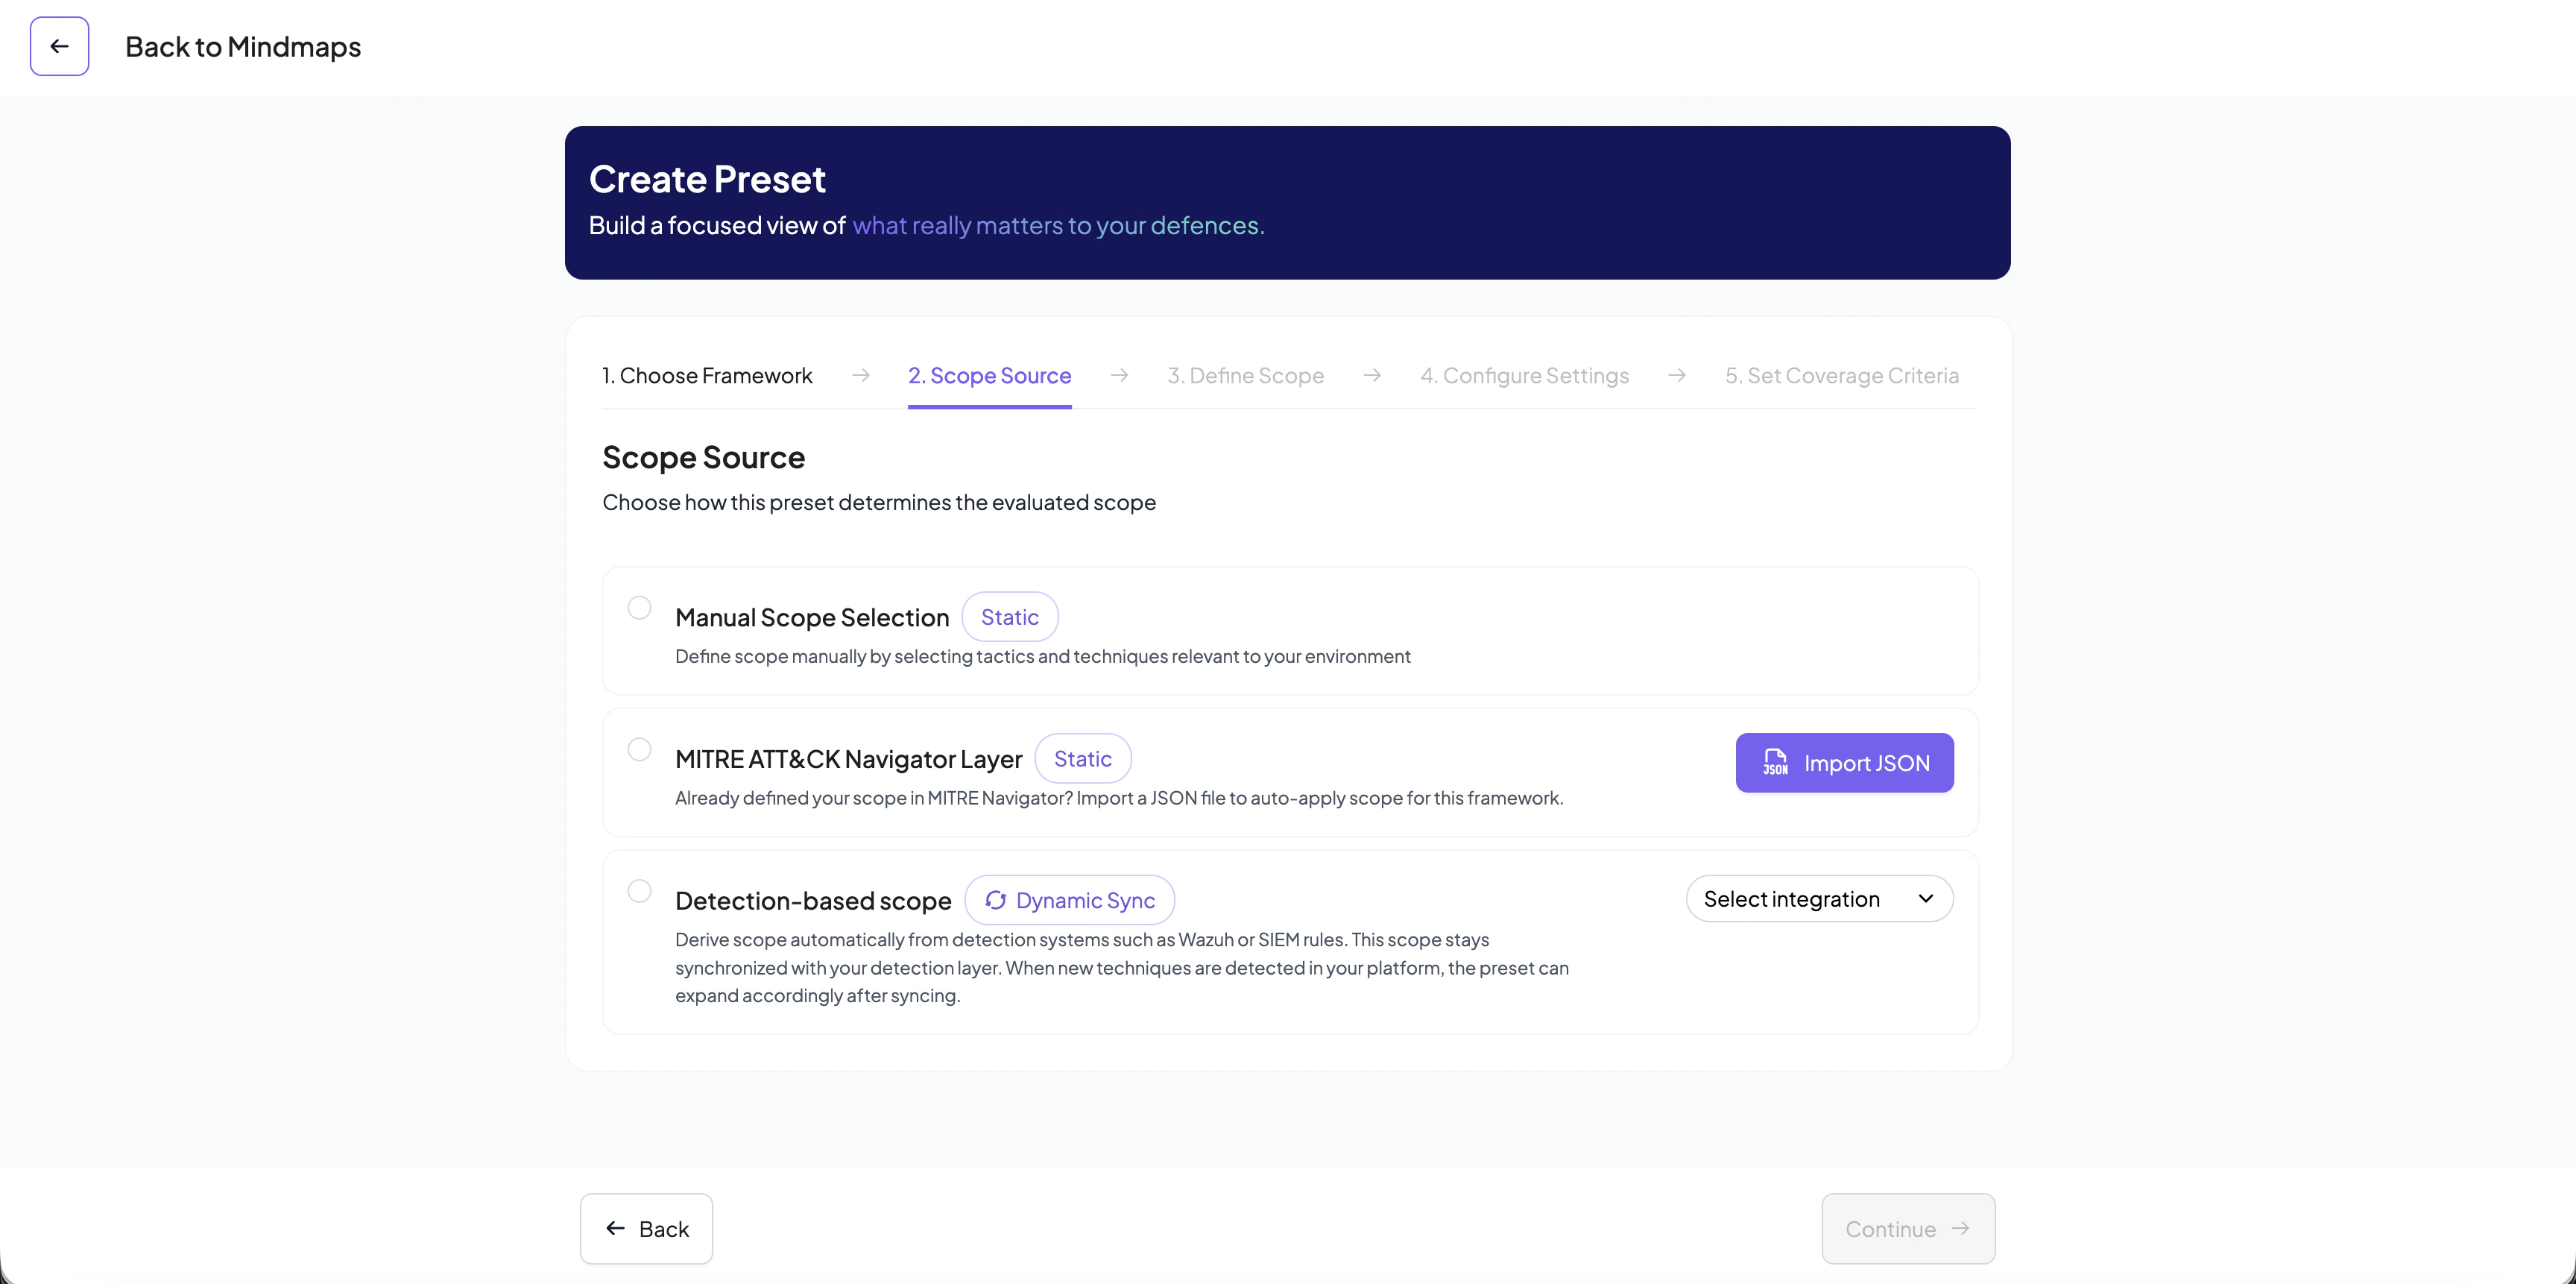
Step 2: Select the scope source
There are three available options :
- Select the framework elements manually
- Import from a MITRE ATT&CK Navigator layer (only when MITRE ATT&CK framework is selected at step 1)
- Import tags from an existing detection system (only when MITRE ATT&CK framework is selected at step 1). If you select that step, you will also need to select an integration. Currently, Wazuh and Microsoft Sentinel are supported.
Step 3: Select the relevant elements of the framework for your preset
You can select individual techniques or entire tactics that are relevant to you. If on step 2, you selected a detection-based scope (dynamic sync)
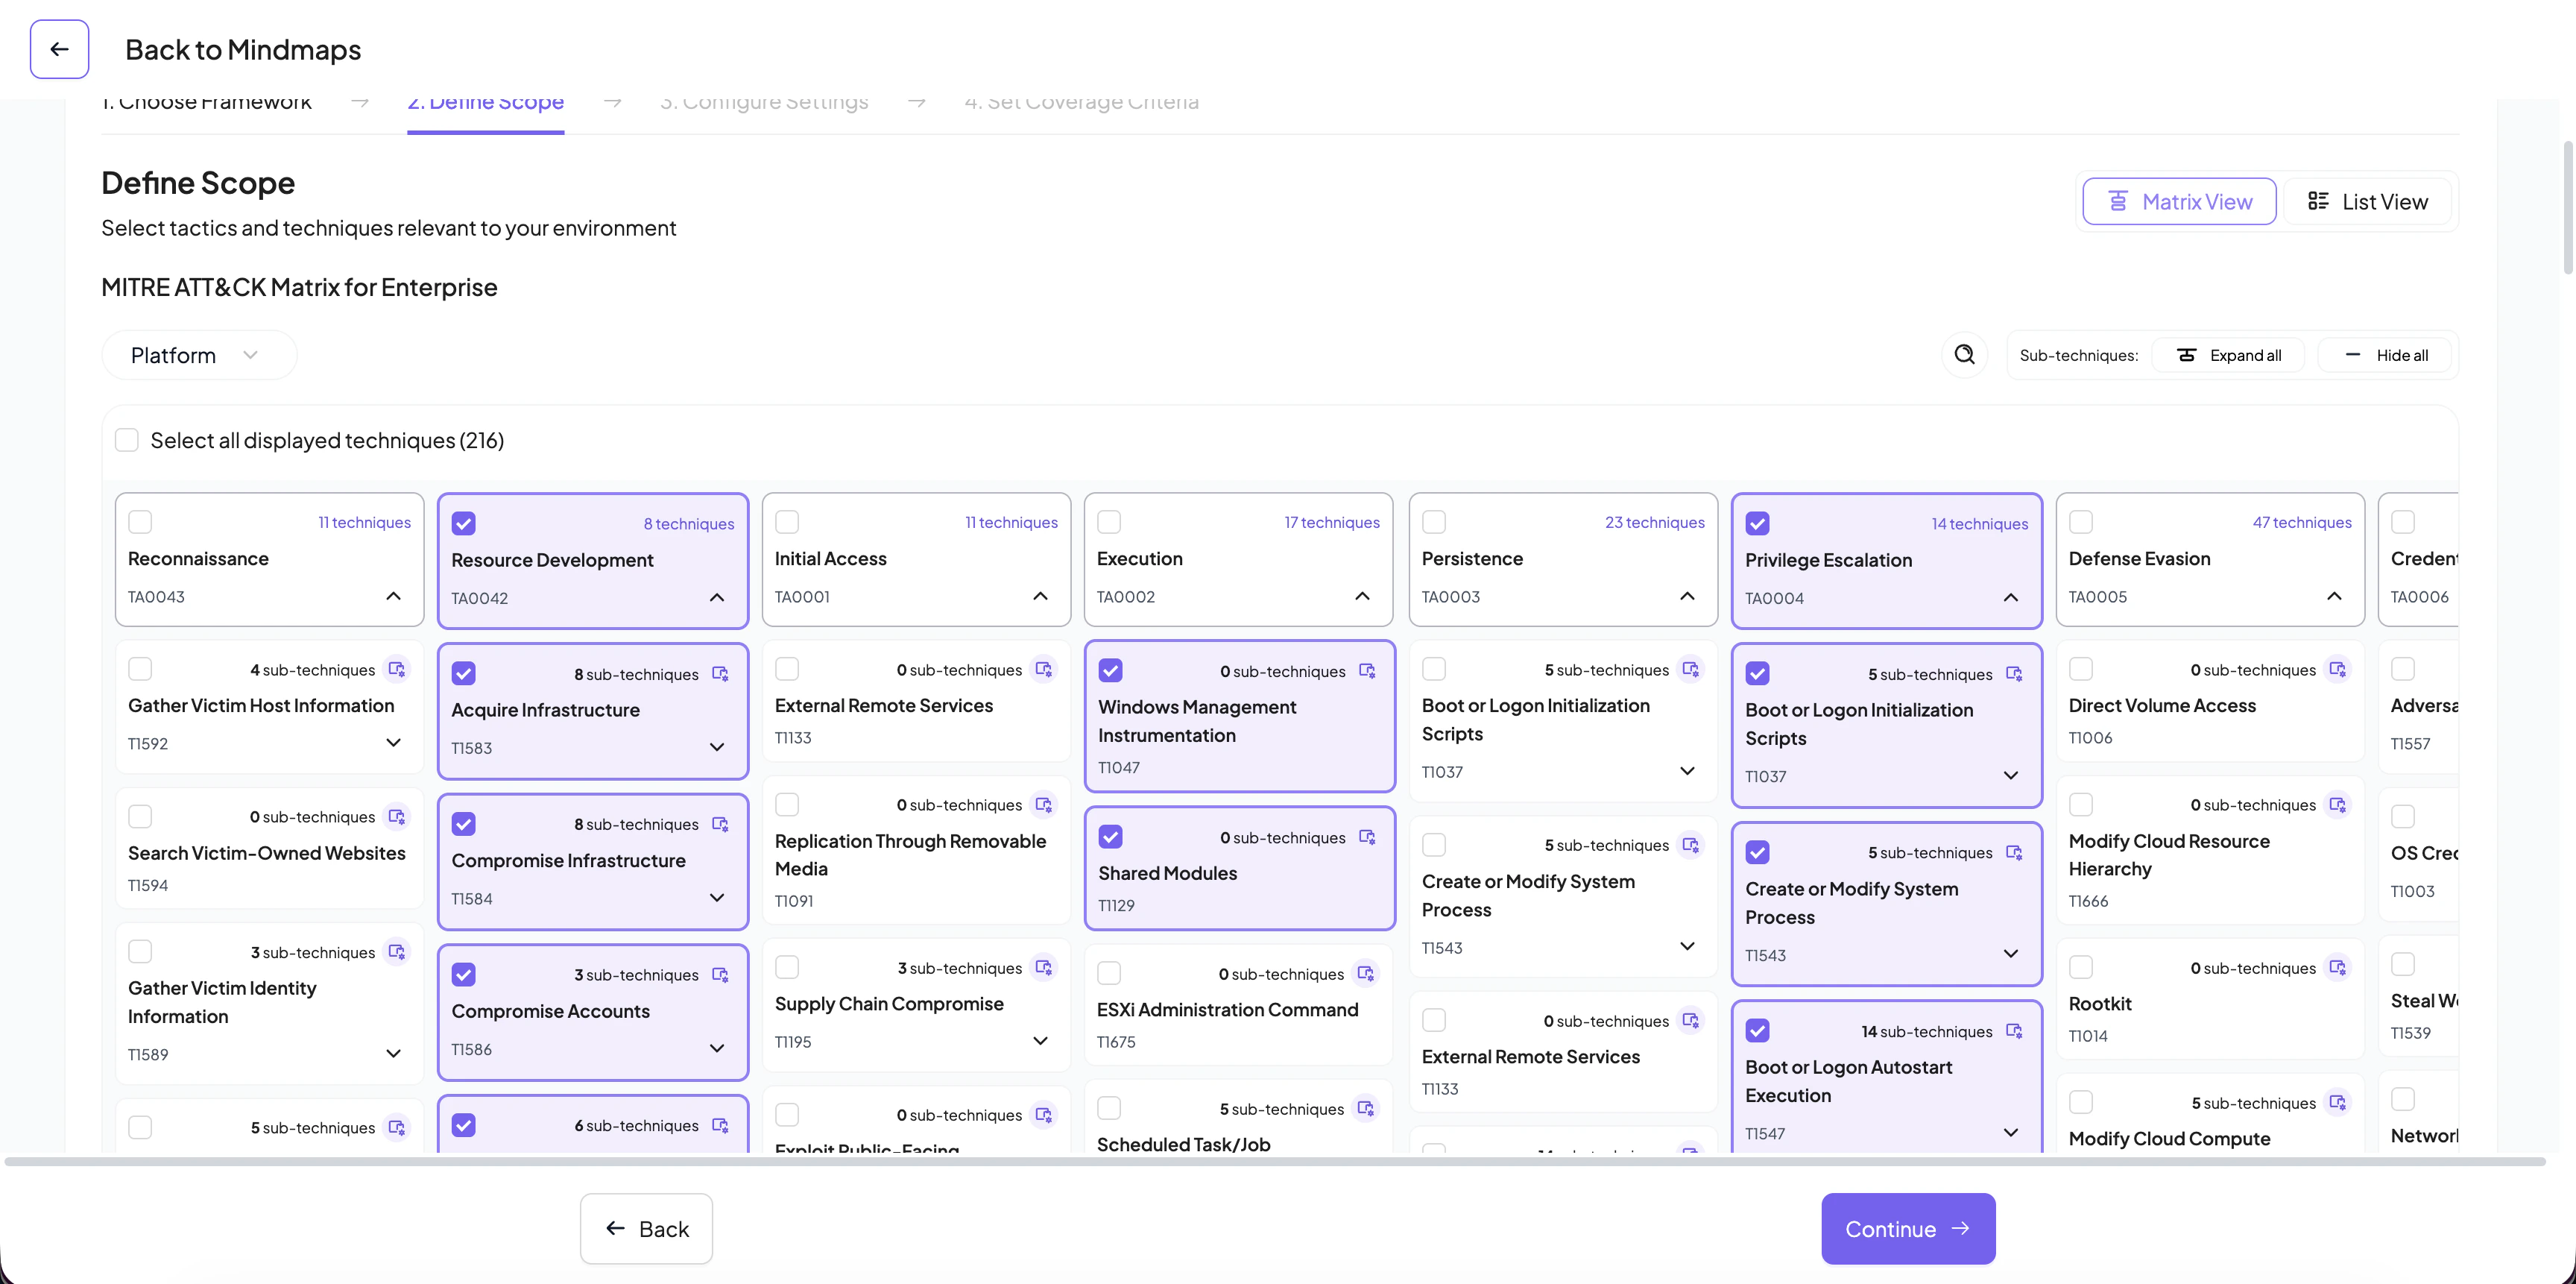 You can even select individual sub-techniques. You can expand and collapse a technique to show/hide the associated sub-techniques.
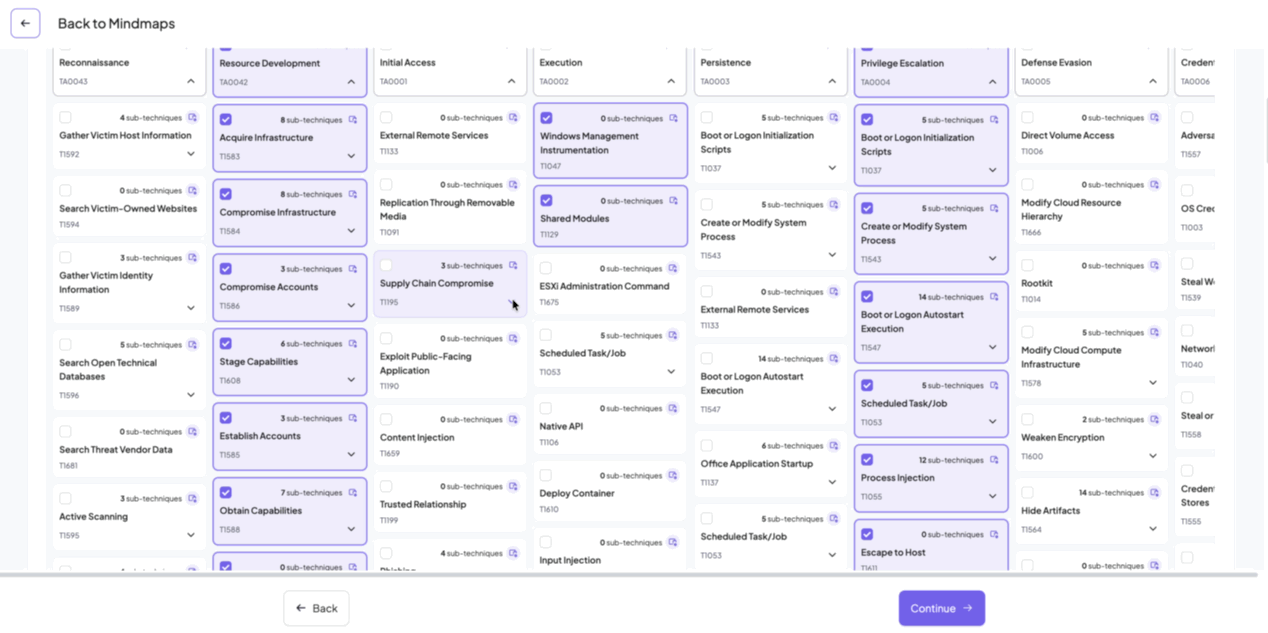 Specifically for MITRE ATT&CK for Enterprise, you can filter the view by product. For example, by selecting Windows only the techniques associated with the Windows platform will be displayed so you can easily select all of them by clicking on the Select all displayed techniques.
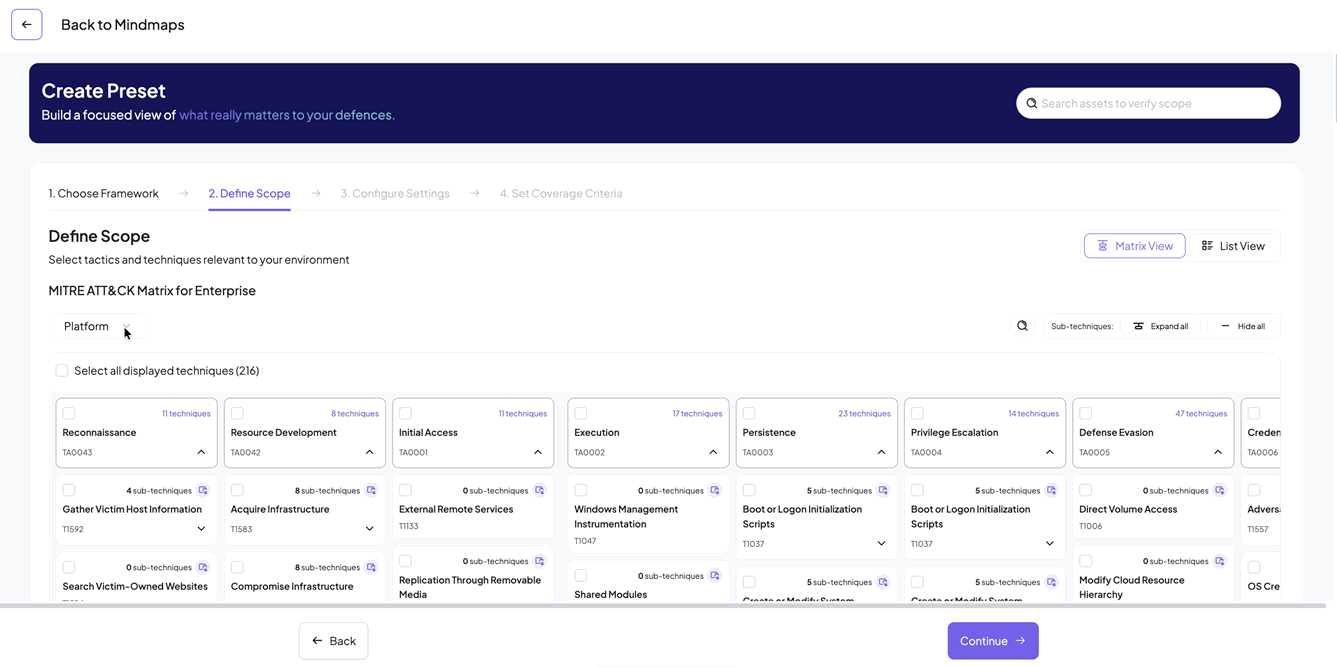
You can expand and collapse all techniques by clicking Expand all/Hide all from the top right corner of the matrix
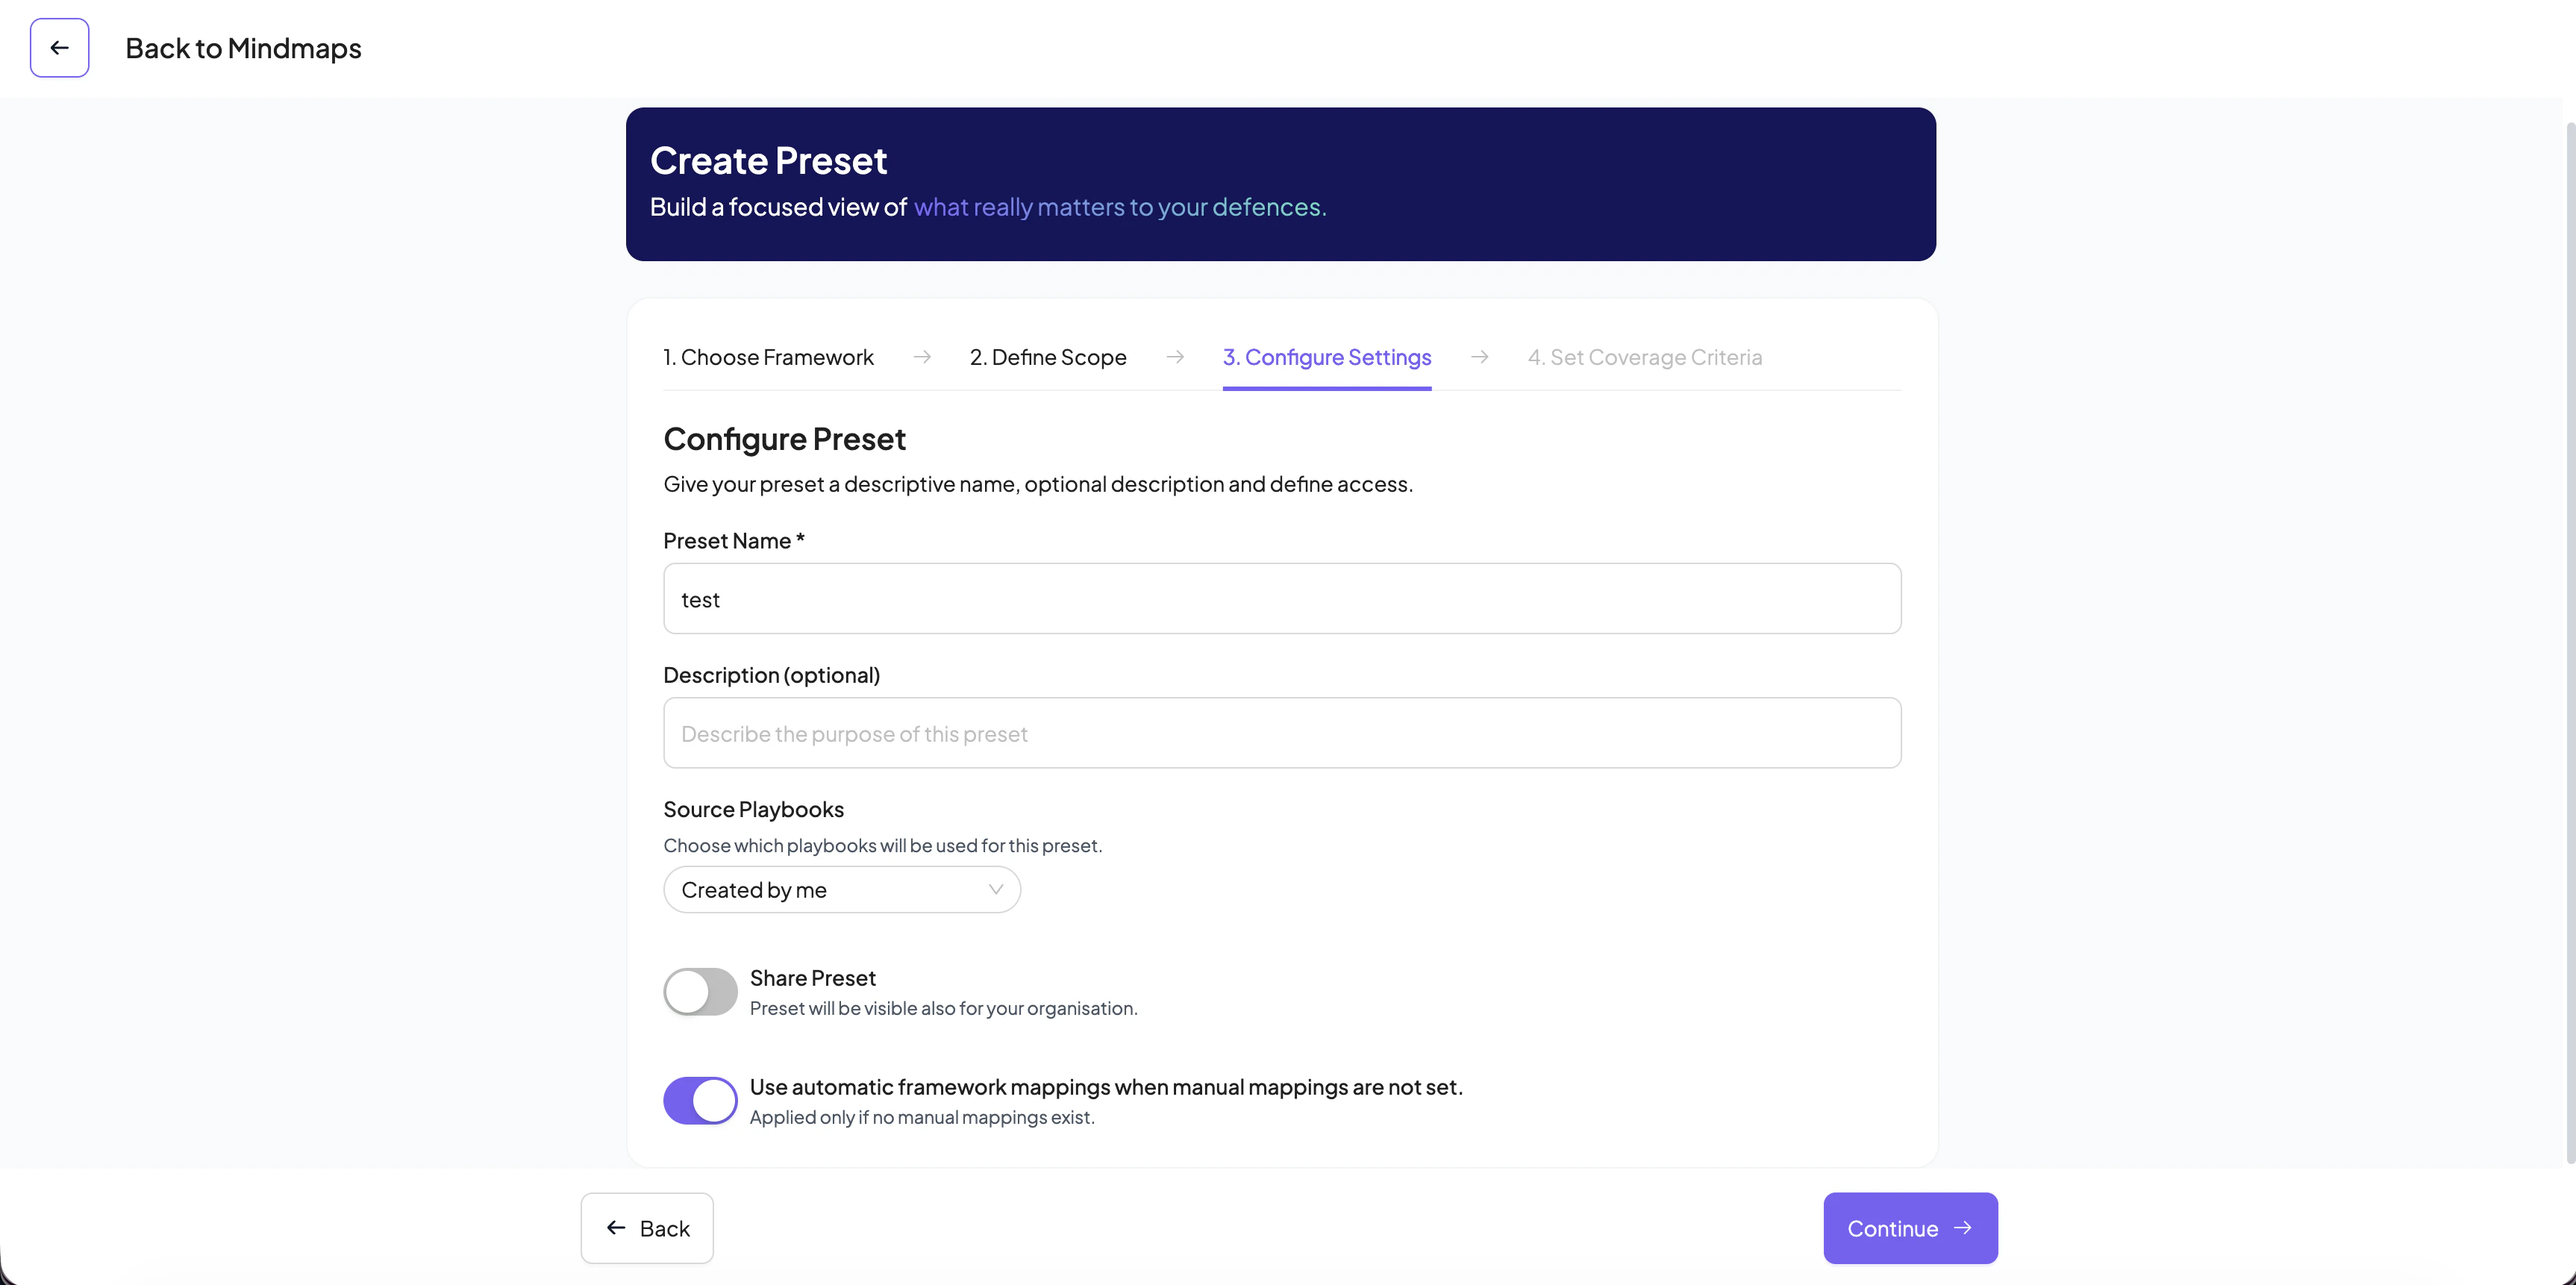
Step 4: Configure the preset settings
Once you have selected the relevant techniques/sub-techniques, you need to provide additional information about the preset:
- Preset name (required): a name to identify this preset.
- Description (optional)
- The playbooks that will be used to calculate the coverage of the preset. The available options are:
- Created by me: only the playbooks created by you will be used
- Shared with me: only the playbooks that are shared with you will be used
- Public playbooks: only publicly shared playbooks will be used
- A filter that was saved from the playbook management system. See Filter playbooks for more details
- Share preset: enable it if you want to share this preset with your organisation
- Use automatic framework mappings when manual mappings are not set: enable this if you want to use the AI-suggested mappings of the playbooks in case you have not manually mapped your playbooks
Step 5: Set coverage criteria
In order for a playbook that is mapped to a technique/sub-technique to be considered that it covers that technique/sub-technique, we should define the criteria when evaluating it. Currently, we support two different criteria:
- Playbooks exists in your workspace: no additional properties need to be met, the sole existence of the playbook is enough.
- Playbook matches selected status: the playbook must have a certain status in order to be considered. The available statuses are Planned, In progress, In review and Completed.
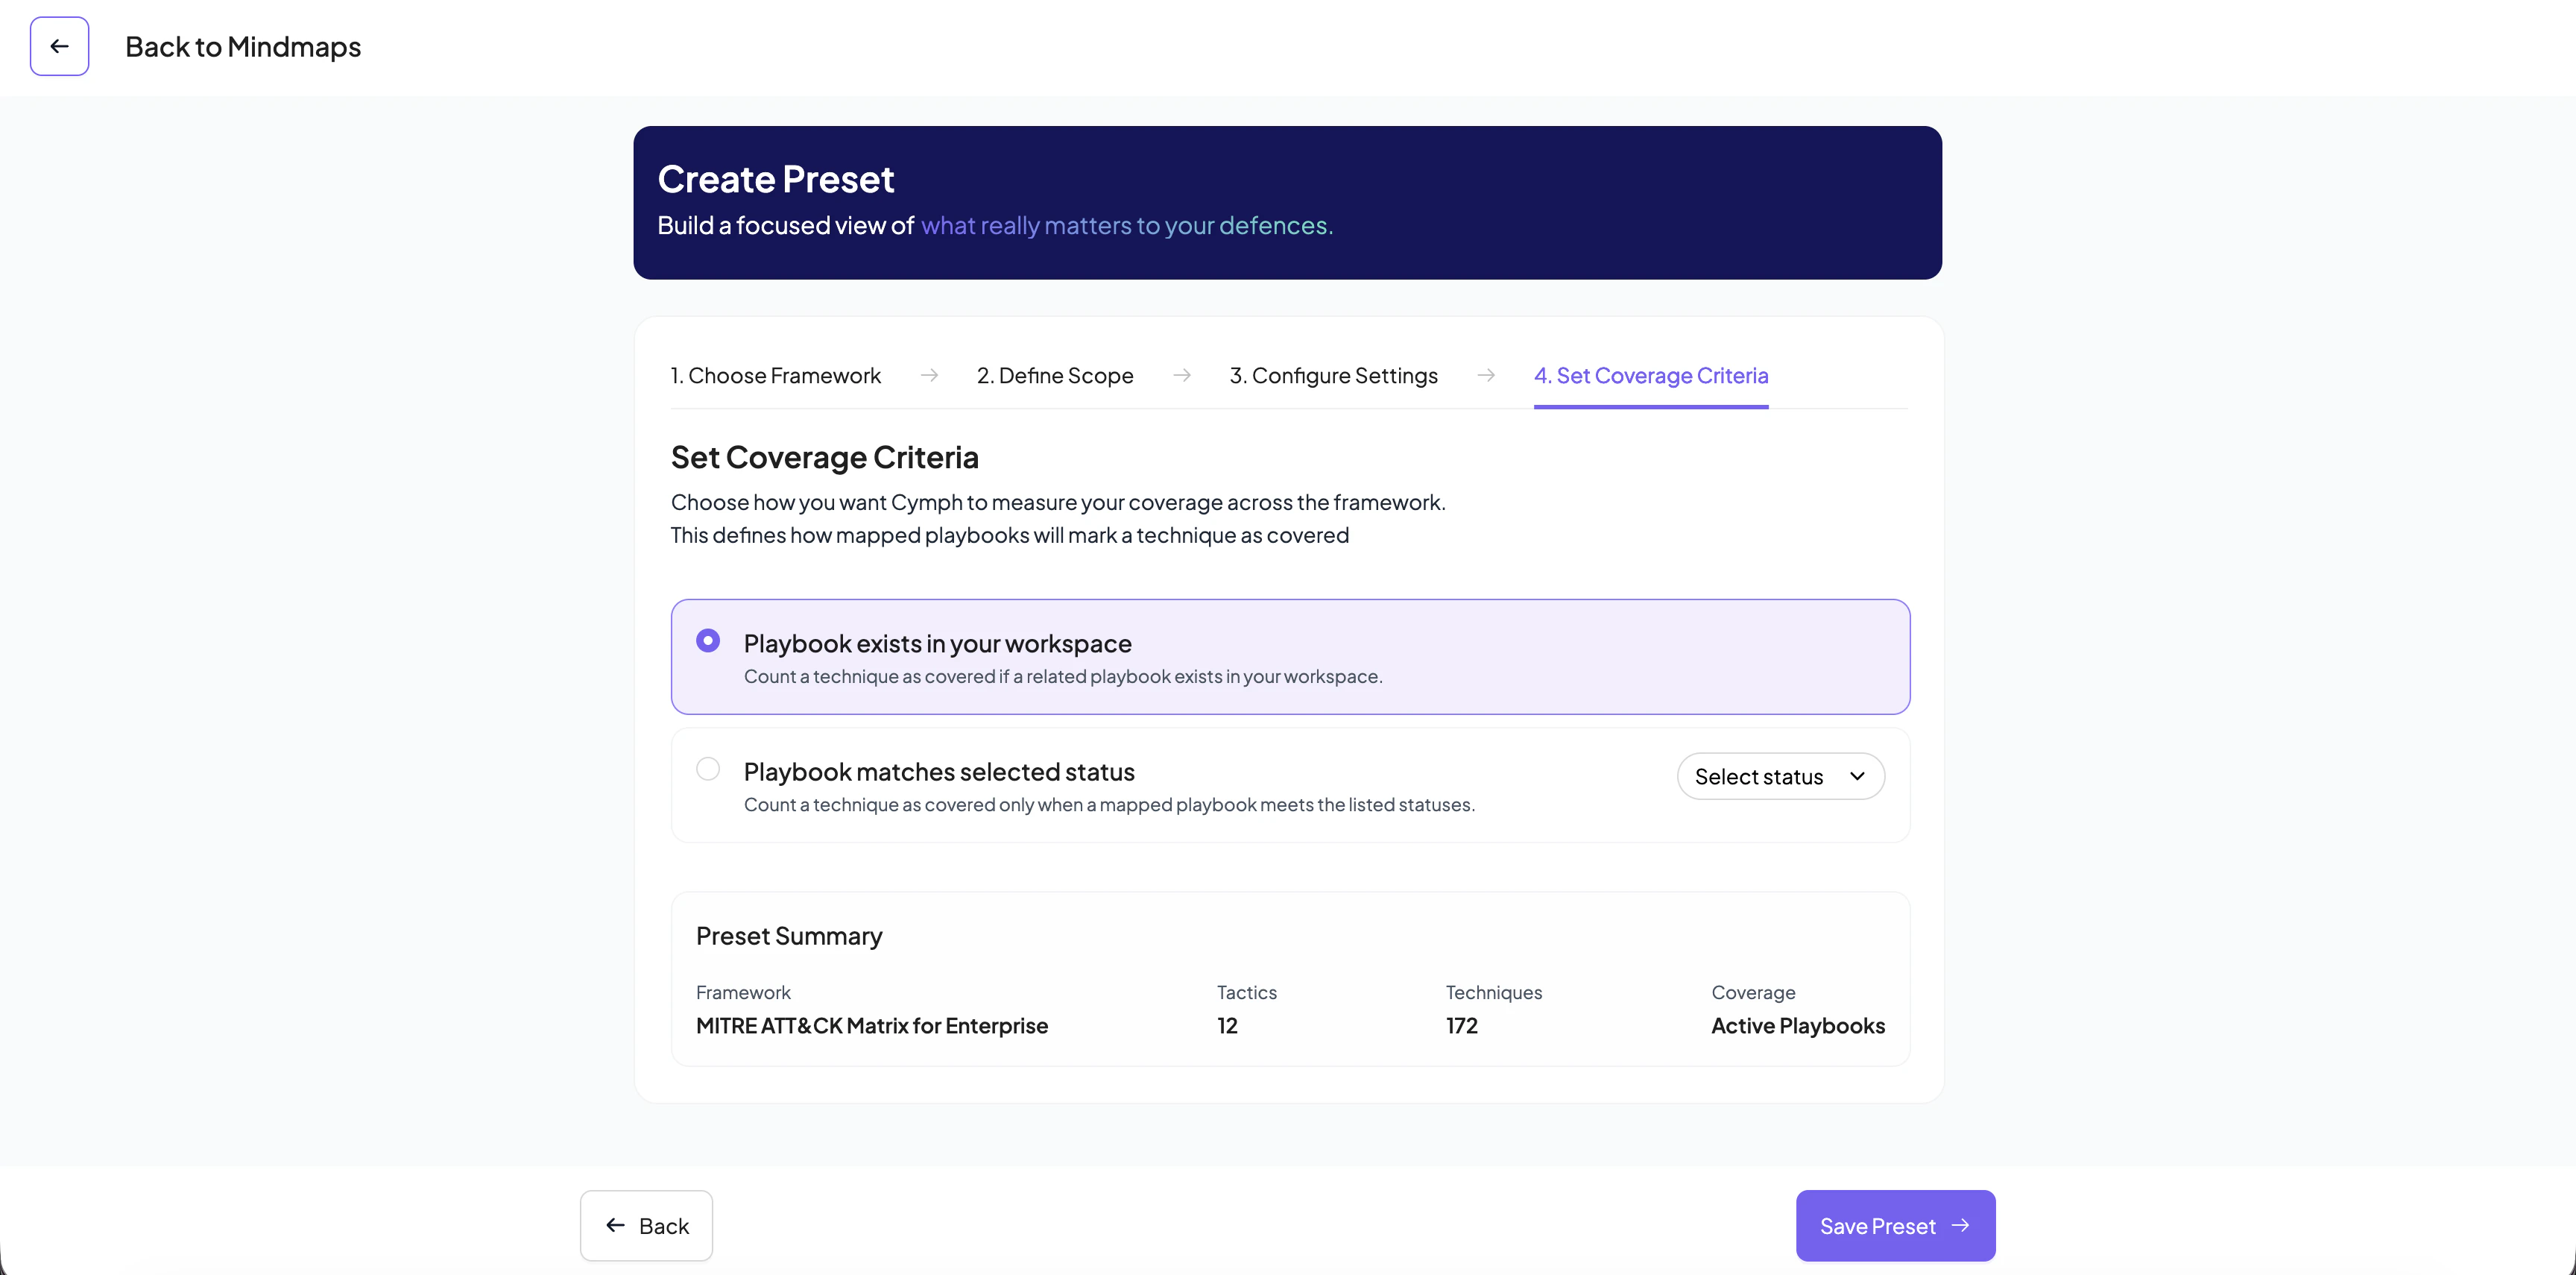 Click on Save Preset and your preset is ready!
How to edit a preset
- Go to the page of the preset
- Select Mind maps from the navigations menu, and then select your preset from the **My Presets **dropdown menu
- Open the action menu of the preset
- Click on the triple dot action button next to the preset name

- Edit your preset
- Select the Edit Preset option
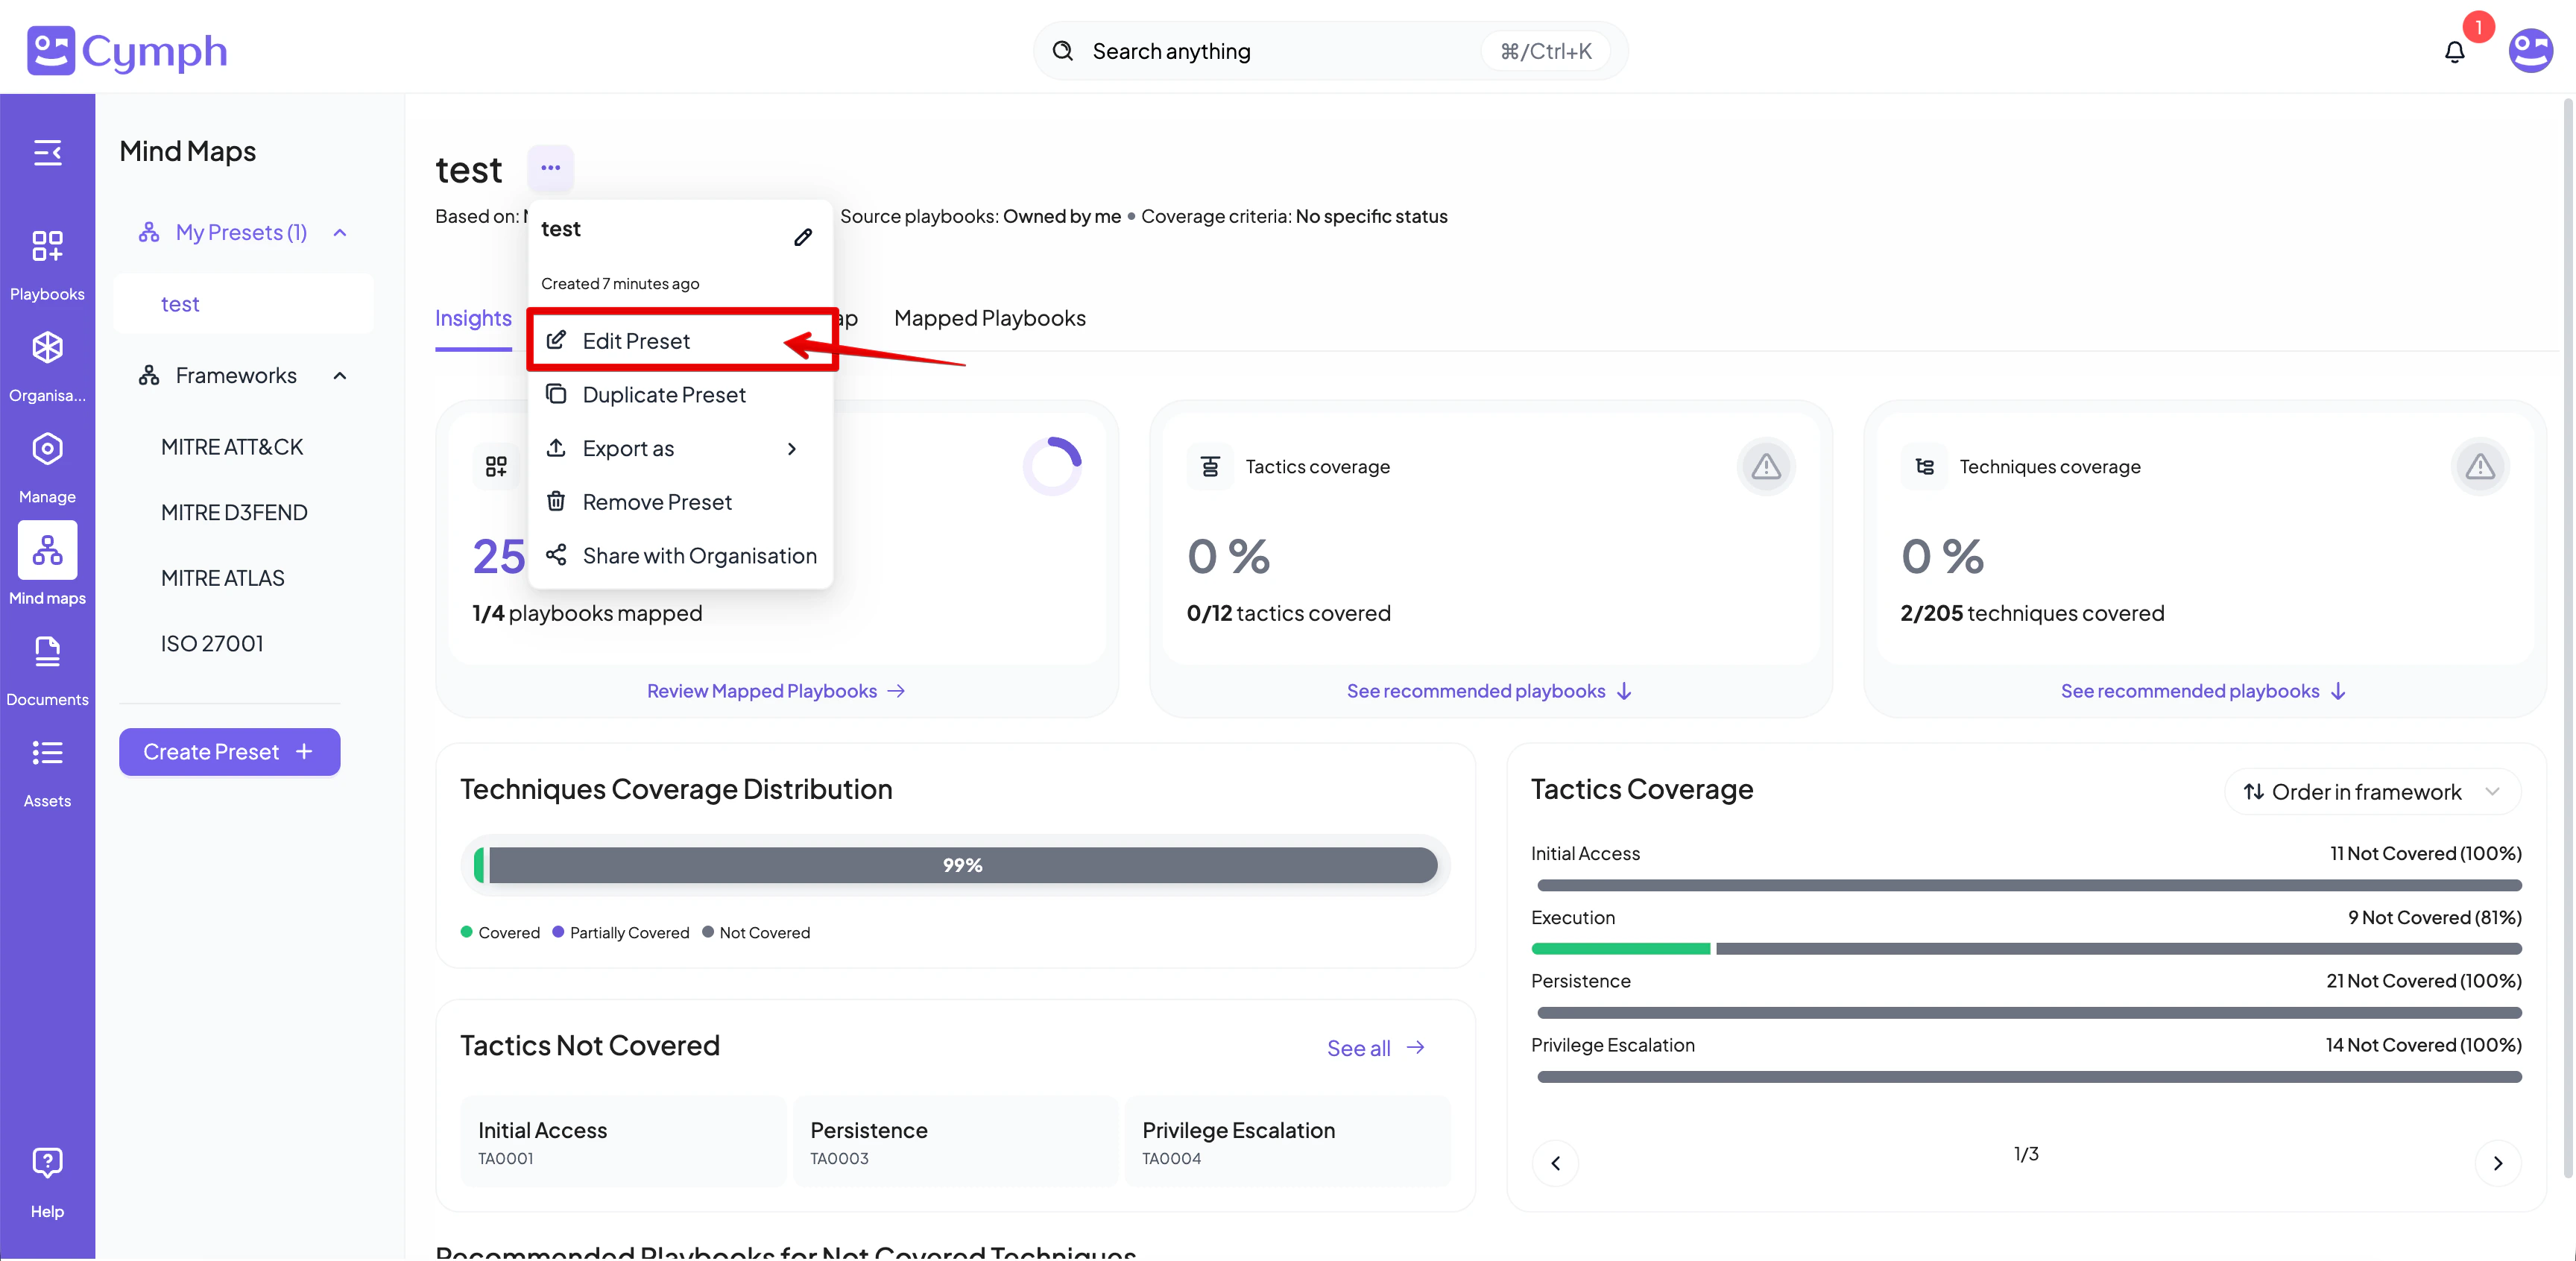
- The edit process follows the same steps as the preset creation. At each individual step modify the information you want.
How to delete a preset
- Go to the page of the preset
- Select Mind maps from the navigations menu, and then select your preset from the My Presets dropdown menu
- Open the action menu of the preset
- Click on the triple dot action button next to the preset name
- Delete your preset
- Select Remove Preset from the dropdown menu
- Confirm that you want to remove the preset
How to duplicate a preset
- Go to the page of the preset
- Select Mind maps from the navigations menu, and then select your preset from the My Presets dropdown menu
- Open the action menu of the preset
- Click on the triple dot action button next to the preset name
- Duplicate your preset
- Select Duplicate Preset from the dropdown menu
A copy of your preset will be created with the suffix “(copy)” appended to the original name.
How to share and unshare a preset with your organisation
- Go to the page of the preset
- Select Mind maps from the navigations menu, and then select your preset from the My Presets dropdown menu
- Open the action menu of the preset
- Click on the triple dot action button next to the preset name
- Share or unshare your preset
- Select Share Preset from the dropdown menu if the preset is not already shared
- Select Unshare Preset if the preset is already shared and you want to unshare it