How to import assets from files
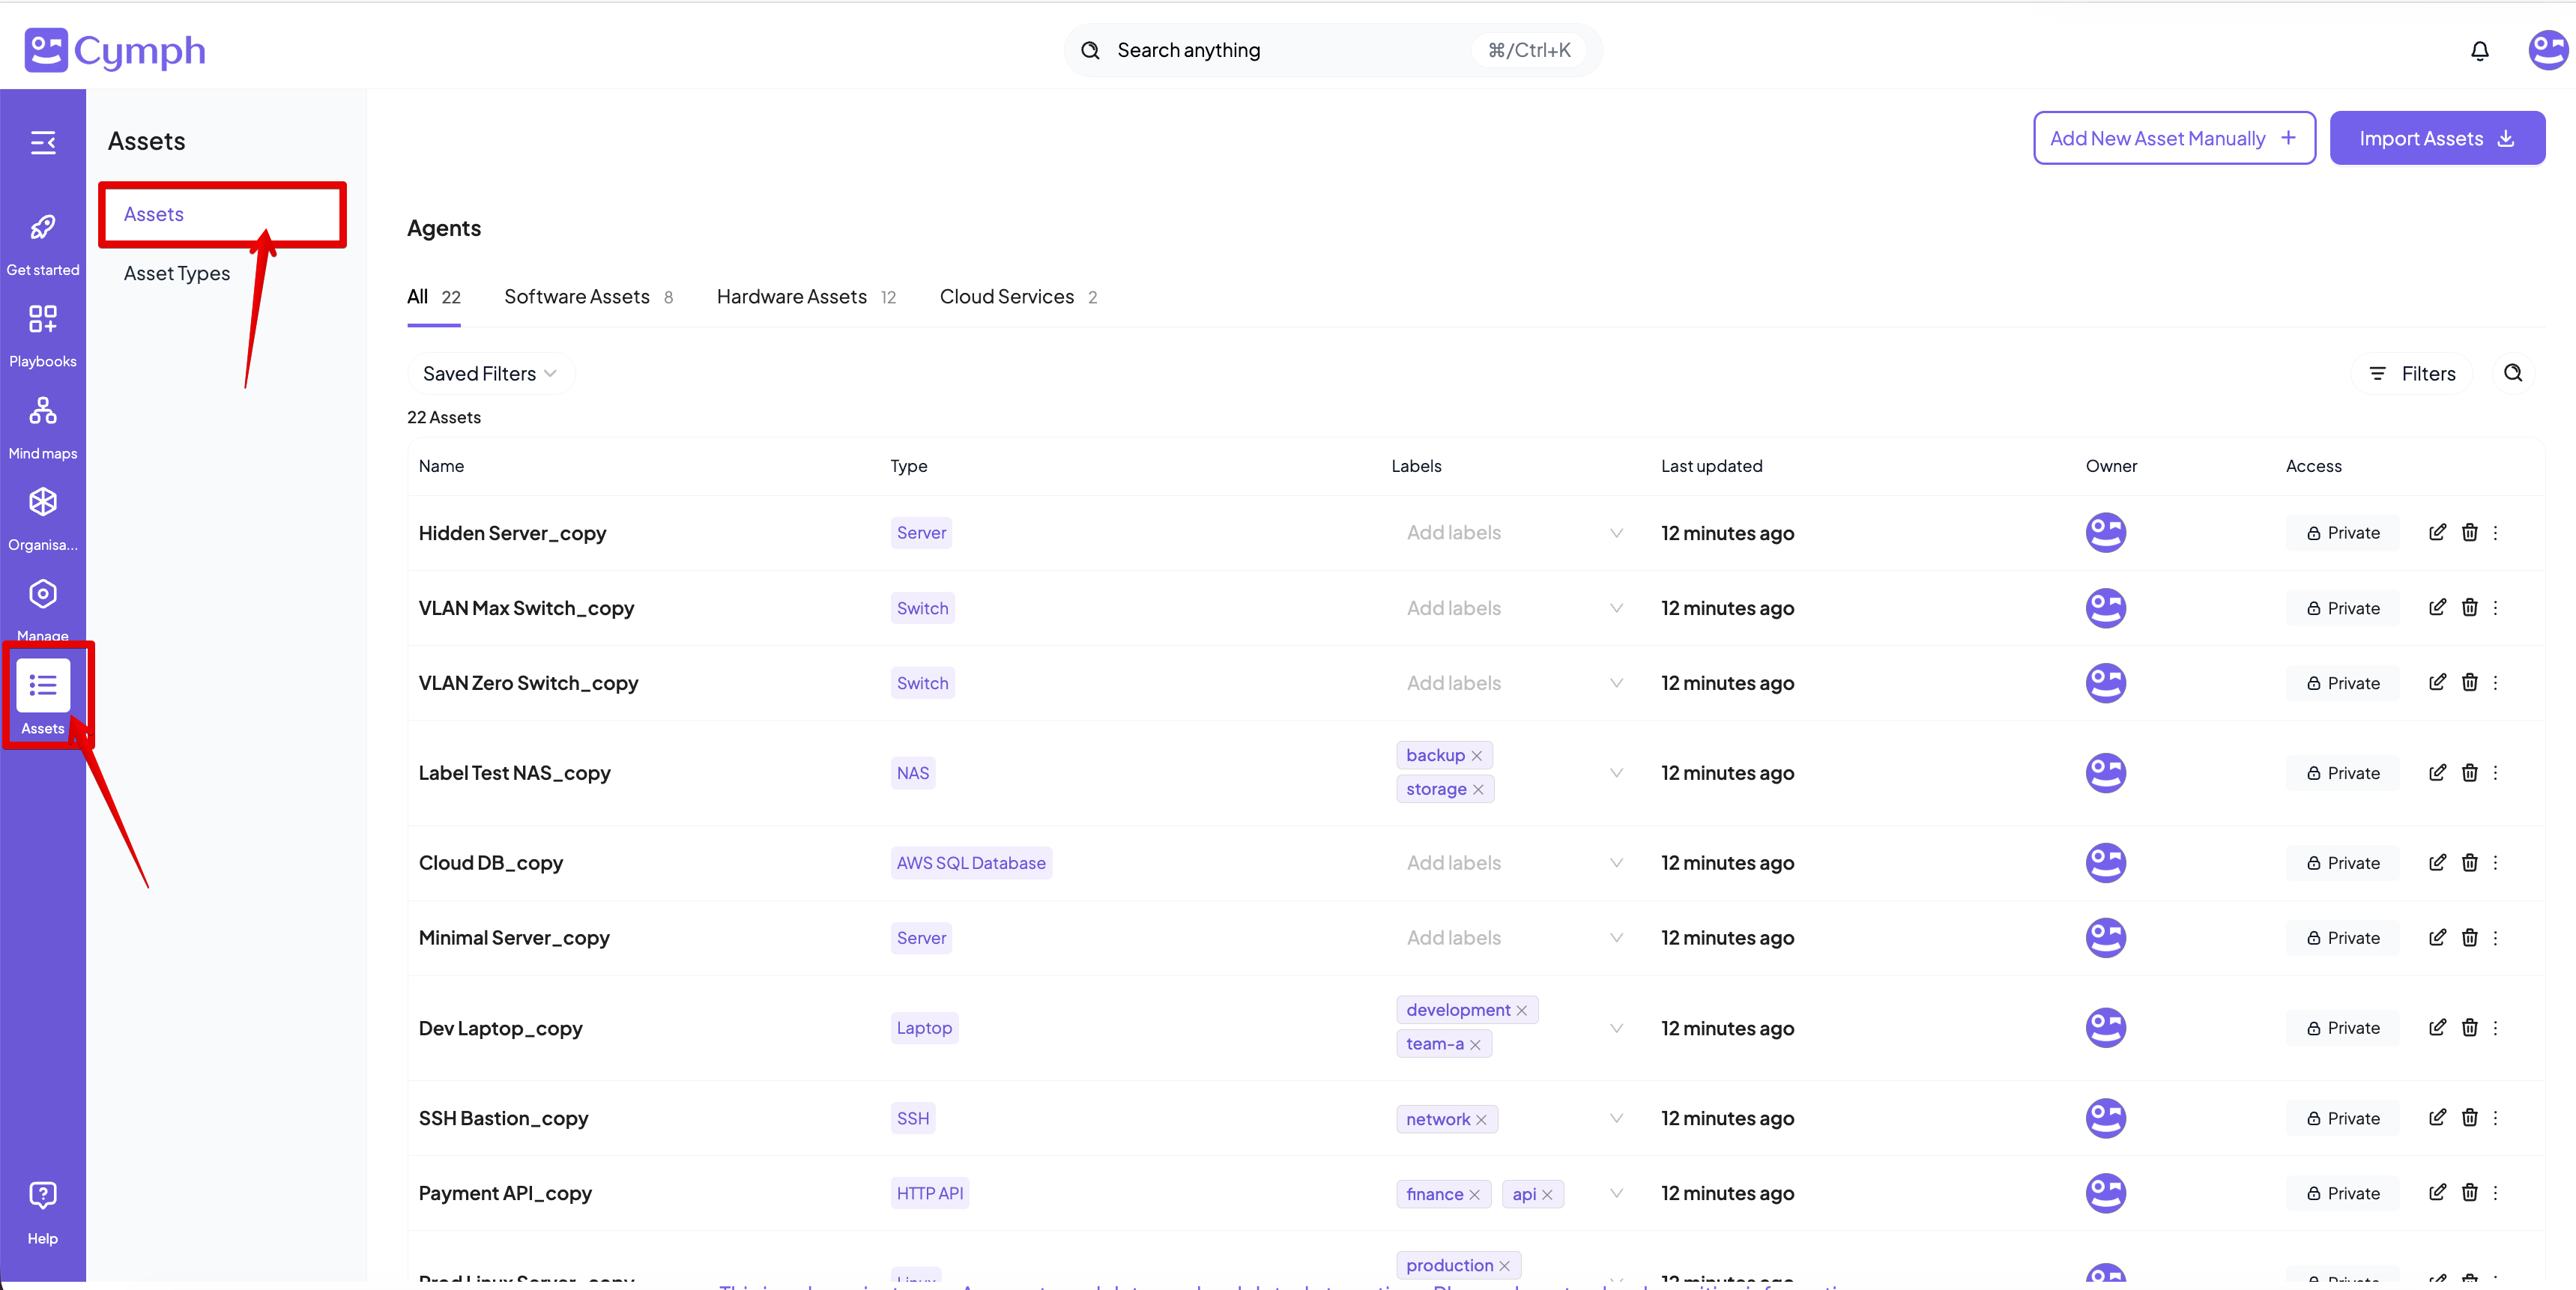
- Go to the Assets page
- Click on Assets from the navigation menu, then select Assets.
- Import assets from a file
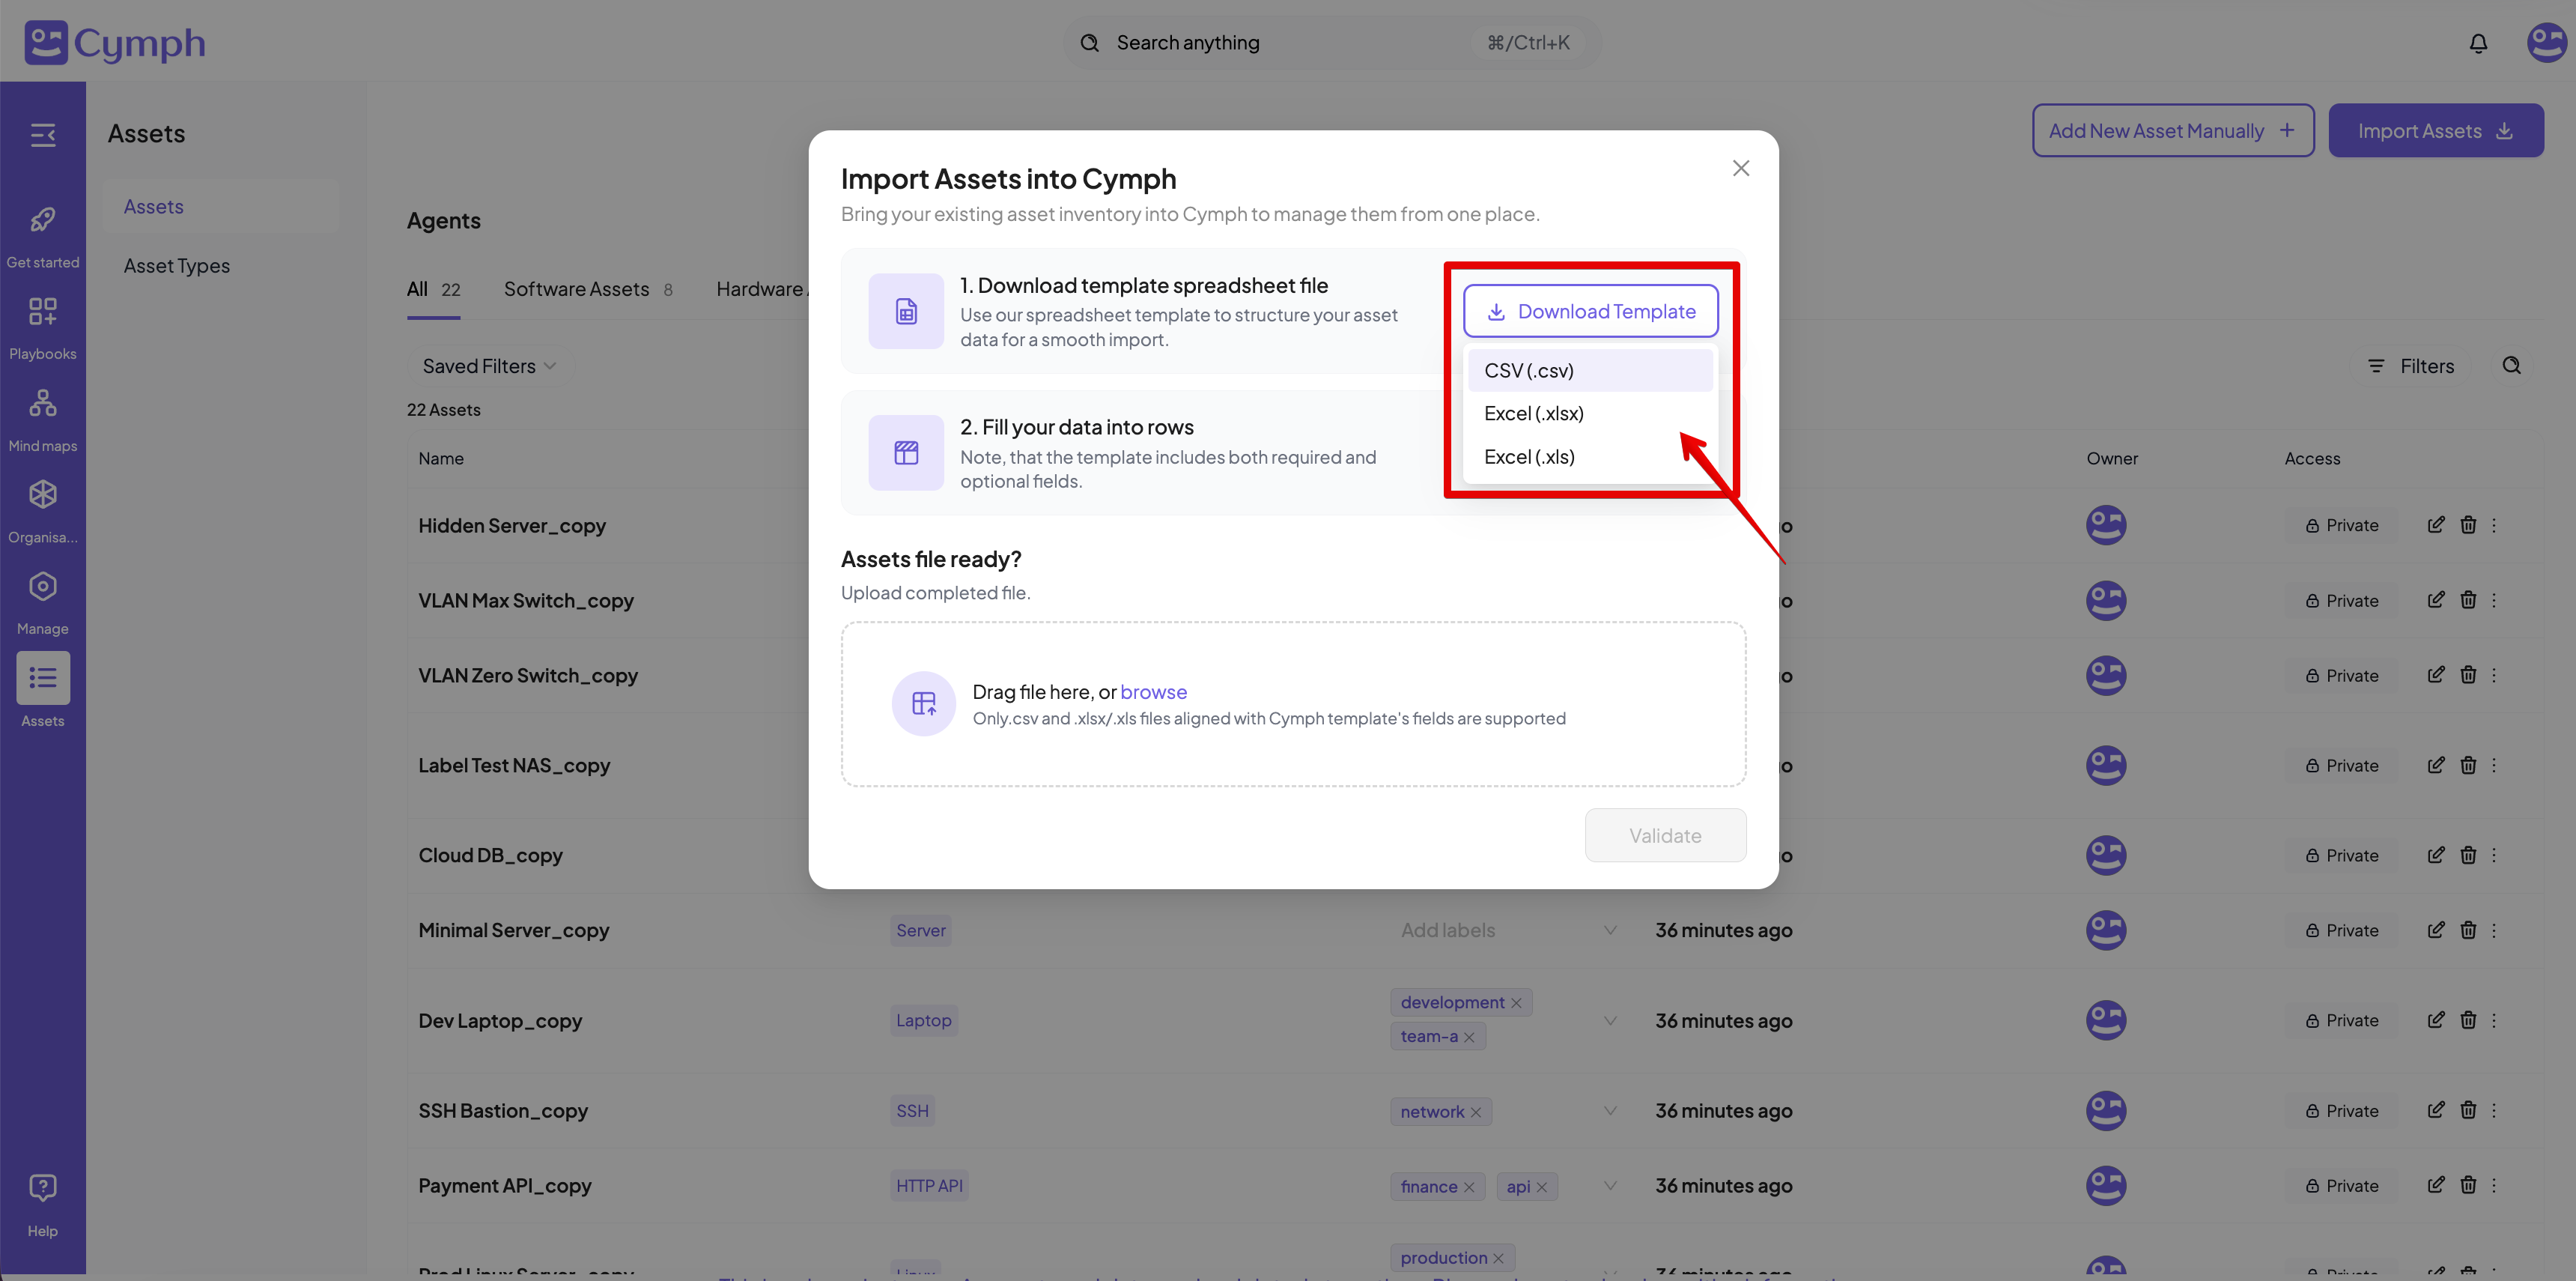
- Click on the Import Assets button at the top right corner

- From the dialog that appears, you can download the templates and fill them in with your assets. The template is provided into three formats: XLSX, XLS and CSV
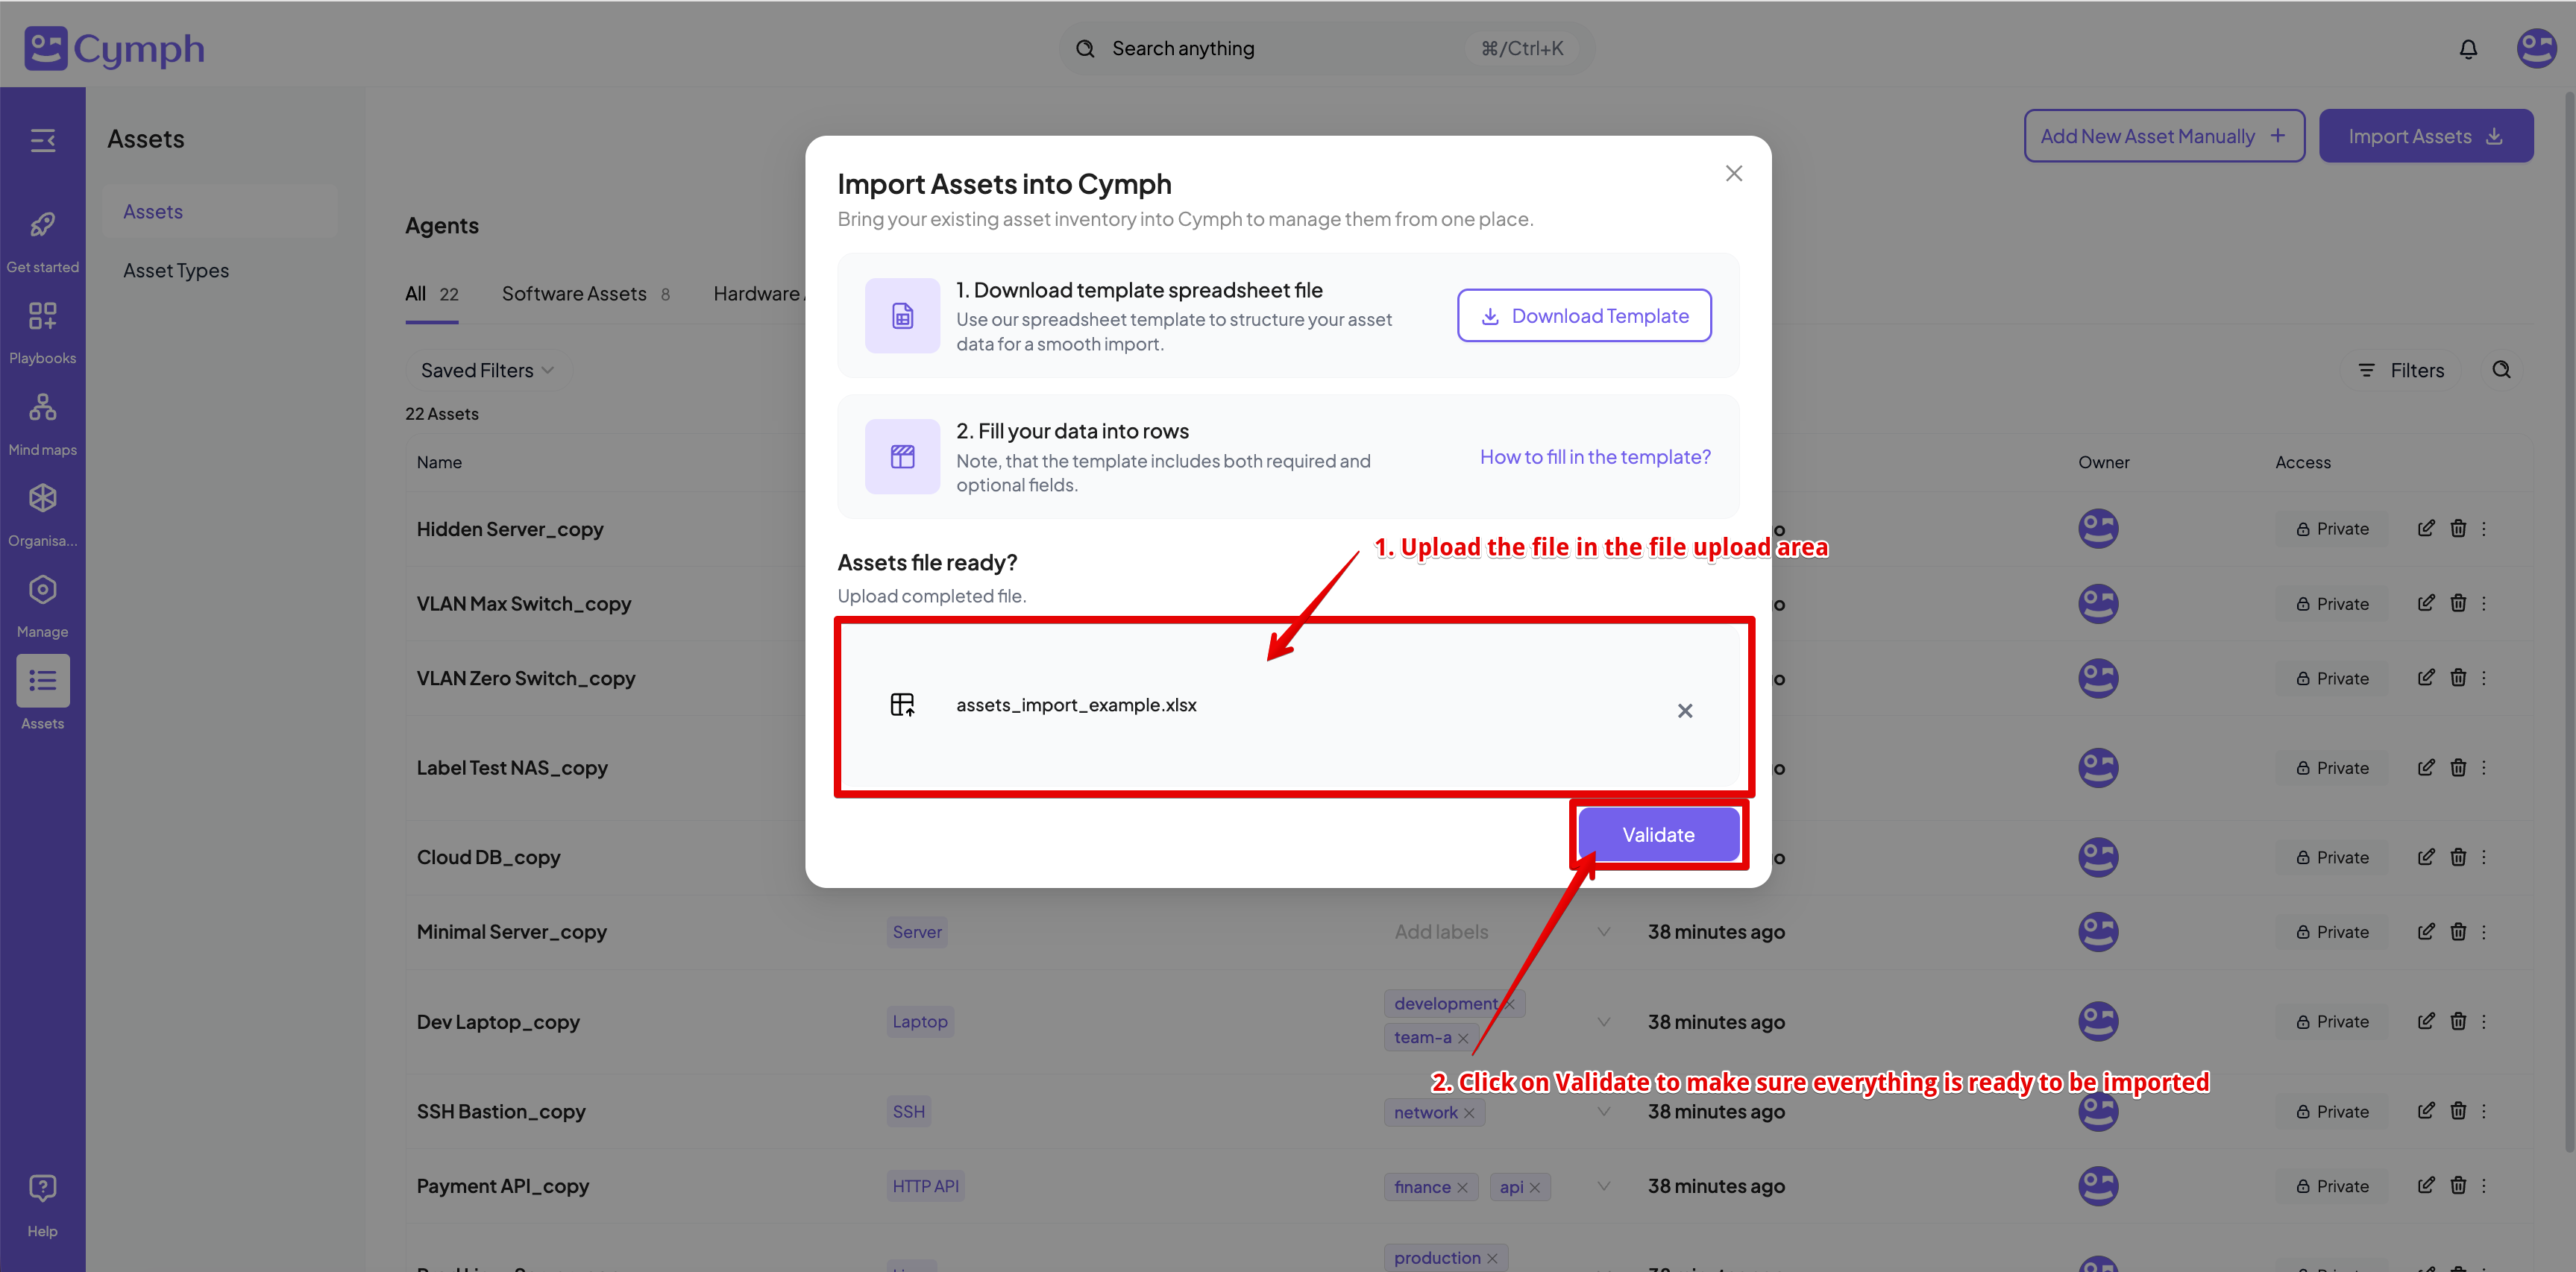
- Upload the file containing the assets and proceed with validation
- Click the Validate option
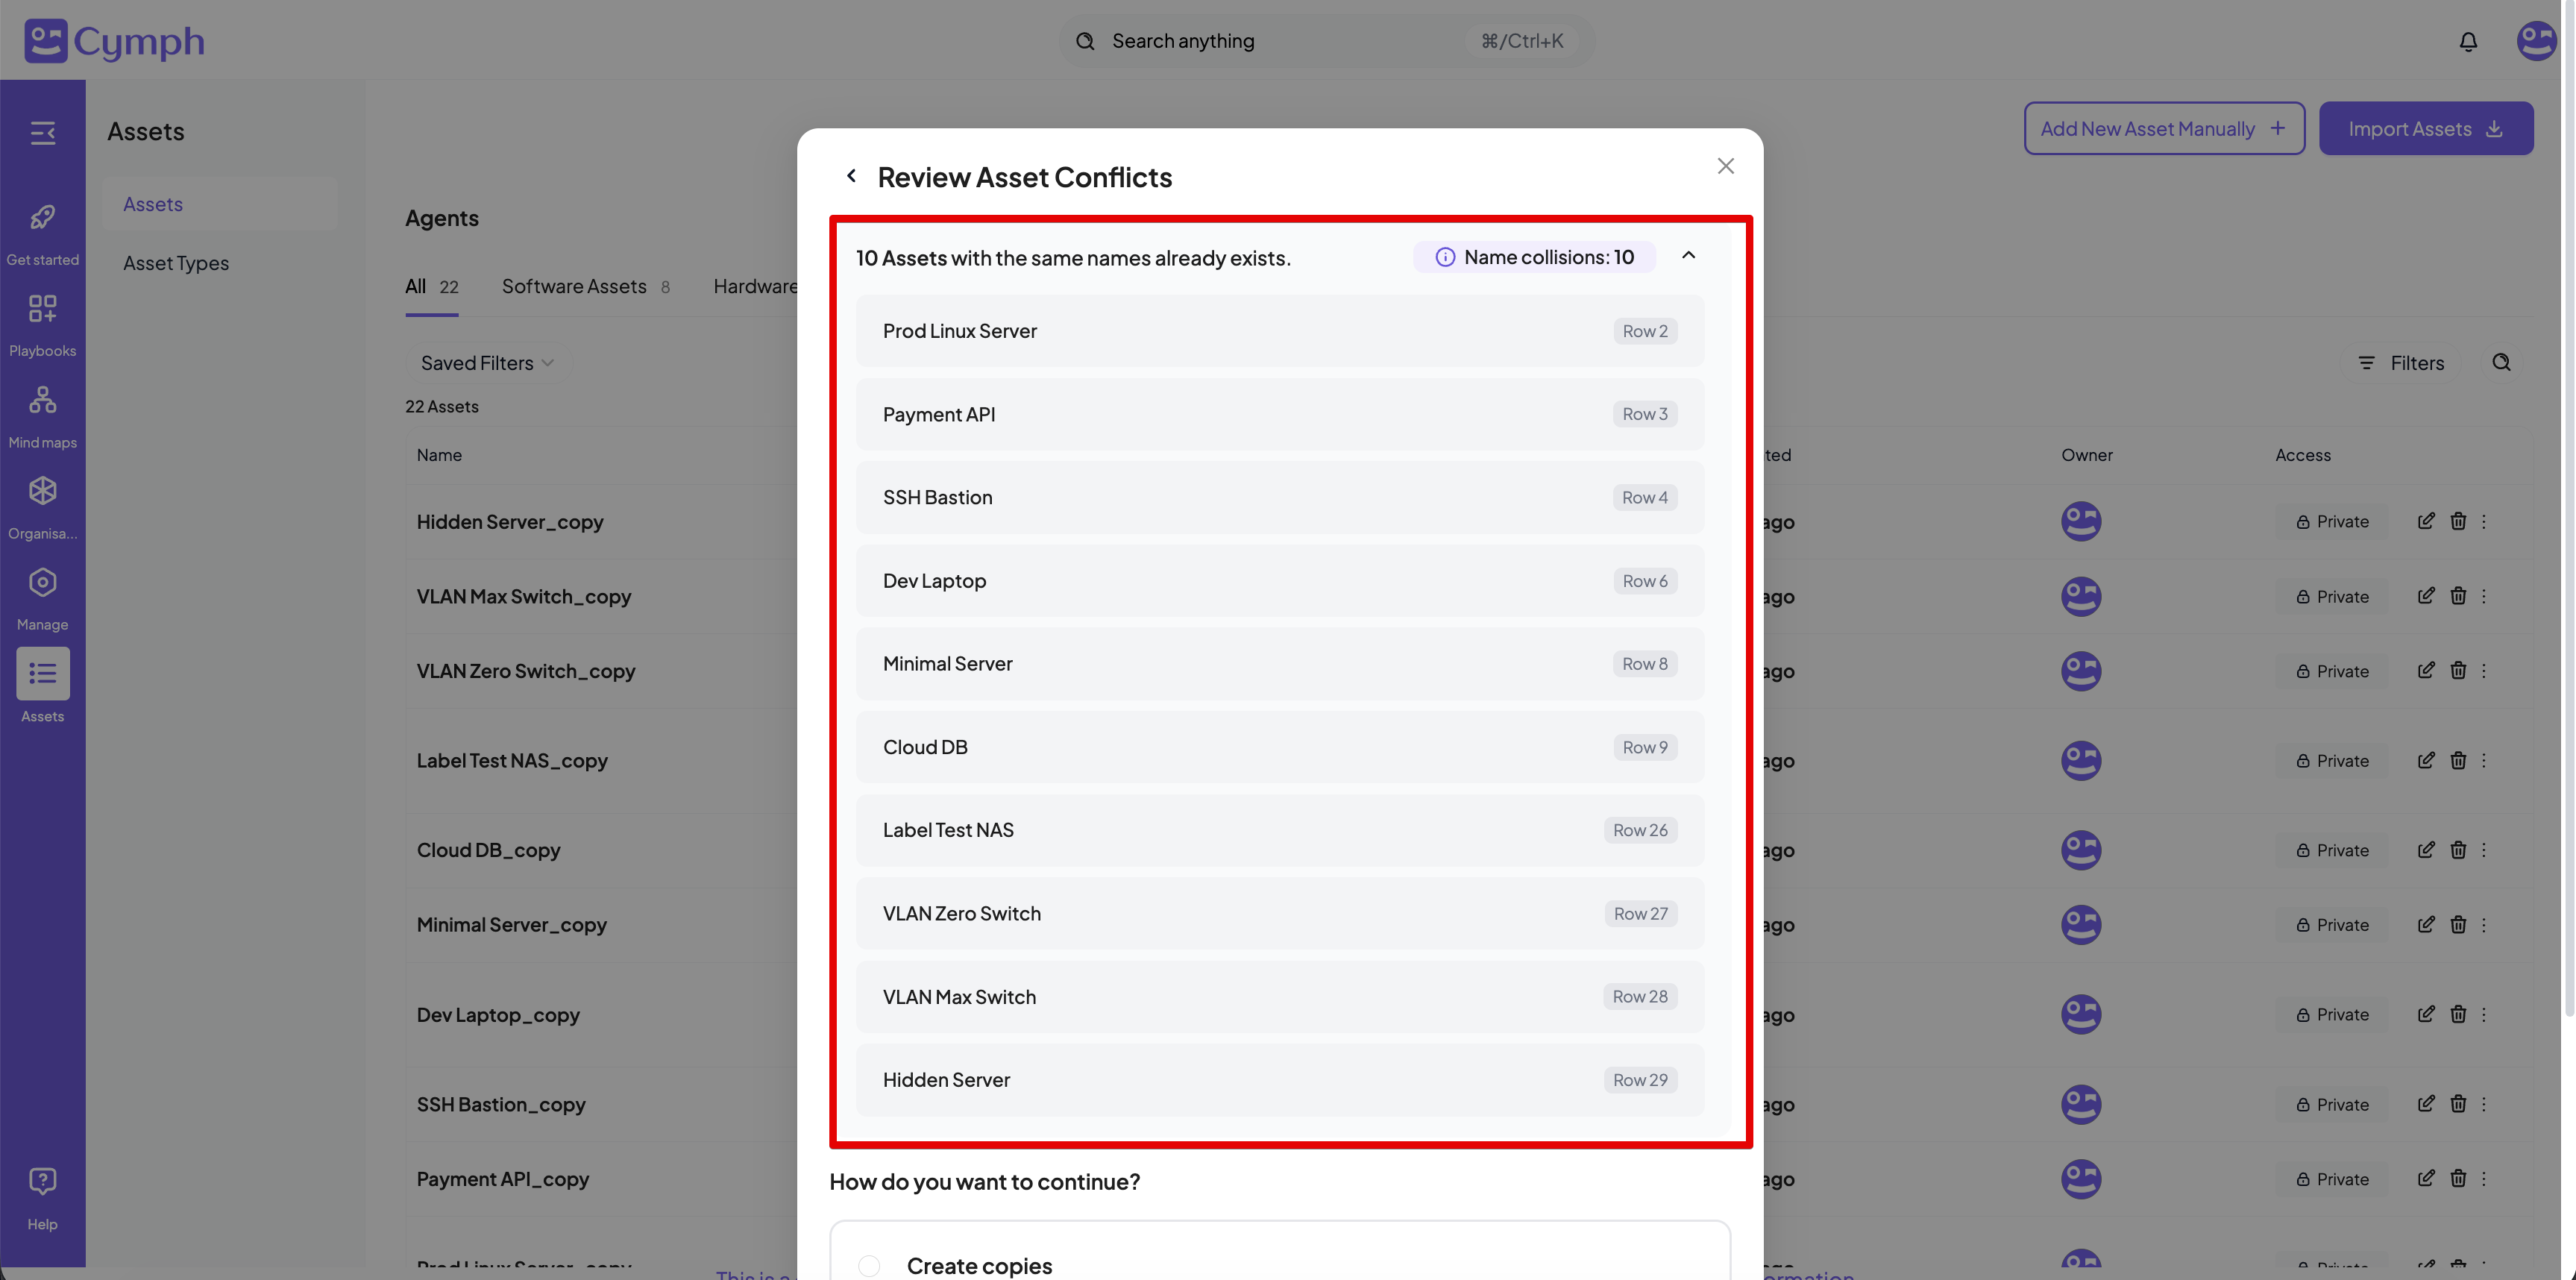
- There might be a case that there will be name conflicts during imports. In that case, you will need to provide the course of actions for handling the conflicts. Two possible options exists:
- Create copies: in that case, the assets will be created with the suffix “_copy” appended to their name.
- Replace assets: the conflicted assets will be replaced by the ones contained in the uploaded file
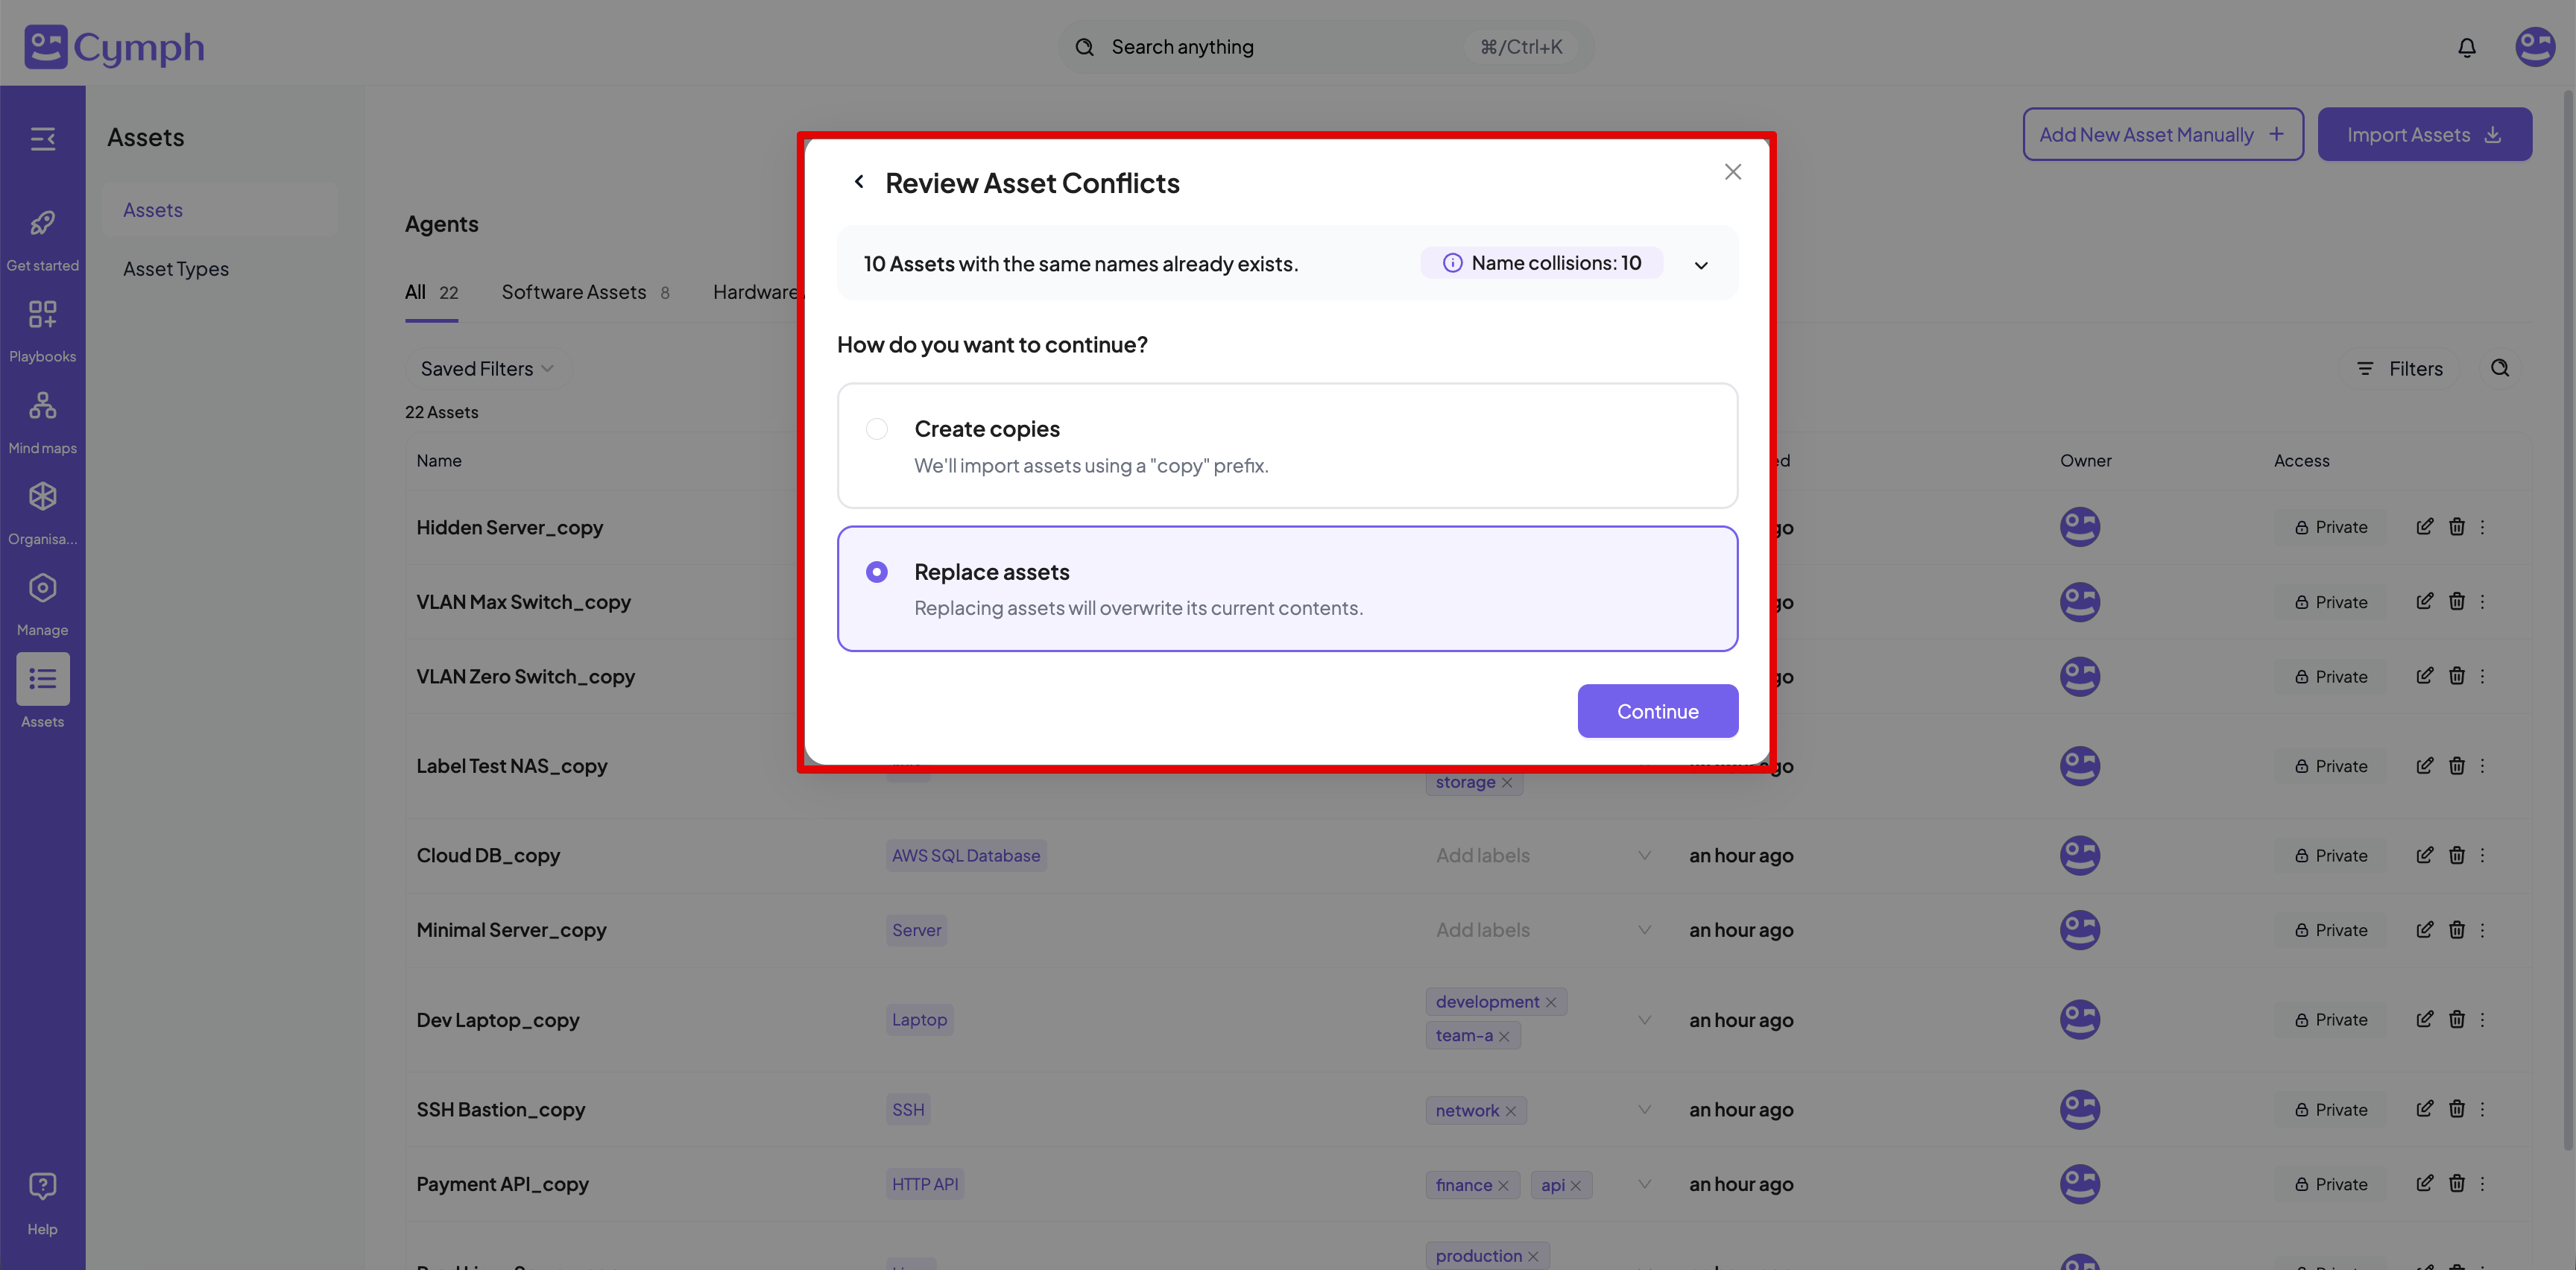
- You can see more details about the conflicts by expanding the top section of the conflict dialog box
- The next step is to review and import the assets. If there are any issues with the data, you will be able to see the errors. In that case, the import cannot continue; all the errors will need to be fixed. You can expand the relevant sections to see more details about the errors.
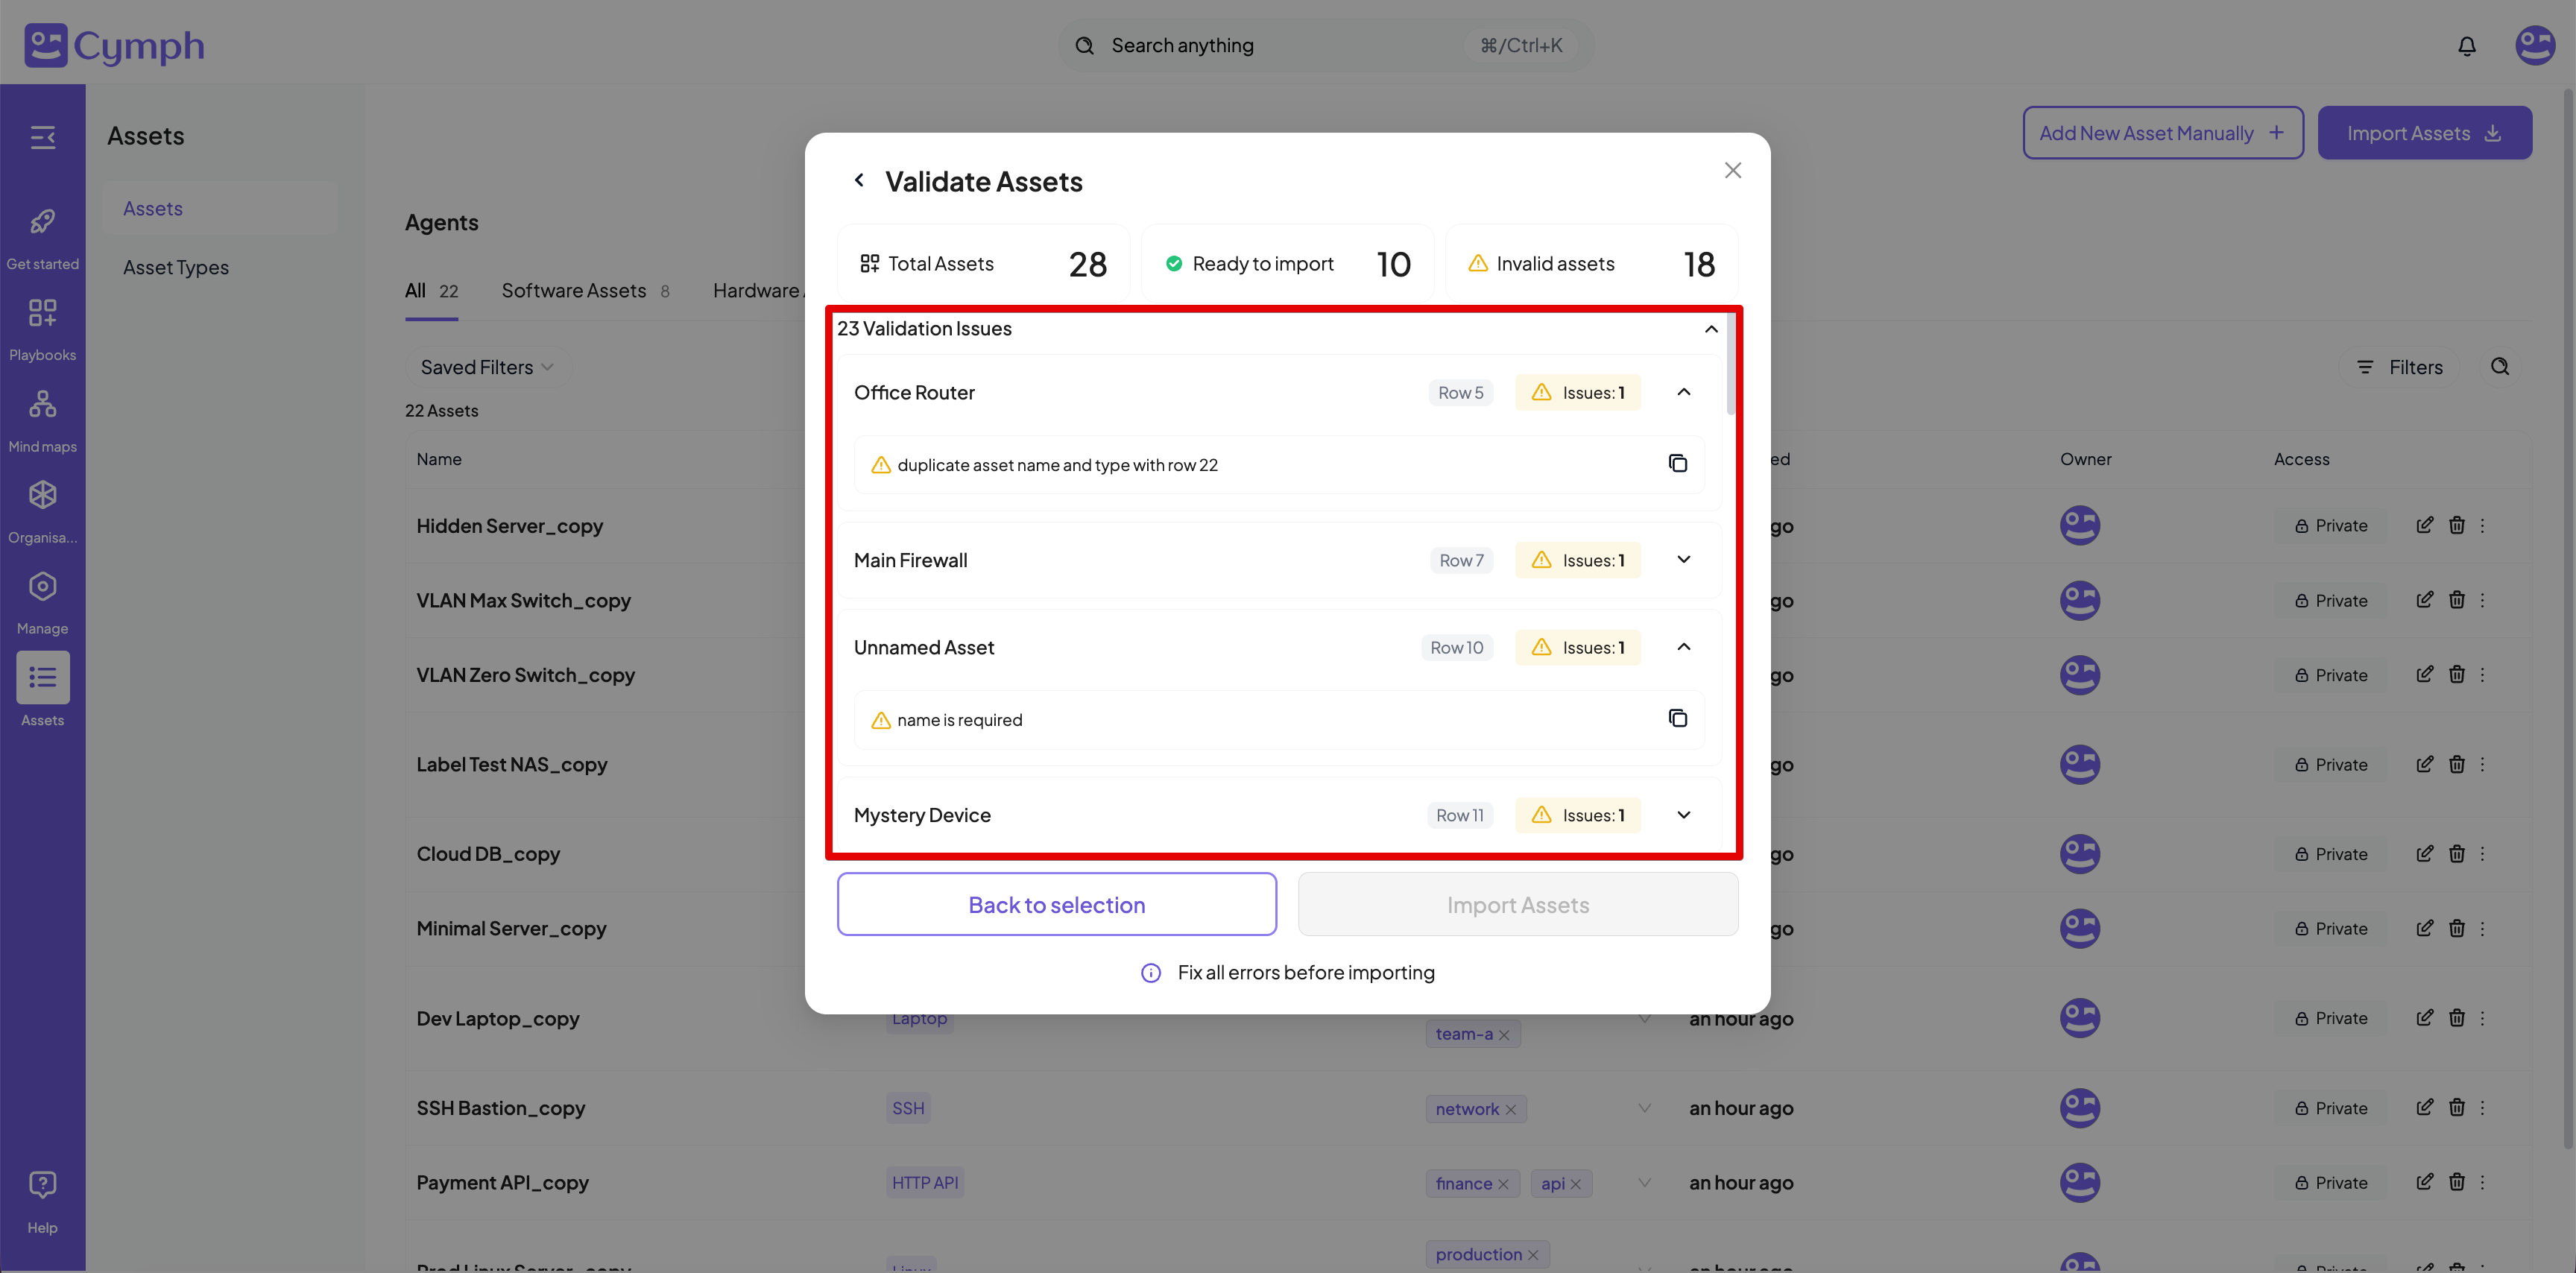
- If no errors exists, you will be able to import assets.
Asset names are unique per asset type, e.g. you cannot have two assets with type “FTP Server” and the same name but you can have the same name across types (for example, an asset named “Asset1” and type “FTP Server” and another one also named “Asset1” and type “SSH Server”).
How to populate the assets file from the template
The template file contains the following fields:- Name: this field is mandatory. Asset names are unique per asset type.
- Description: provides a description of your asset.
- Type: the asset type. The list of available asset types can be seen from the Asset Types page (navigate to Assets section and then choose Asset Types from the navigation sidebar).
- Labels: this field is optional. It is a comma-separated list of labels that will be assigned to the asset.
- Domain name: optional, denotes the domain name assigned to the asset.
- IPv4: optional, a comma-separated list of the IPv4 address(es) assigned to the asset.
- IPv6: optional, a comma-separated list of the IPv6 address(es) assigned to the asset.
- URL: optional, a comma-separated list of the URL(s) assigned to the asset.
- Mac Address: optional, a comma-separated list of the MAC address(es) assigned to the asset.
- Vlan: optional, a comma-separated list of the VLAN tag(s) assigned to the asset.
- Port: optional, denotes the port where the asset listens to.
- State: optional, denotes the current state of the asset and can be: “Active”, “Broken”, “Don’t show”, “In repair”, “Non-active”, “Sold”, “Spare”, “Stock”, “Stolen”.
- Notes: optional, additional notes for that asset.
Importing Assets from Wazuh
Connect your Wazuh deployment to Cymph and bring its monitored endpoints straight into your asset inventory — no manual data entry required.What gets imported
Cymph reads your Wazuh agents and turns each one into a host asset in your workspace. For every agent you import, Cymph automatically captures:- The host’s operating system
- Its network details (IP and MAC addresses)
- Its hostname
How it works
- Connect your Wazuh integration to the workspace (one-time setup).
- Pick the agents you want to bring in.
- Cymph pulls them from Wazuh and adds them to your asset inventory.
Importing Assets from Nessus
Upload a Nessus scan report and let Cymph turn the discovered hosts and services into assets in your inventory.What gets imported
From a Nessus report (.nessus file), Cymph creates:
- One asset per scanned host, with its operating system, IP and MAC addresses, and hostname.
- An asset for each service Nessus detected on that host — for example web servers, databases, DNS servers, mail servers, file servers, remote-access services, printers, and identity services. Where the report is specific enough, Cymph also records the product (such as MySQL, PostgreSQL, or Tomcat).
How it works
- Upload your Nessus scan report.
- Cymph reads it and shows you what it found, sorted into assets that are ready to import, ones that need attention, and any that already exist in your inventory.
- Review the results and confirm the import.
Importing Assets from Azure
Connect your Azure environment to Cymph and import your cloud resources directly into your asset inventory, keeping Cymph in sync with what you run in Azure.What gets imported
Cymph pulls resources from your Azure subscriptions and maps them to the right Cymph asset type. Supported resources include: Compute- Virtual Machines
- VM Scale Sets
- BareMetal Instances
- App Services
- Container Apps
- AKS (Kubernetes) Clusters
- Azure Red Hat OpenShift Clusters
- Azure Spring Apps
- Azure SQL Server
- Azure Database for PostgreSQL
- Azure Database for MySQL
- Cosmos DB Accounts
- Cosmos DB for MongoDB (vCore) Clusters
- Azure Cache for Redis
- Users
- Service Principals
- Managed Identities
- Storage Accounts
- Key Vaults
How it works
- Connect your Azure integration to the workspace (one-time setup).
- Choose the resources you want to bring in.
- Cymph imports them and maps each one to the matching Cymph asset type.
How to create an asset manually
- Go to the Assets page.
- Click on Assets from the navigation menu, then select Assets.
- Add a New Asset.
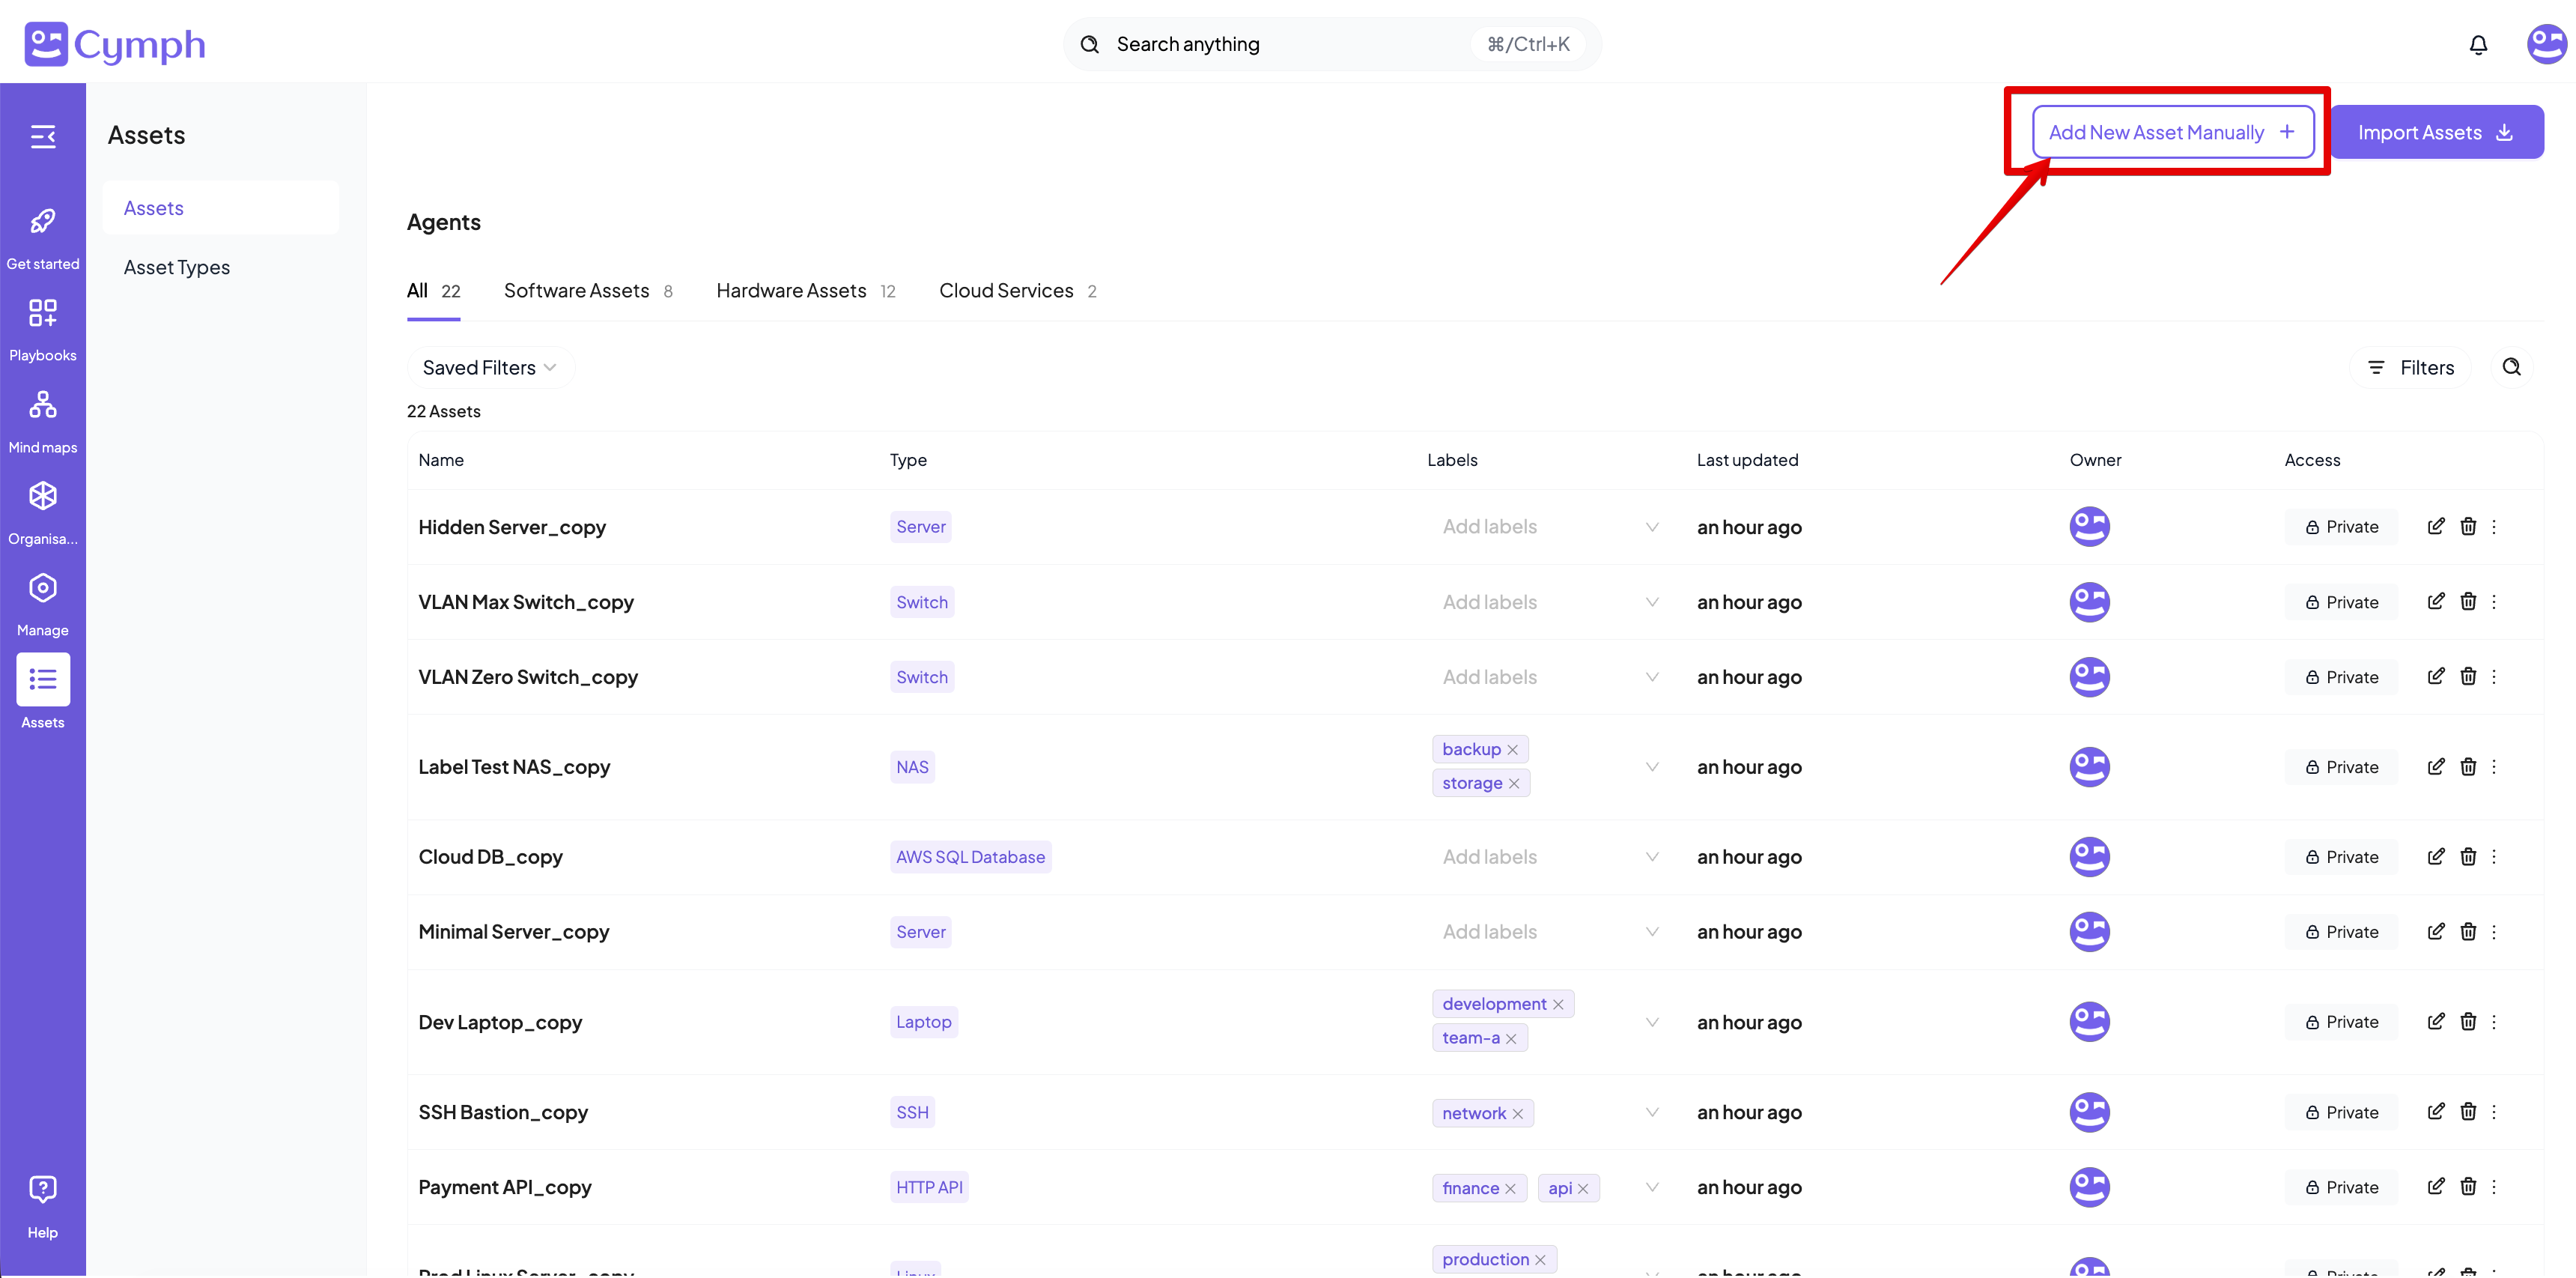
- Click on the Add New Asset Manually button at the top-right corner.
- Choose an asset type.
- Asset types are grouped into two categories, Peoples and Places, Software Assets, Hardware Assets and Cloud Services.
- Select the desired category
- Click on the radio button next to the desired type to select it.
- Click Next once the desired type is selected.

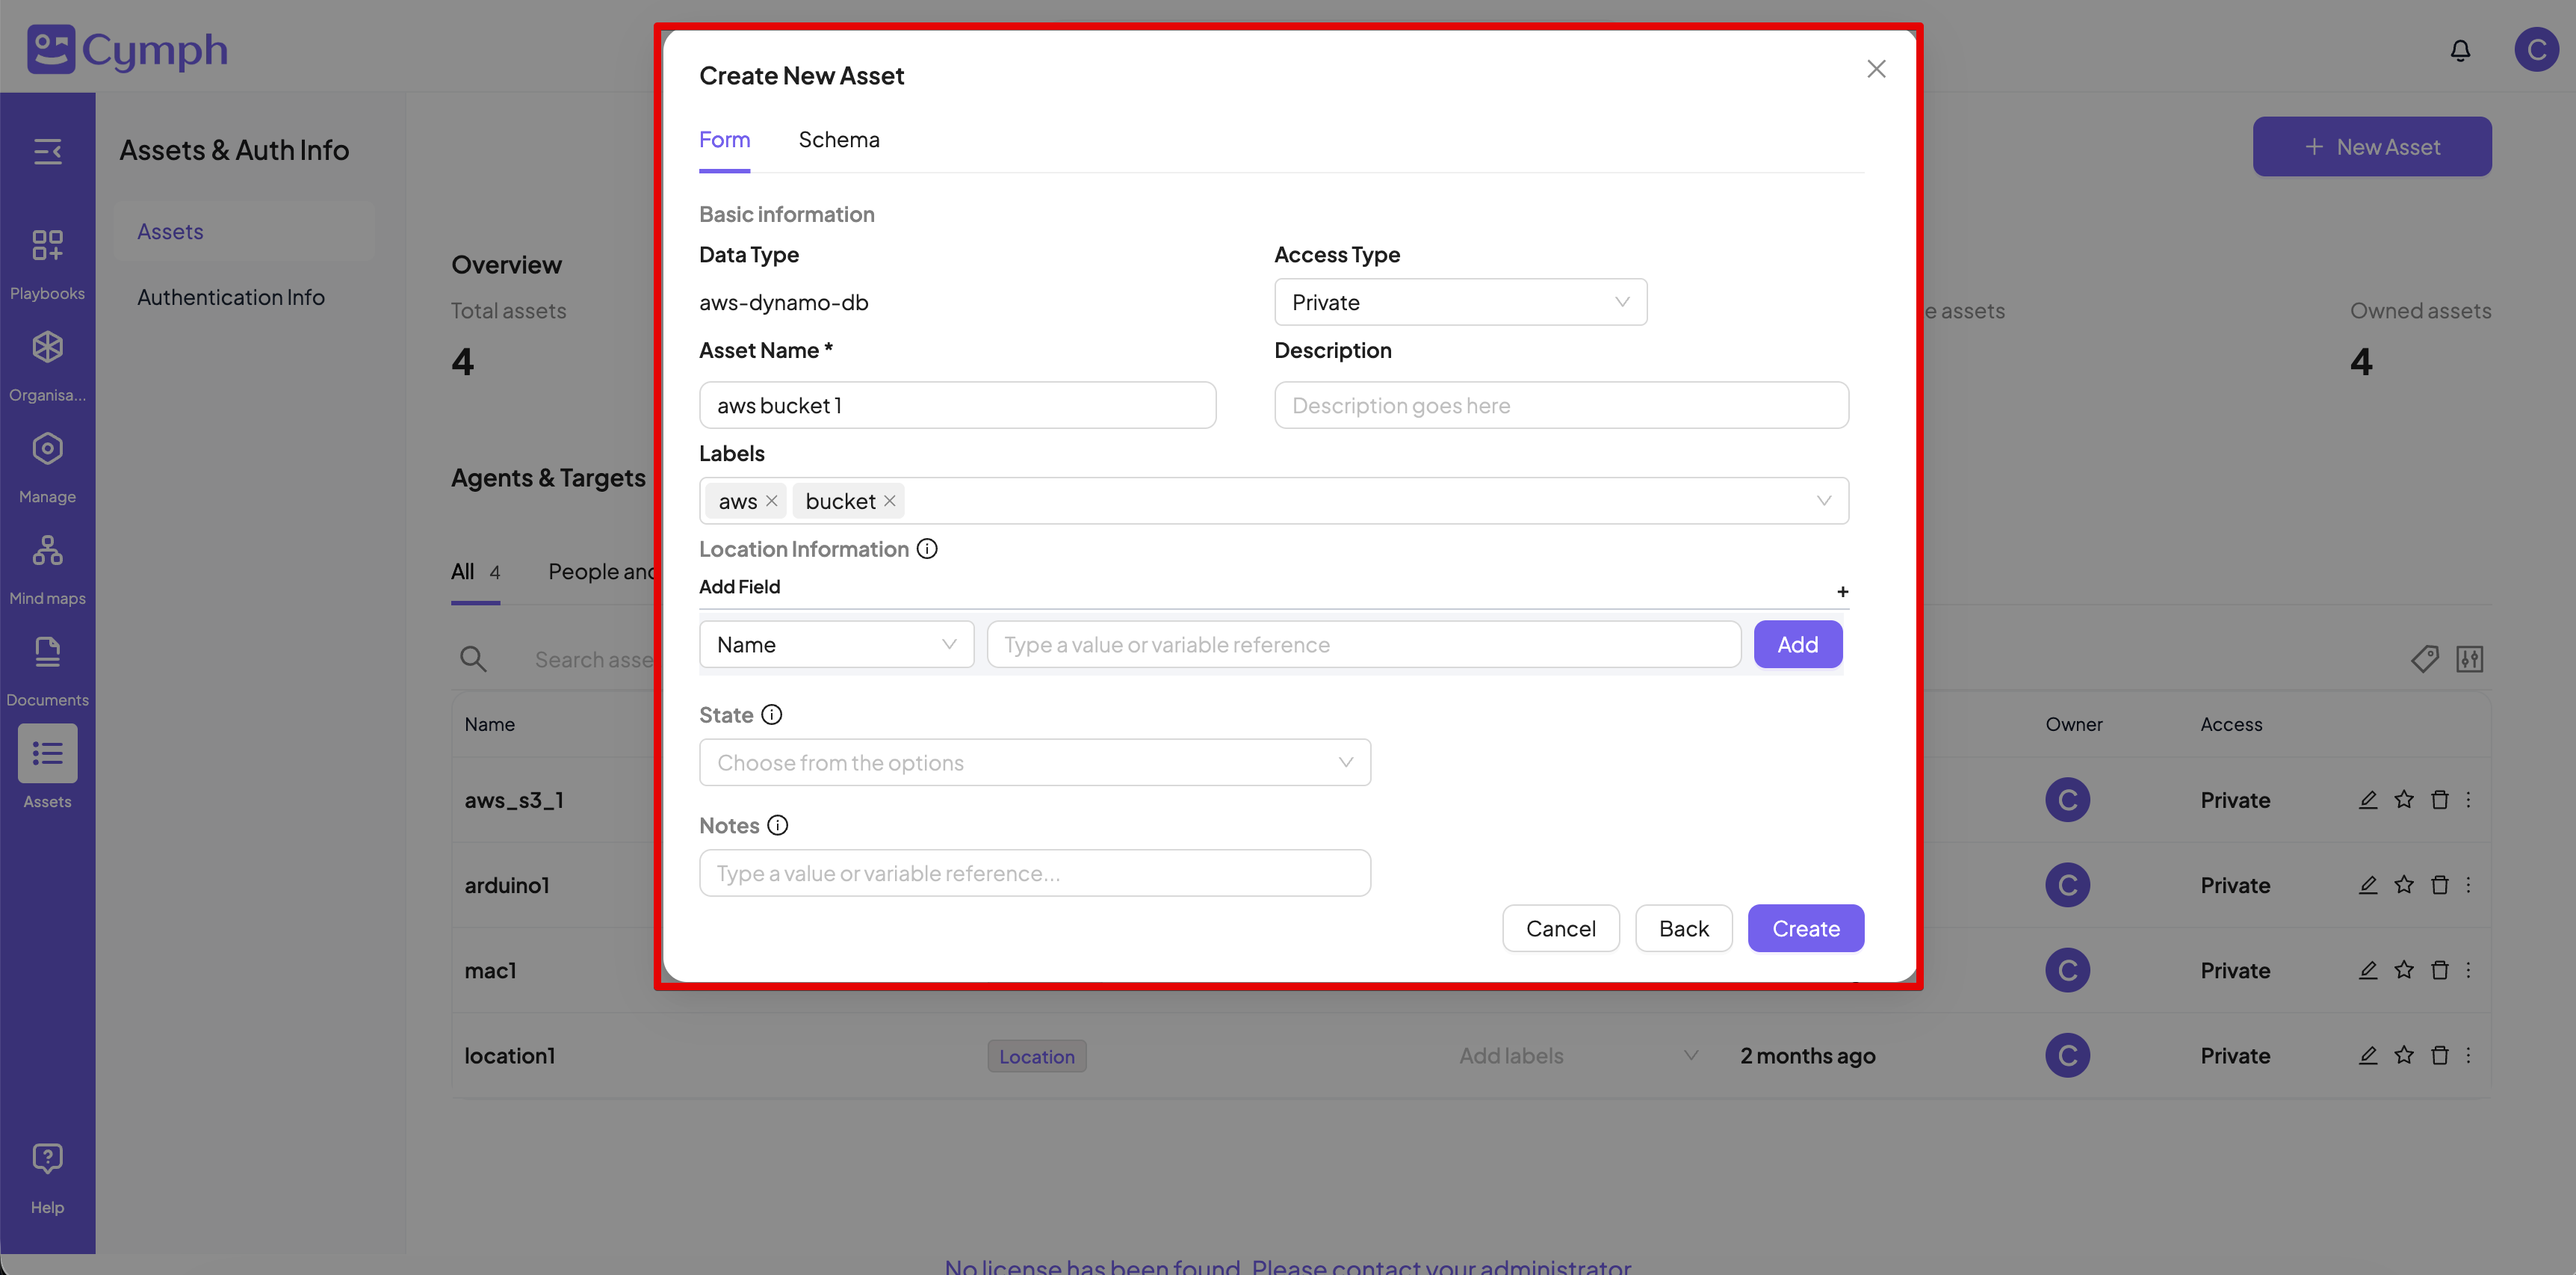
- Create the asset.
- Enter the asset details. Fields marked with an asterisk (*) are mandatory.
- Provide the Access Type. By default, the access status of the asset is Private.
- Private access means the asset is only visible to you.
- Shared access means the asset is visible to you and your organisation members.
- Public access means the asset is visible to all Cymph users.
- Provide a set of labels for the asset (optional)
- Location information includes details about the asset, like name, description, network information and geolocation information. You can add multiple location information fields.
- Contact information includes details about the people that need to be contacted for this assets
- Account information lists information about username and roles that are related to this asset.
- Provide a state for the asset (optional). The state can be: active, broken, don’t show, in-repair, non-active, sold, spare, stock, stolen
- Criticality: define the criticality level of the asset. Possible values are: Low, Standard, High and Critical
- Recovery time objective defines the RTO time in minutes
- **Recovery point objective **defines the RPO time in minutes
- **Environment **includes a references to the environment type the asset is used in: Test, Dev, Staging or Production
- **Owned by: **one or multiple asset owners. Owners are accountable for the asset
- Managed by: one or multiple asset managers.
- Depends on: a list of assets that this asset depends one
- Used by: a list of assets or team that this asset is used by
- Runs on / Hosted by: a list of assets that are used to run or host this specific asset
- Part of / Parent: the parent asset
- Provide optional notes
- Click Create.
How to update an asset
- Go to the Agents page.
- Click on Assets from the navigation menu, then select Assets.
- Click the Edit icon next to the asset that needs update.
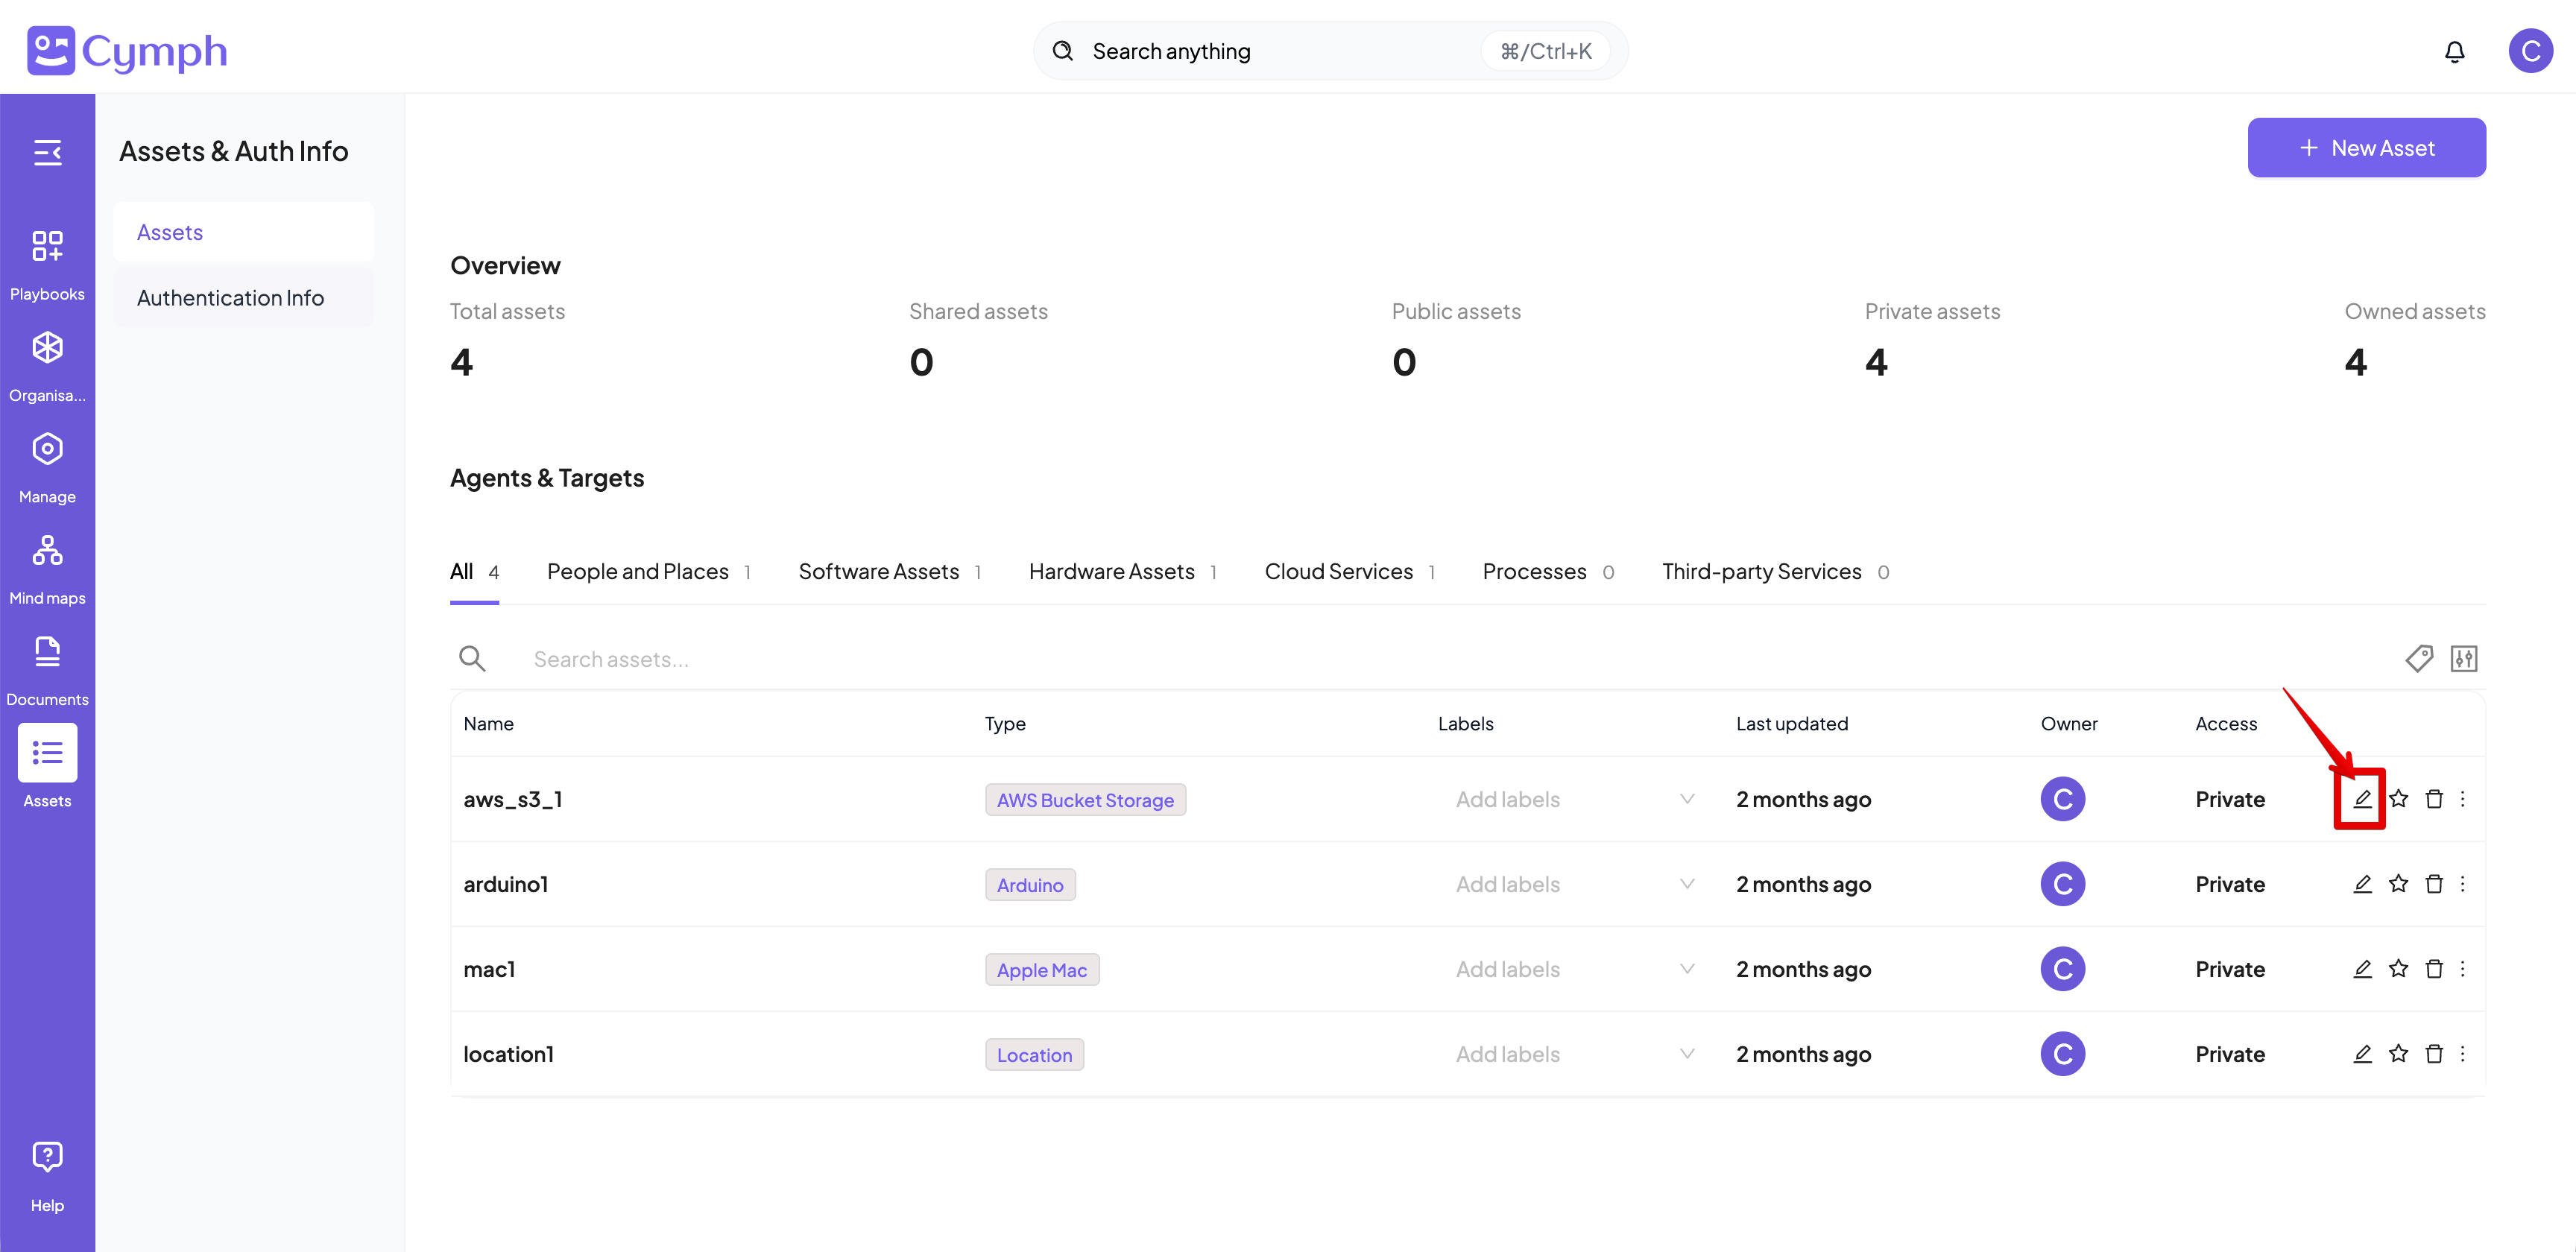
- Update asset details.
- Click the Update button once all information is updated.
- The list of assets is automatically updated.
How to delete an asset
- Go to the Agents page.
- Click on Assets from the navigation menu, then select Assets.
- Delete the asset.
- Click the Delete icon next to the asset you want to delete.
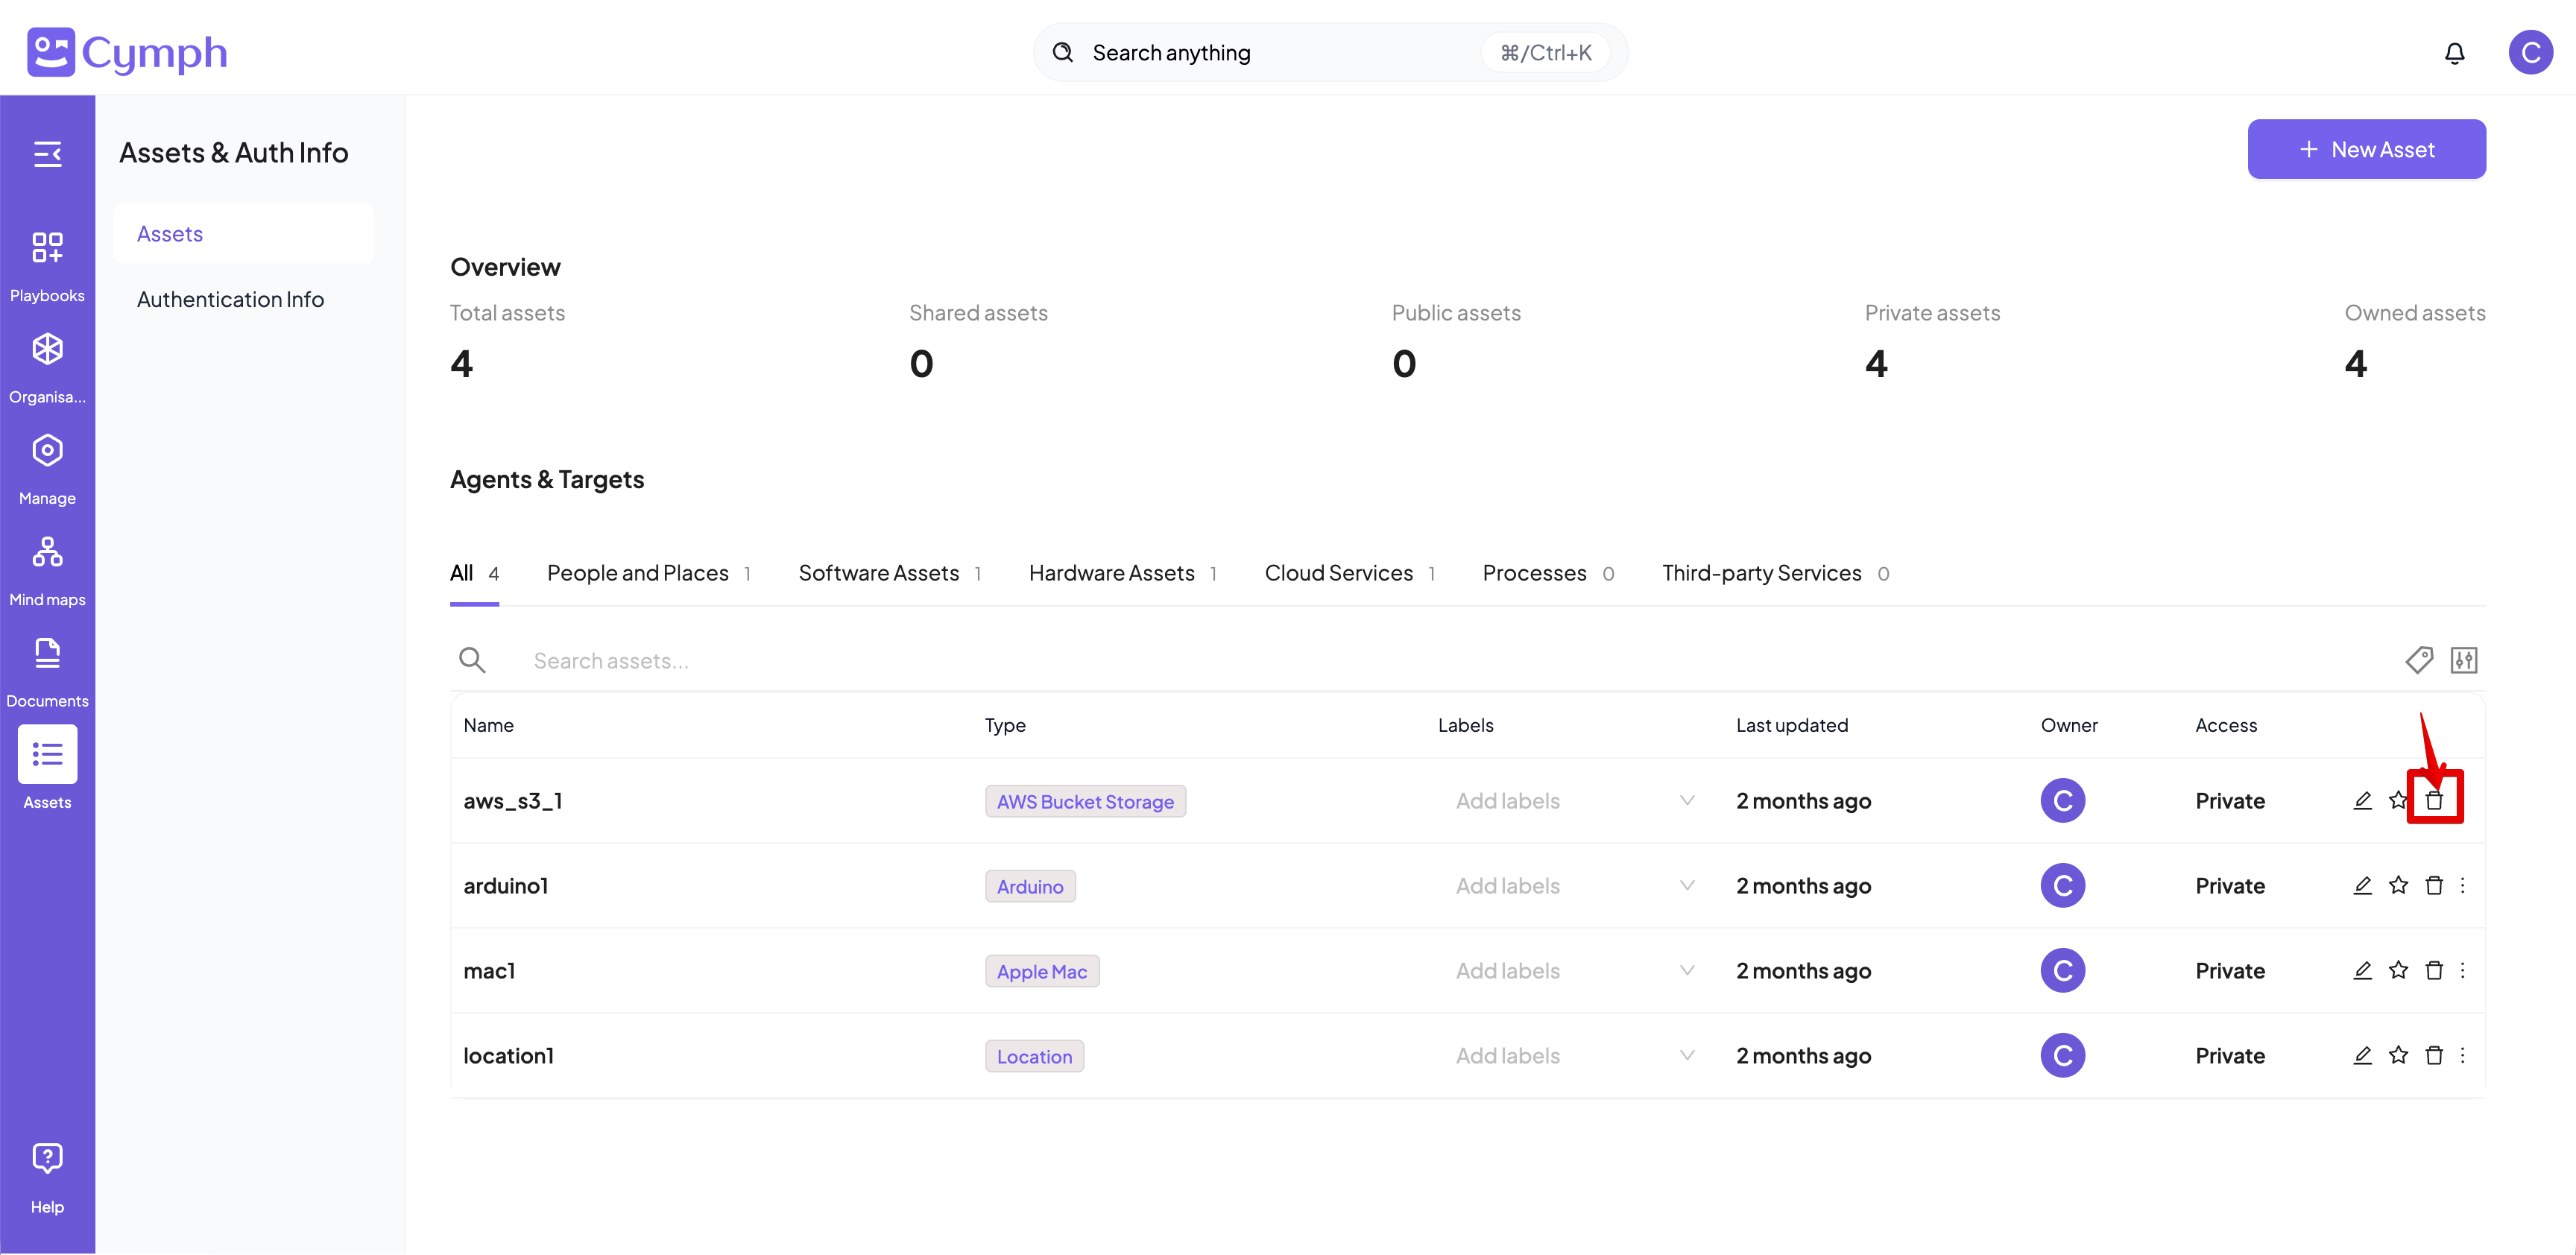
- Confirm deletion.
- Click the Delete button on the confirmation dialog.
- The list of assets is automatically updated.
How to duplicate an asset
- Go to the Agents page.
- Click on Assets from the navigation menu, then select Assets.
- Click the triple dot icon ⫶ to open the actions menu for the playbook you want to duplicate.
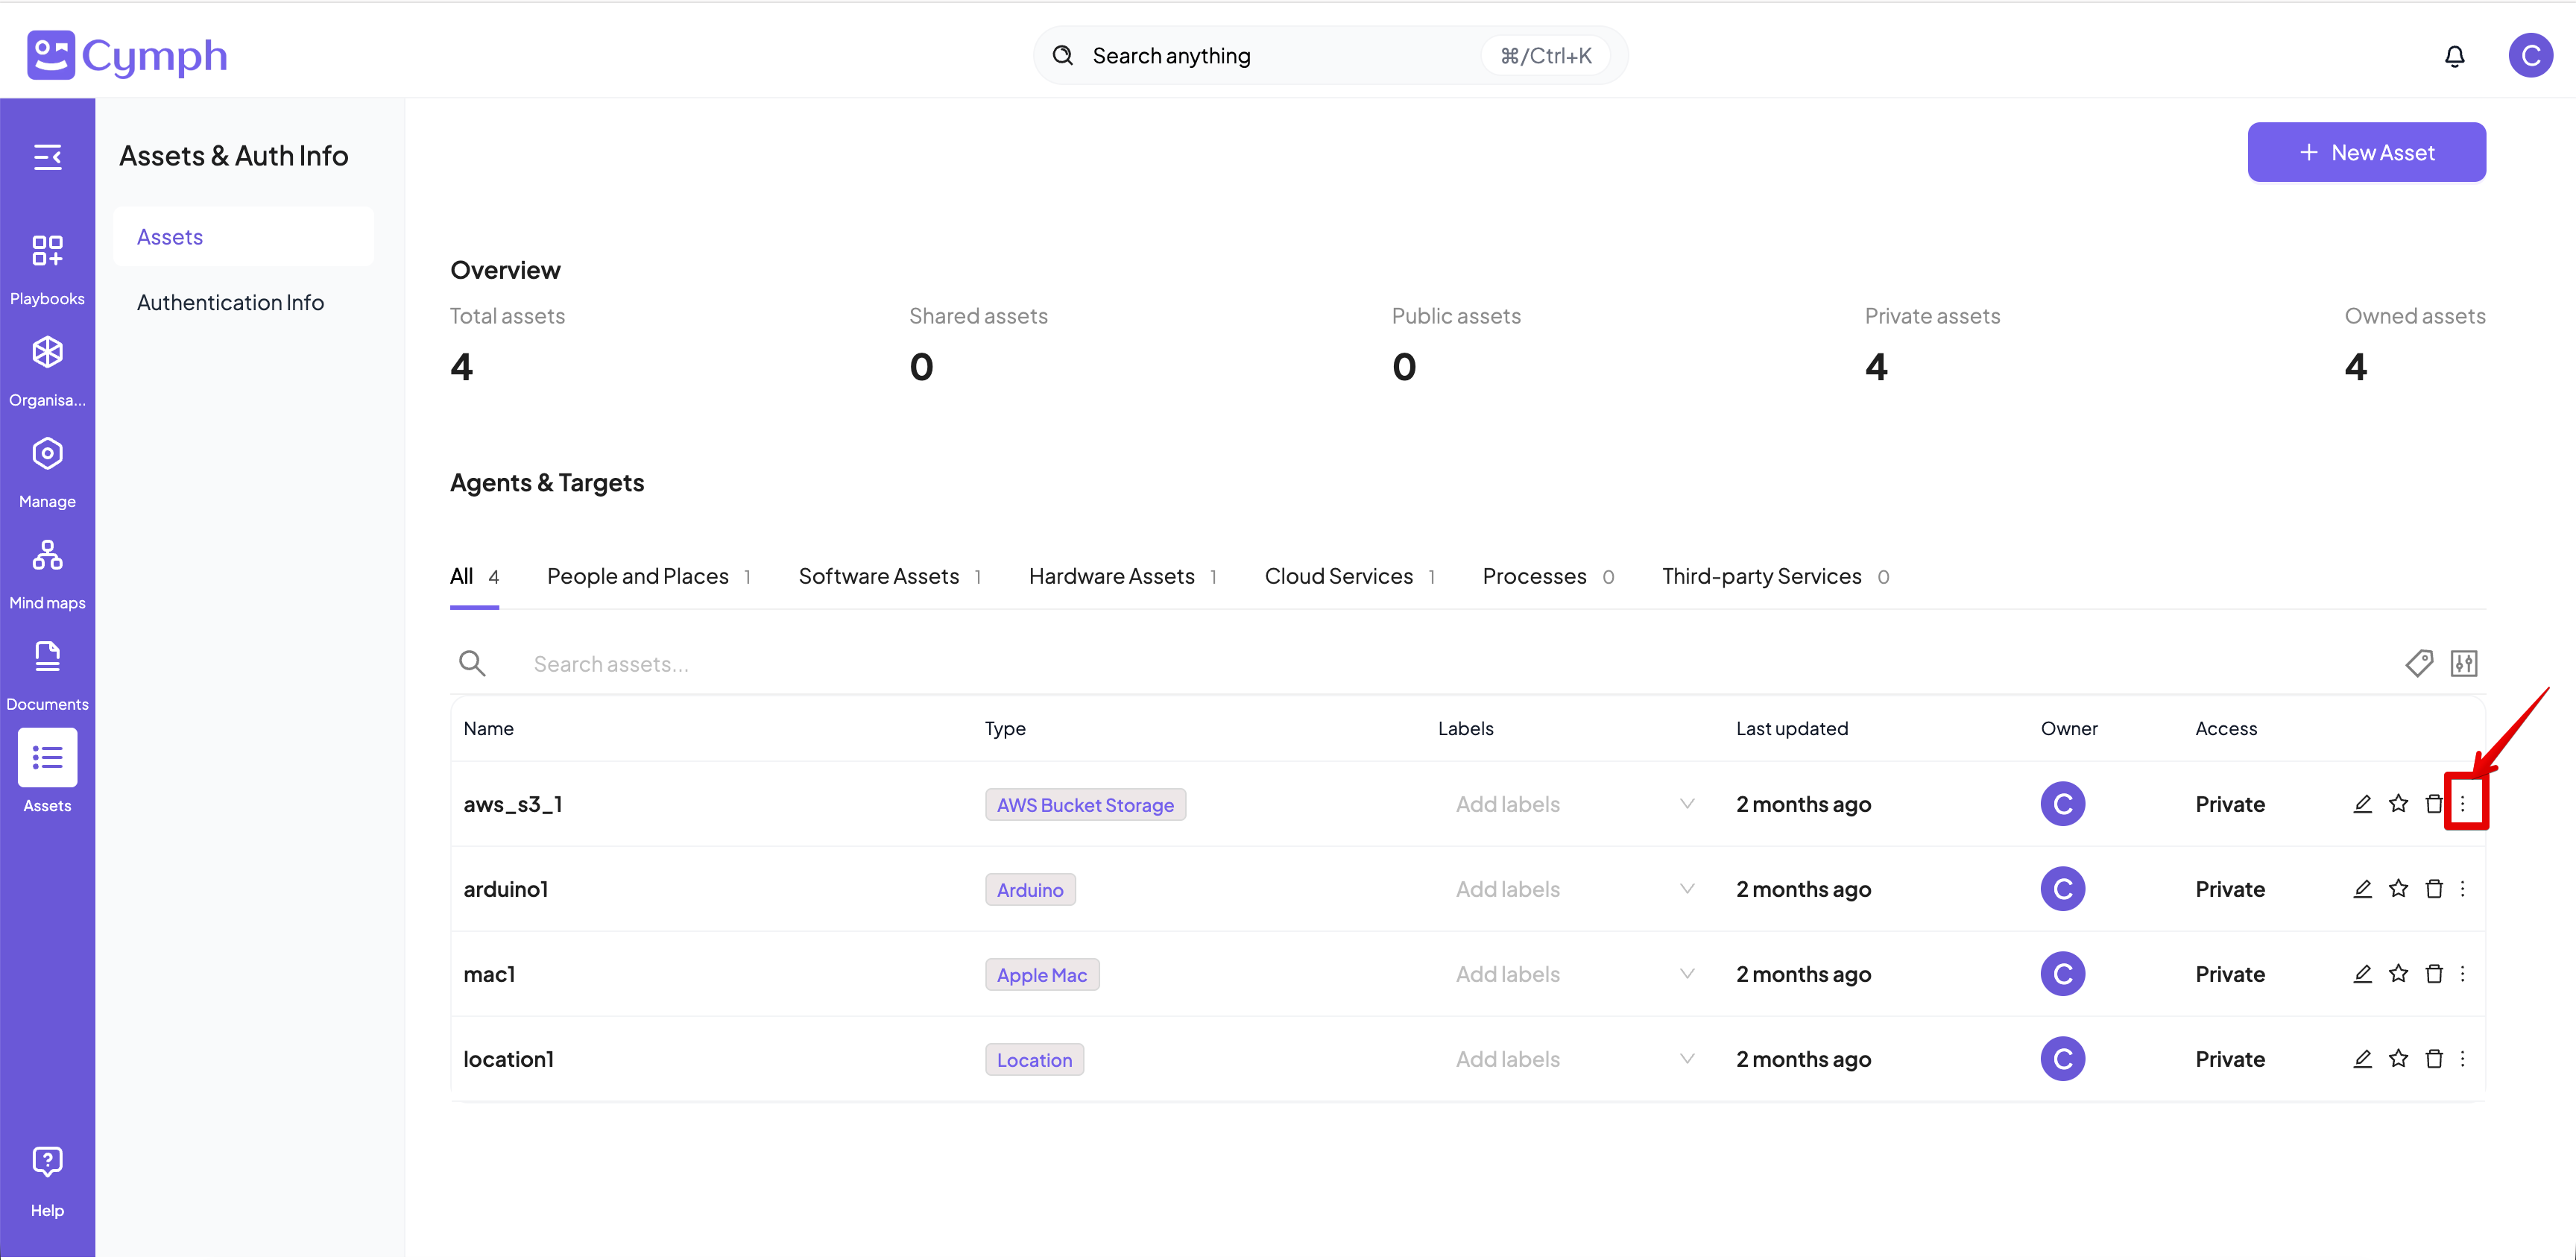
- Select the Duplicate action
- Duplicate the asset.
- Provide a name for the asset. By default the name of the source asset will be used followed up by the “(copy)” suffix.
- Click on the Duplicate button.
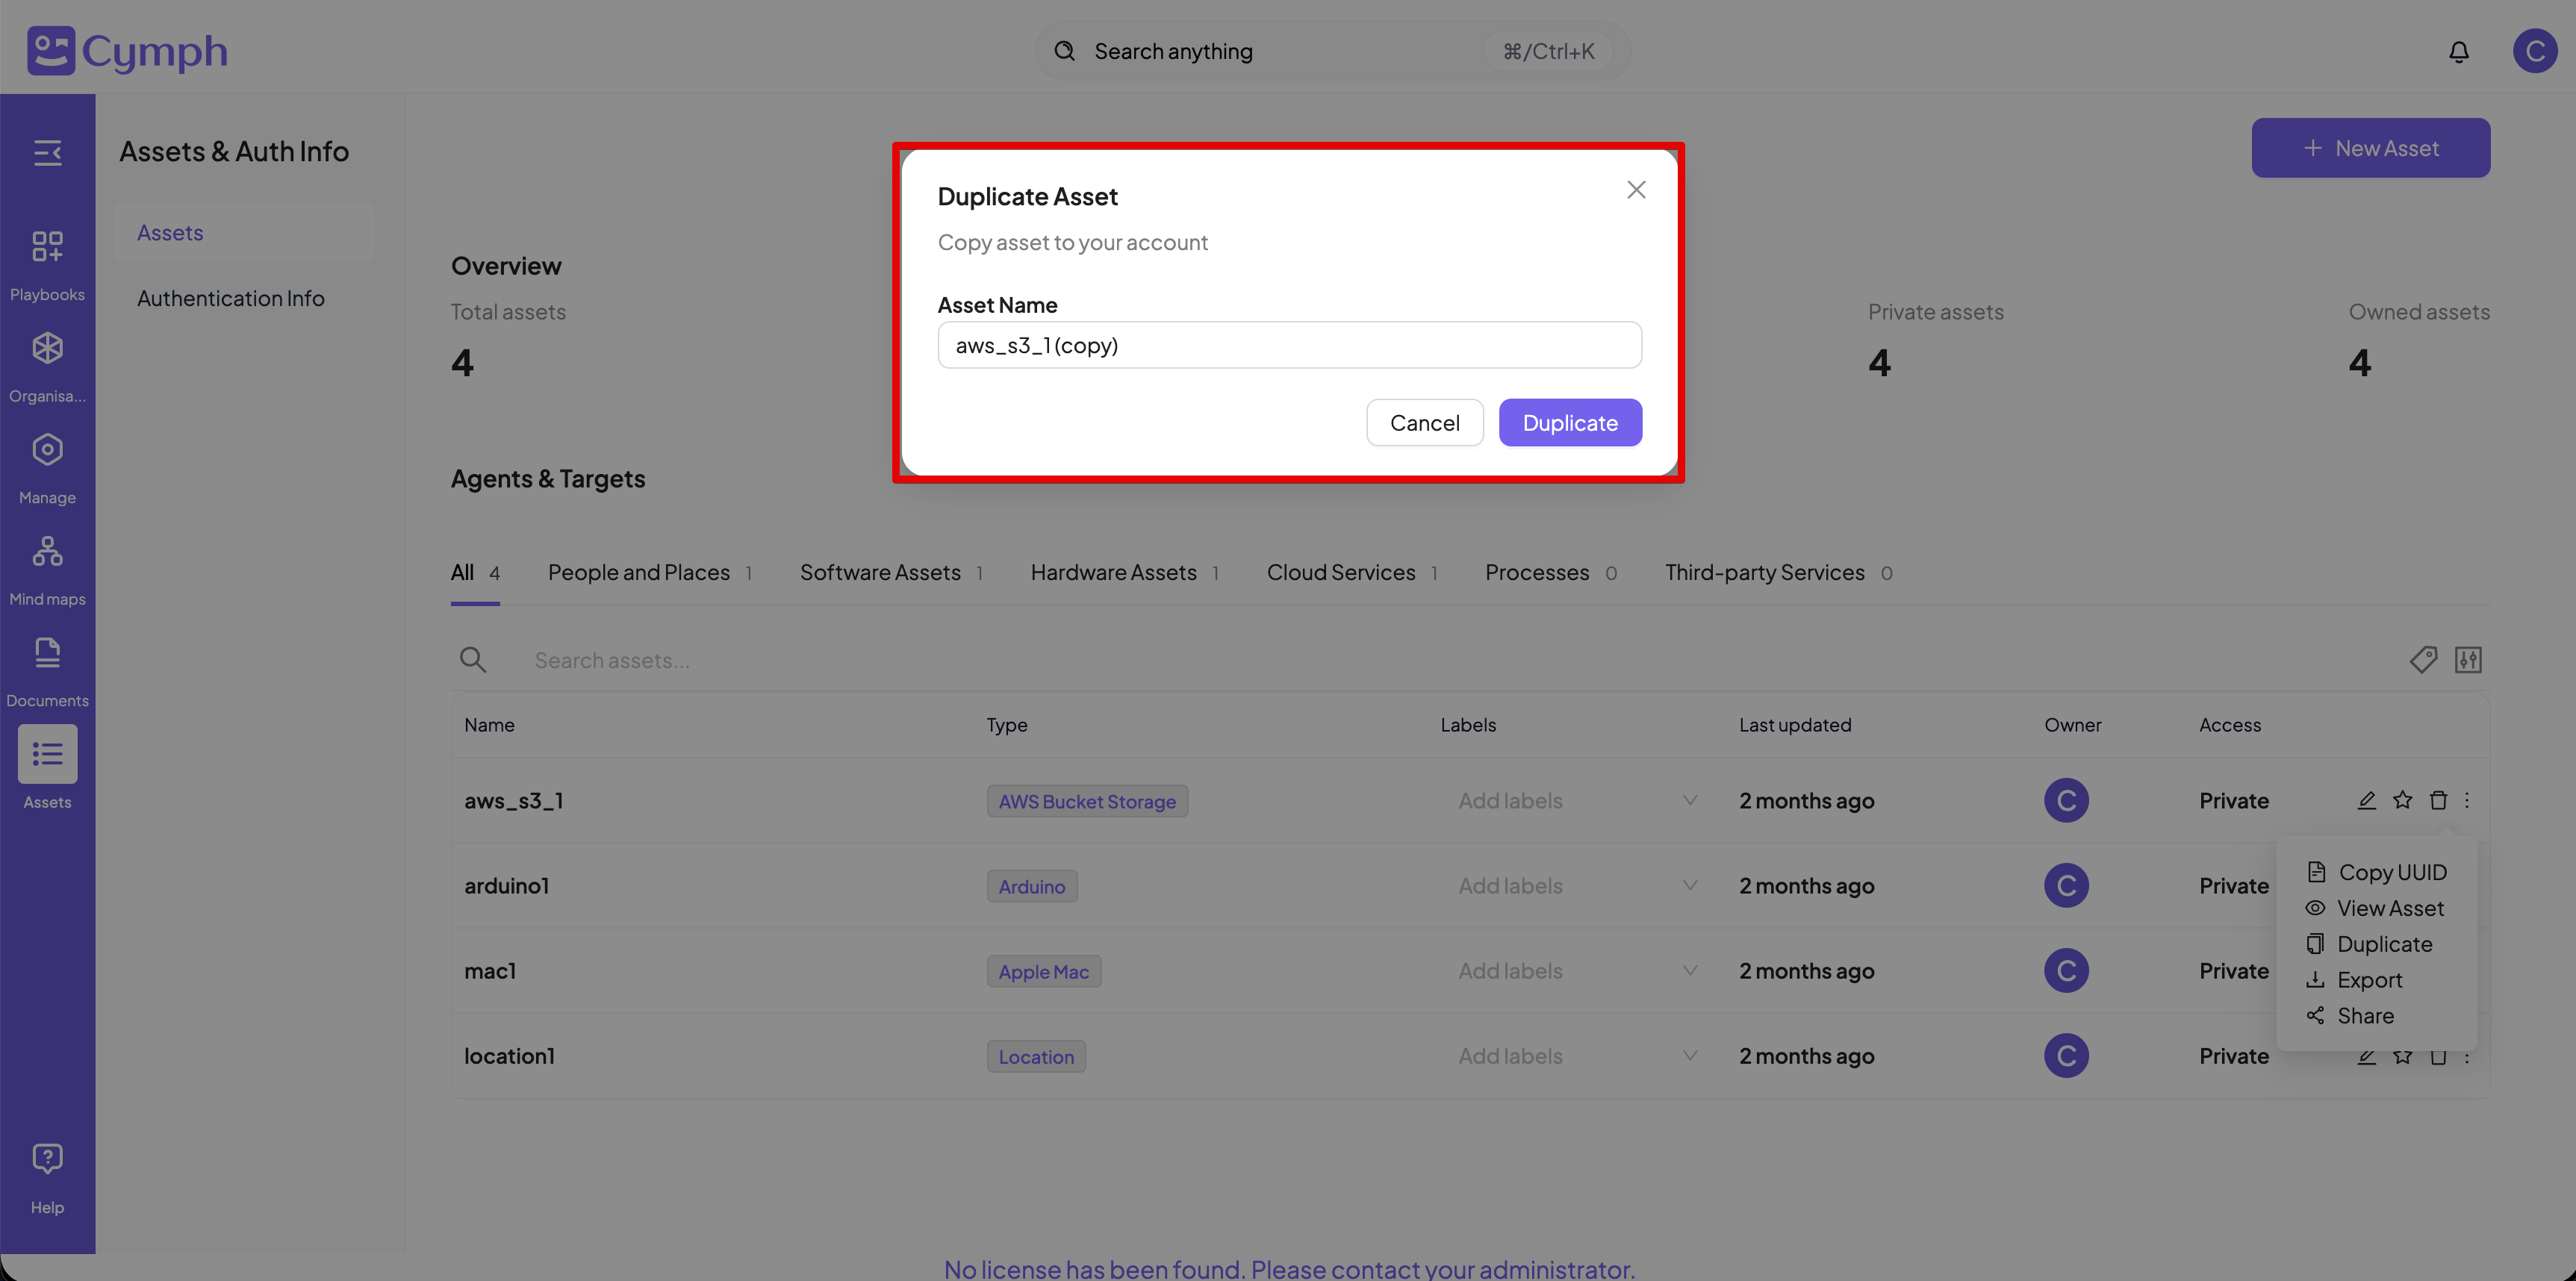
- The list of assets will be automatically updated and show the new asset.
Assets need to have unique name per asset type. For example, two assets of the Group type cannot have the same name. However, assets with different types can have different names.
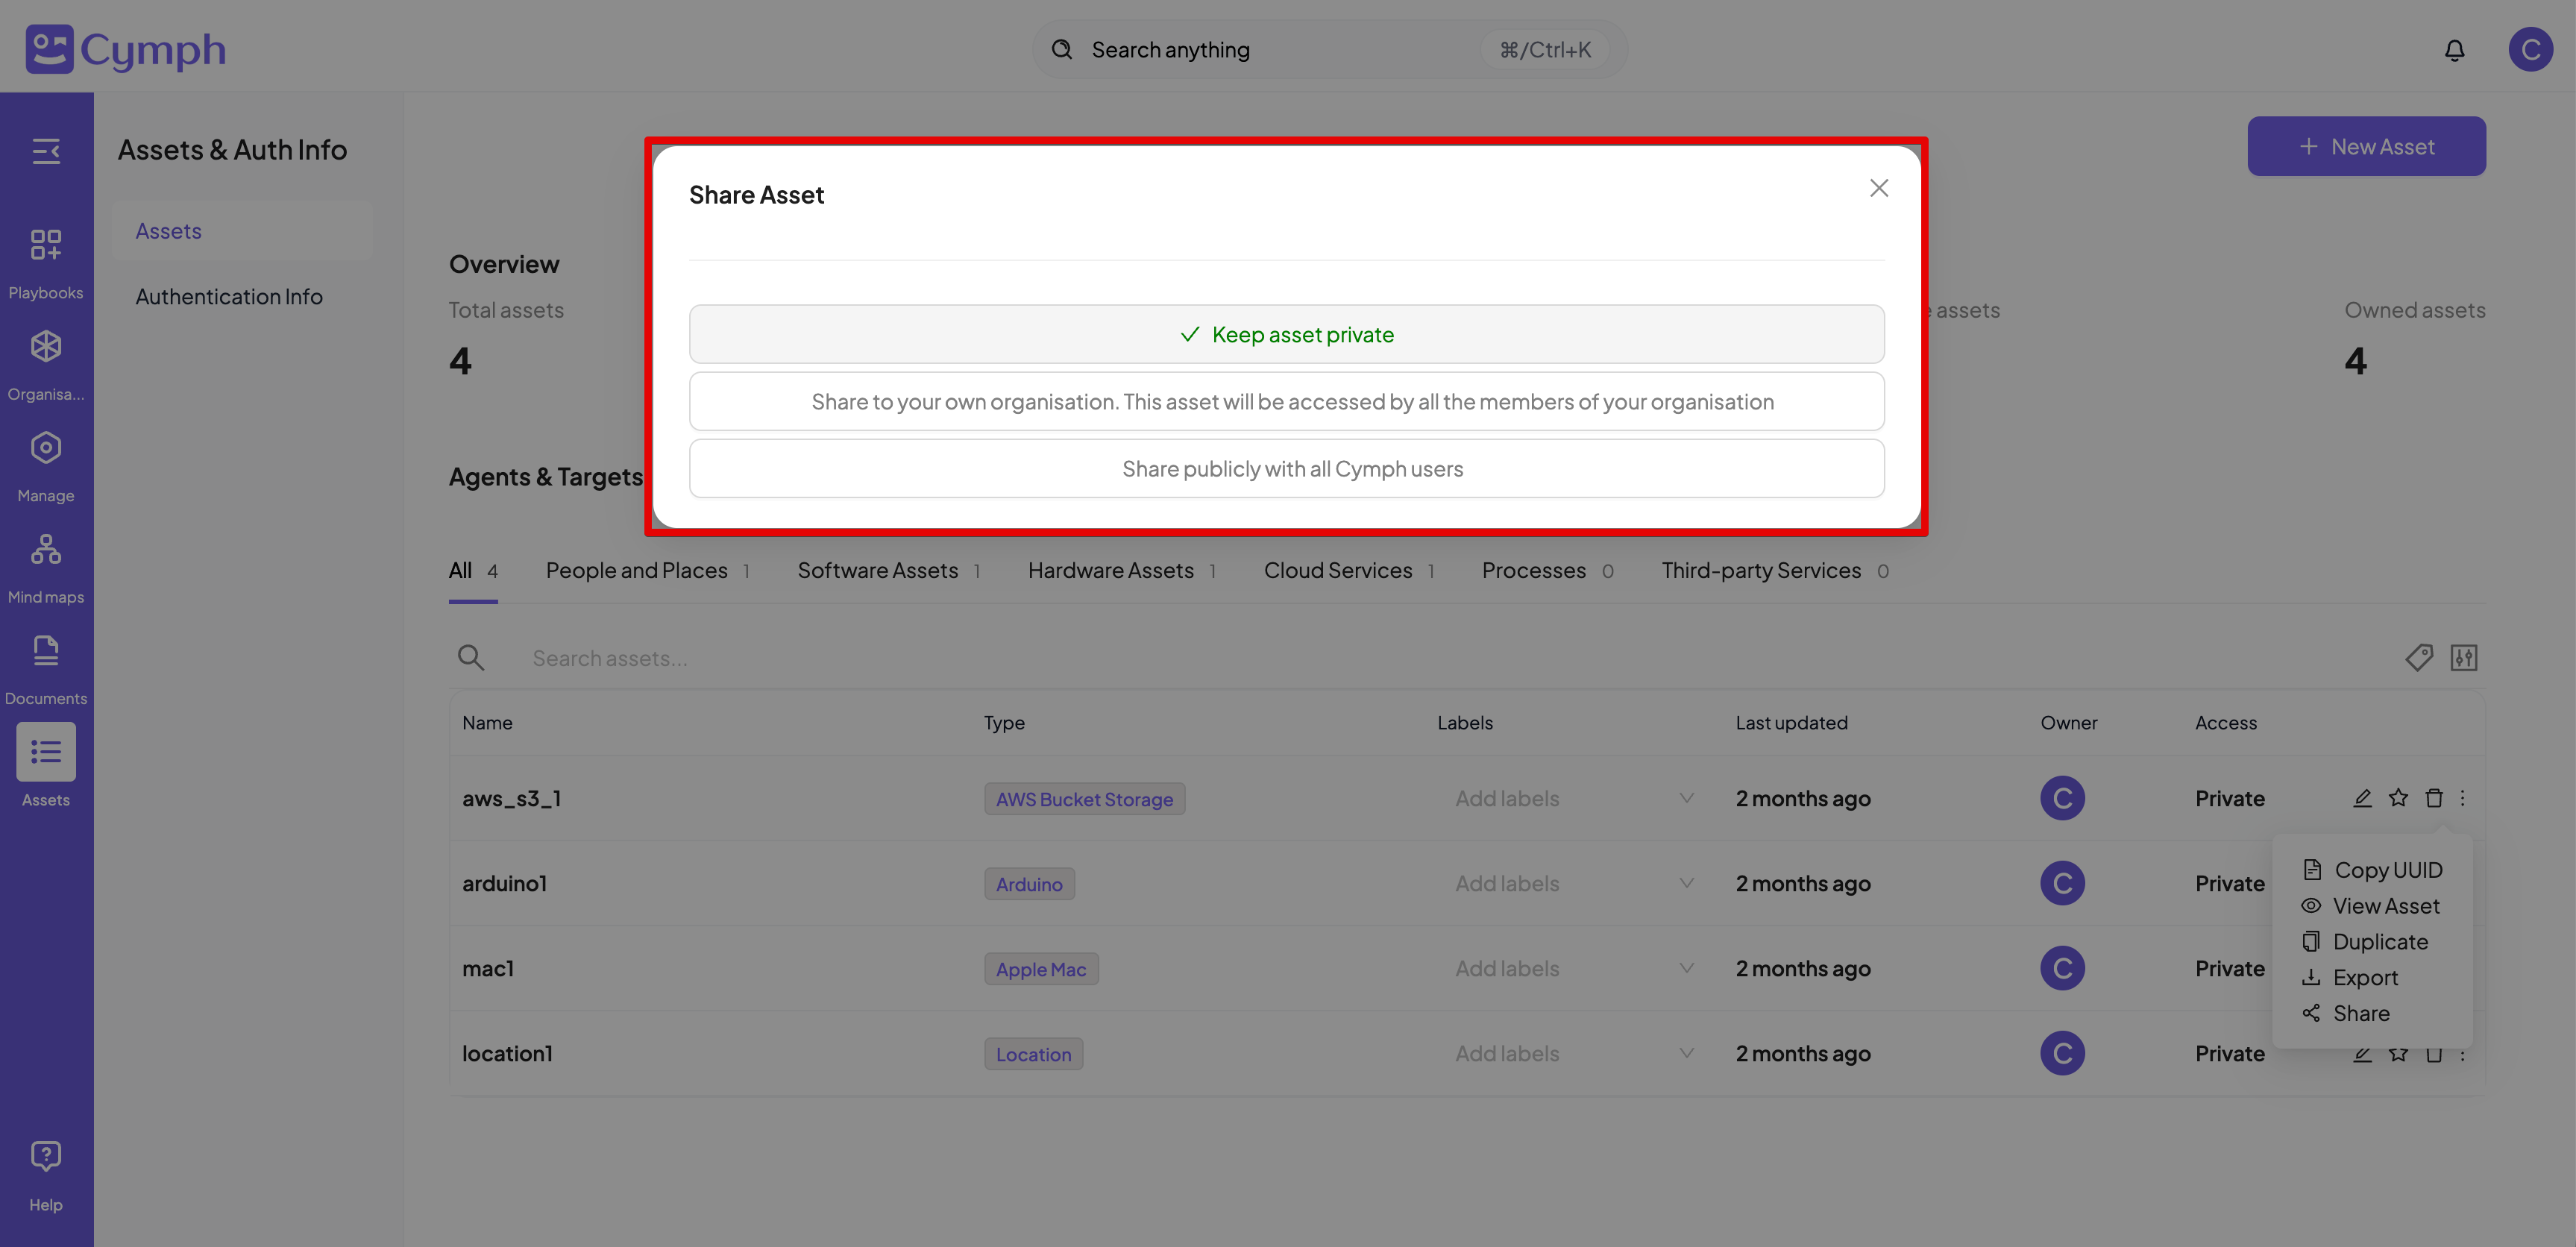
How to share an asset
- Go to the Assets page.
- Click on Assets from the navigation menu, then select Assets.
- Click the triple dot icon ⫶ to open the actions menu for the playbook you want to duplicate.
- Select the Share option.
- Choose the access type.
- From the dialog box that appears, select the share mode for your asset.
- By selecting an option, the access type is changed automatically.
How to export an asset
- Go to the Assets page.
- Click on Assets from the navigation menu, then select Assets.
- Click the triple dot icon ⫶ to open the actions menu for the playbook you want to duplicate.
- Export the asset.
- Click the Export option.
- The asset will exported as a comma-separated CSV file, named after the asset name and a .csv suffix, with the following schema:
Name,Type,Description,Labels,Domain Name,IPv4,IPv6,URL,Mac Address,Vlan,Port,State,Notes
How to view supported asset types
- Go to the Asset Types page
- Click on Assets from the navigation menu, then select Asset Types
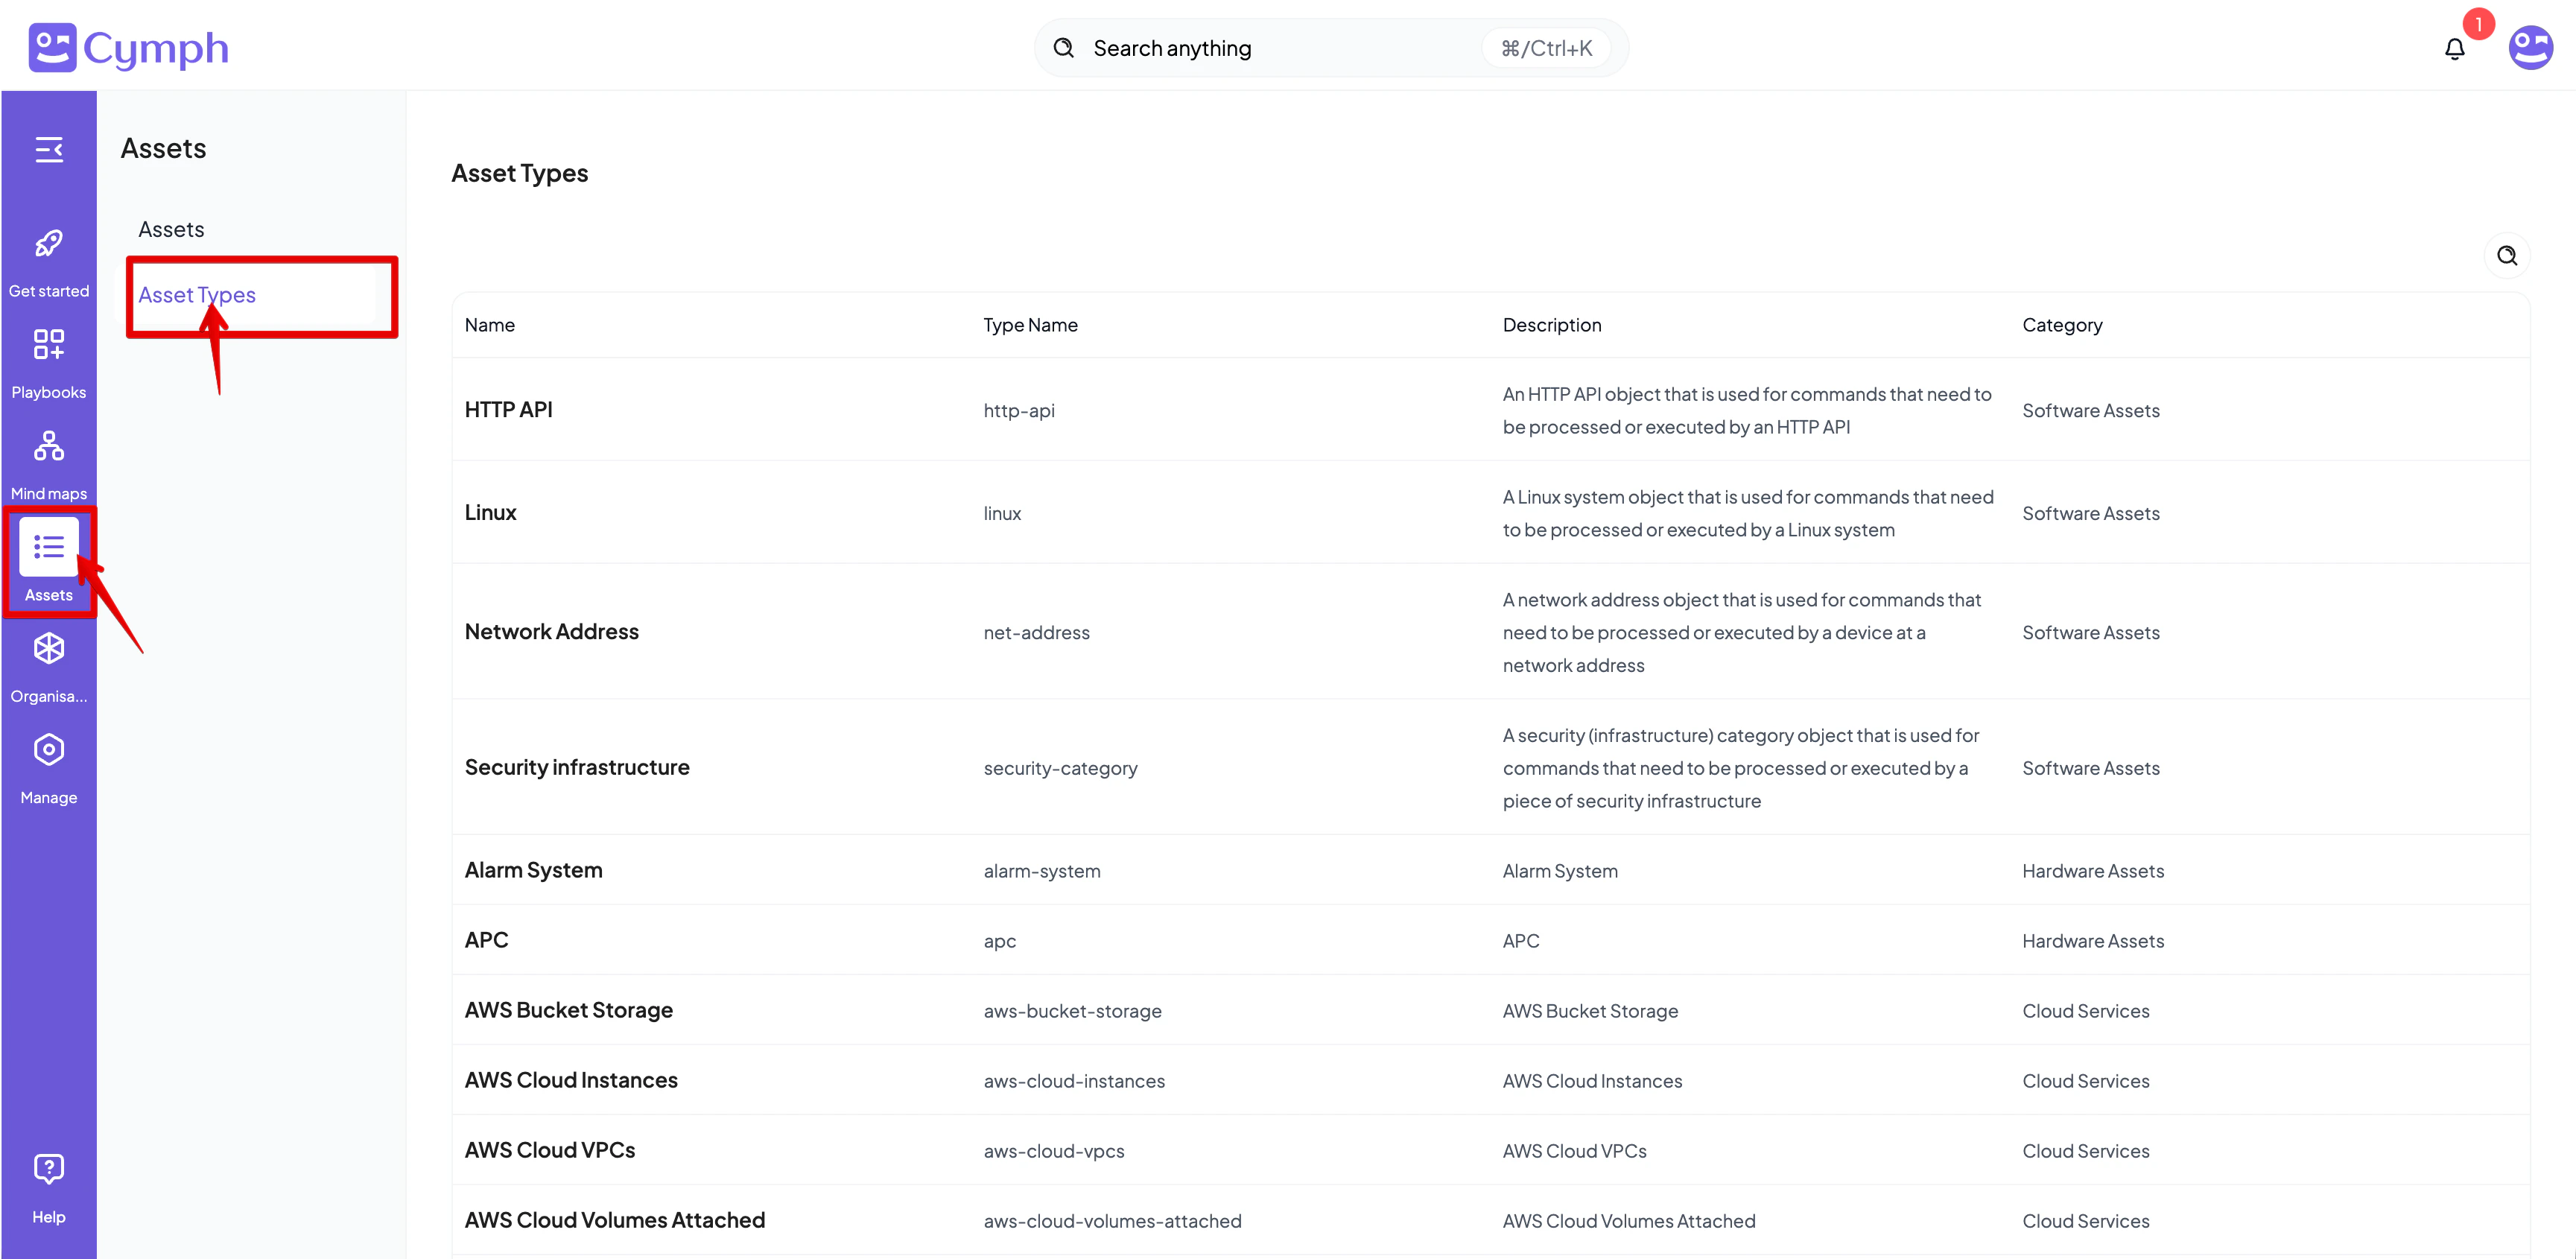
- From there you can browse and search the existing asset types