Overview
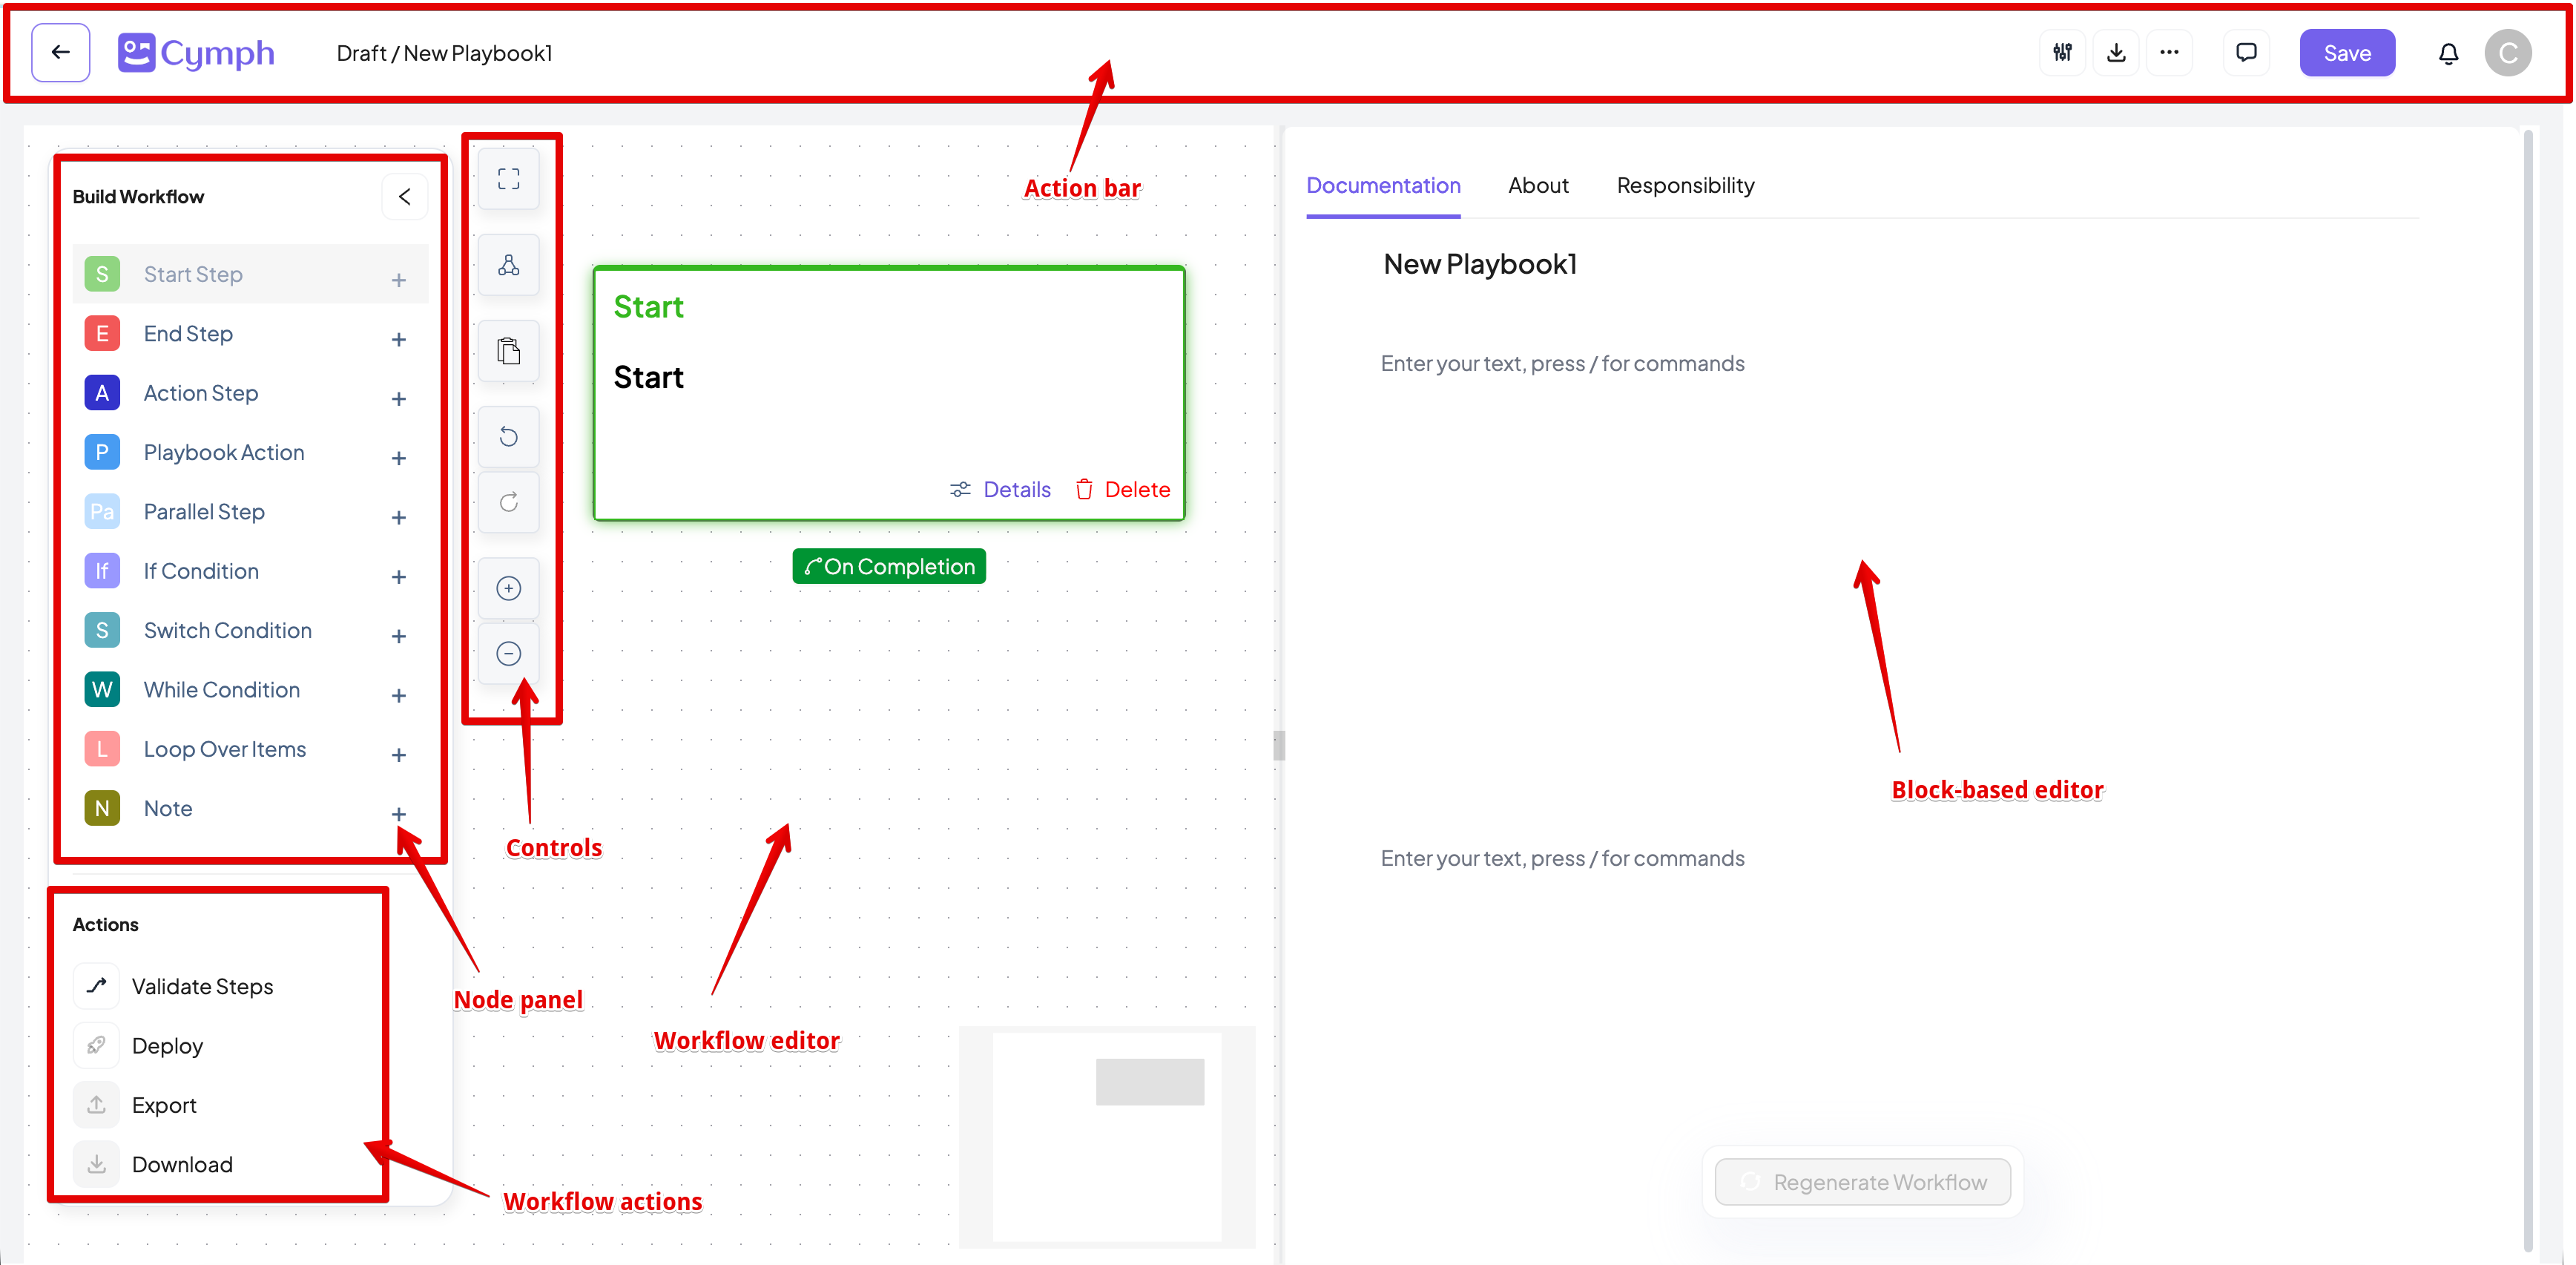
The Playbook Editor view allows you to view, edit, create, import, export and share playbooks. It consists of four main parts:- The action bar that includes key actions like commenting, sharing, downloading and saving a playbook.
- The workflow editor where you create and edit a workflow for your playbooks.
- The node panel that allows you to select and drag a step to the workflow area.
- The control buttons panel that provide the functionality to fit view, align nodes, zoom in and out as well as pasting.
- The workflow actions that allow you to validate, deploy, export and download the workflow
- The documentation editor, a block-based editor where you can edit the text part of your playbook
Document editor
The document ditor allows you to write documentation for the playbook. It is a block-based editor that allows you to format the text, add bullet and numbered lists, tables, images and attachments. You can show the available commands by pressing ’/’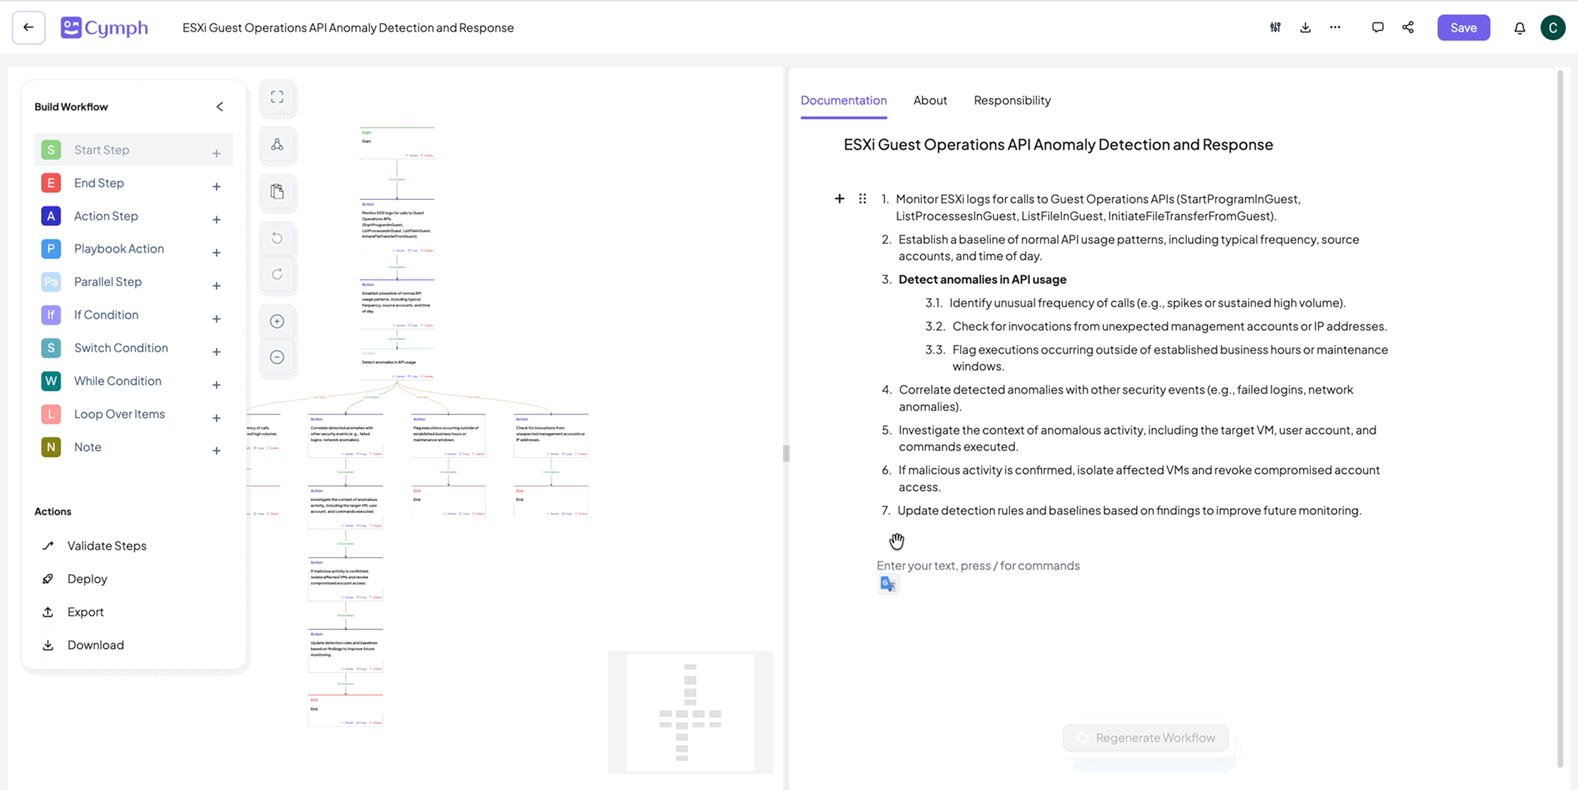

Workflow editor
Creating a step
- Drag and drop a step from the node panel to the canvas area.
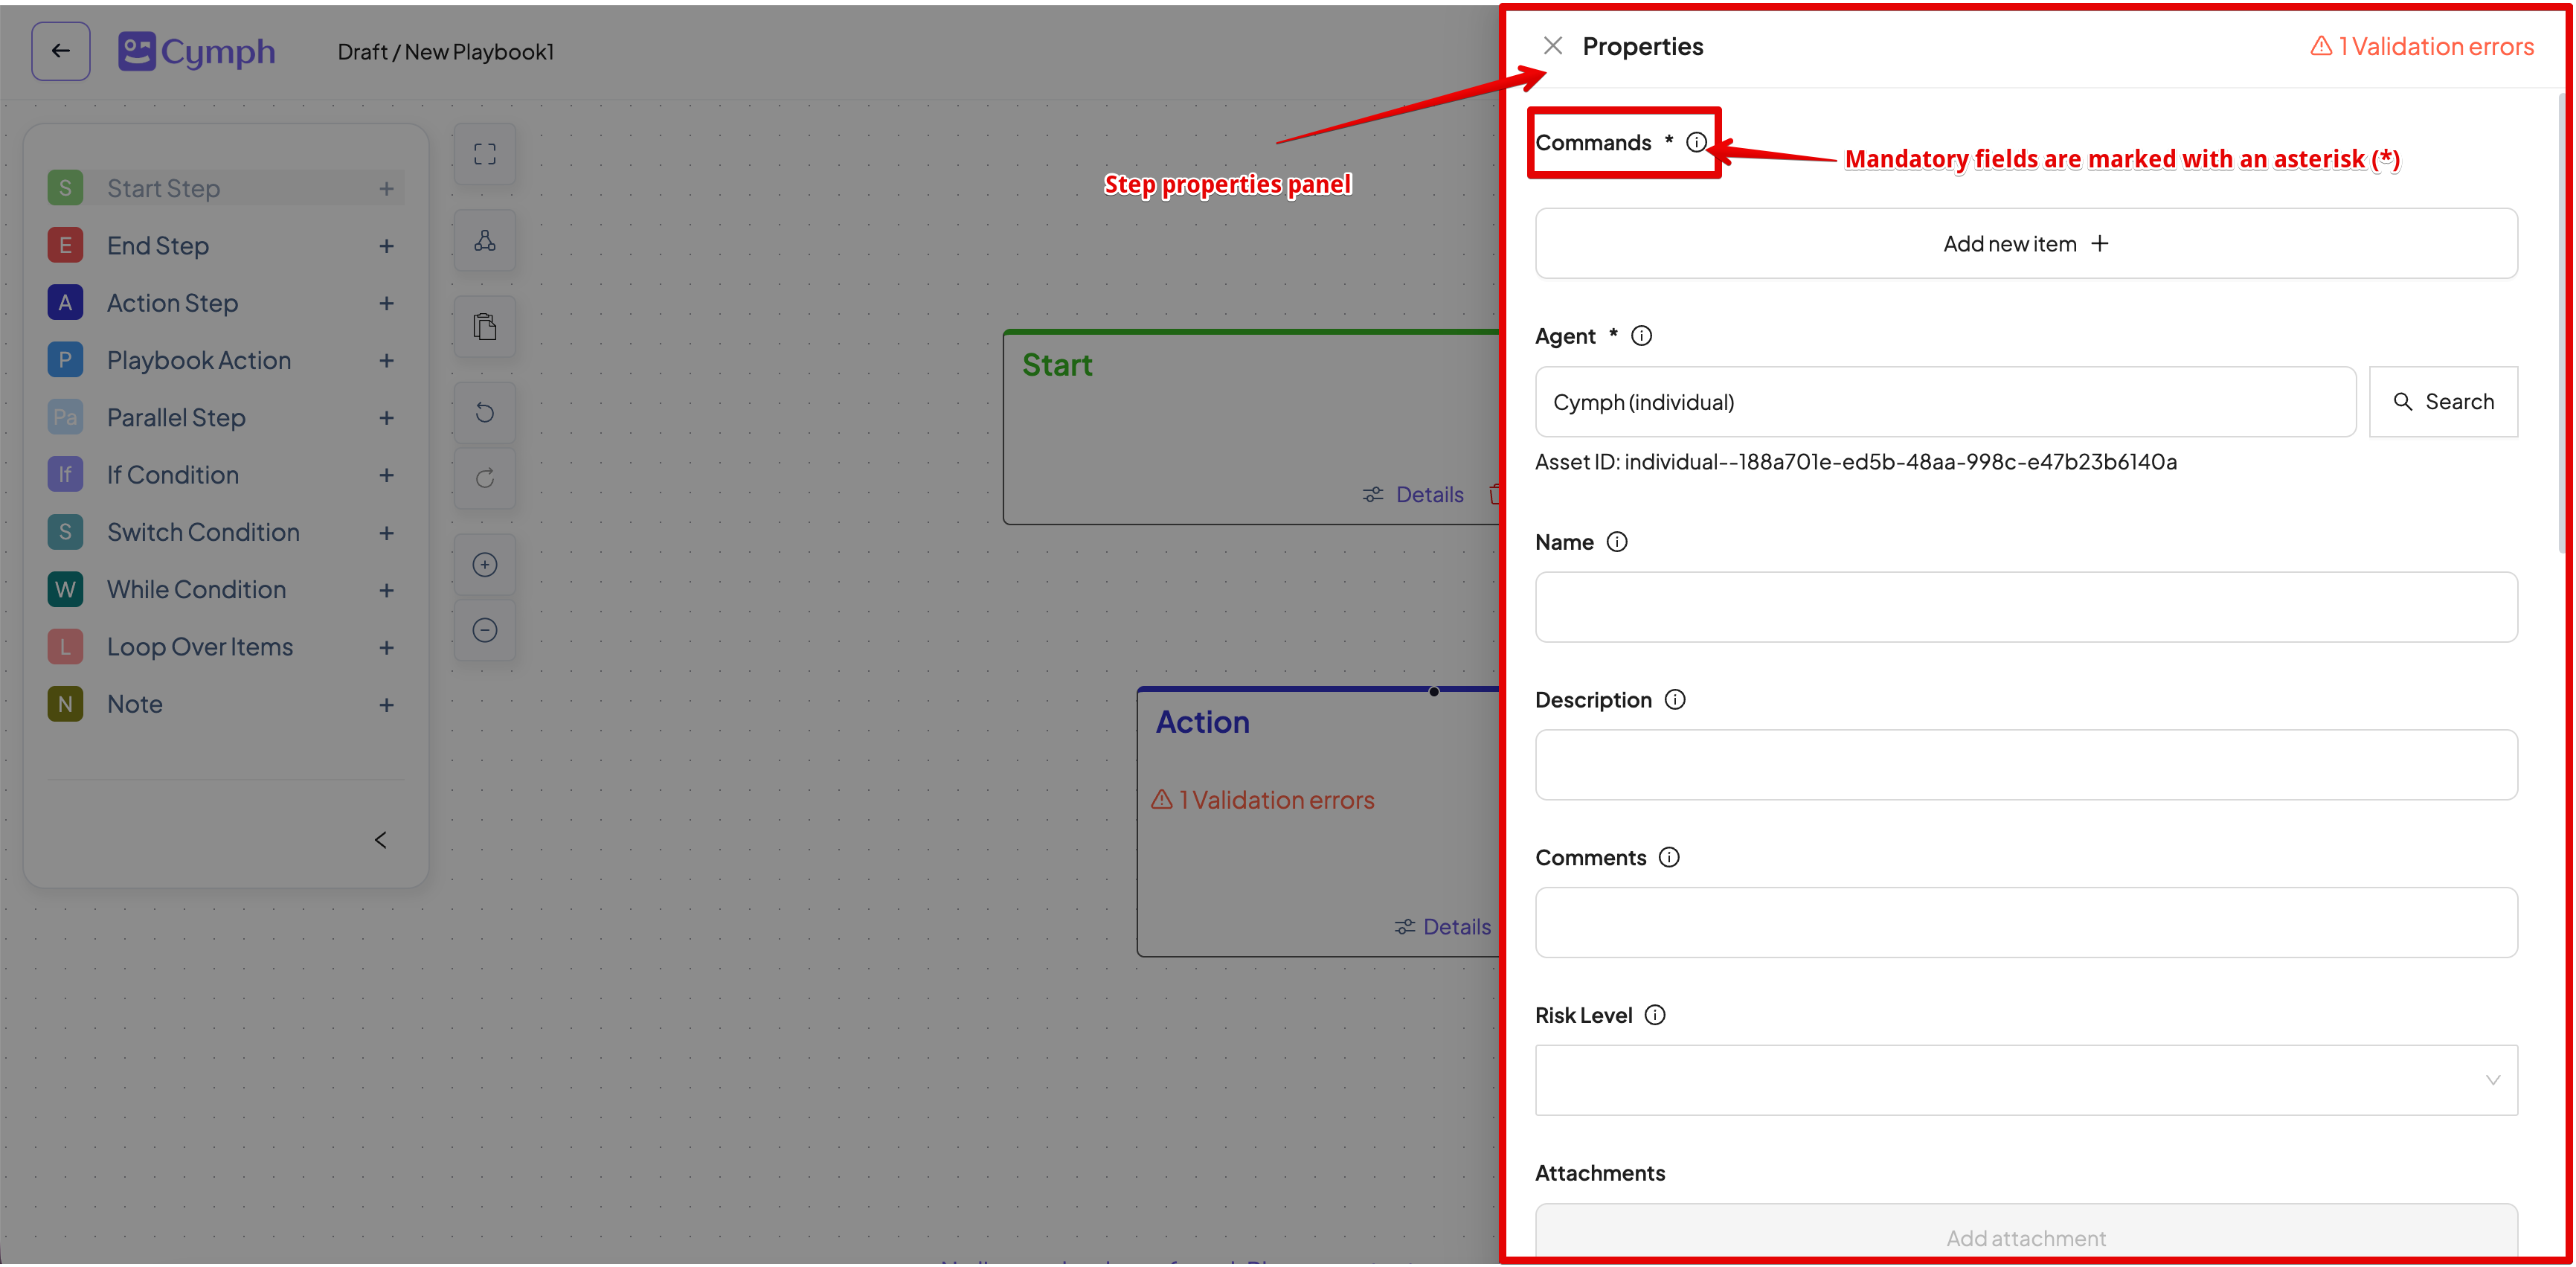
- The step properties drawer panel will automatically appear on the right side of your screen.
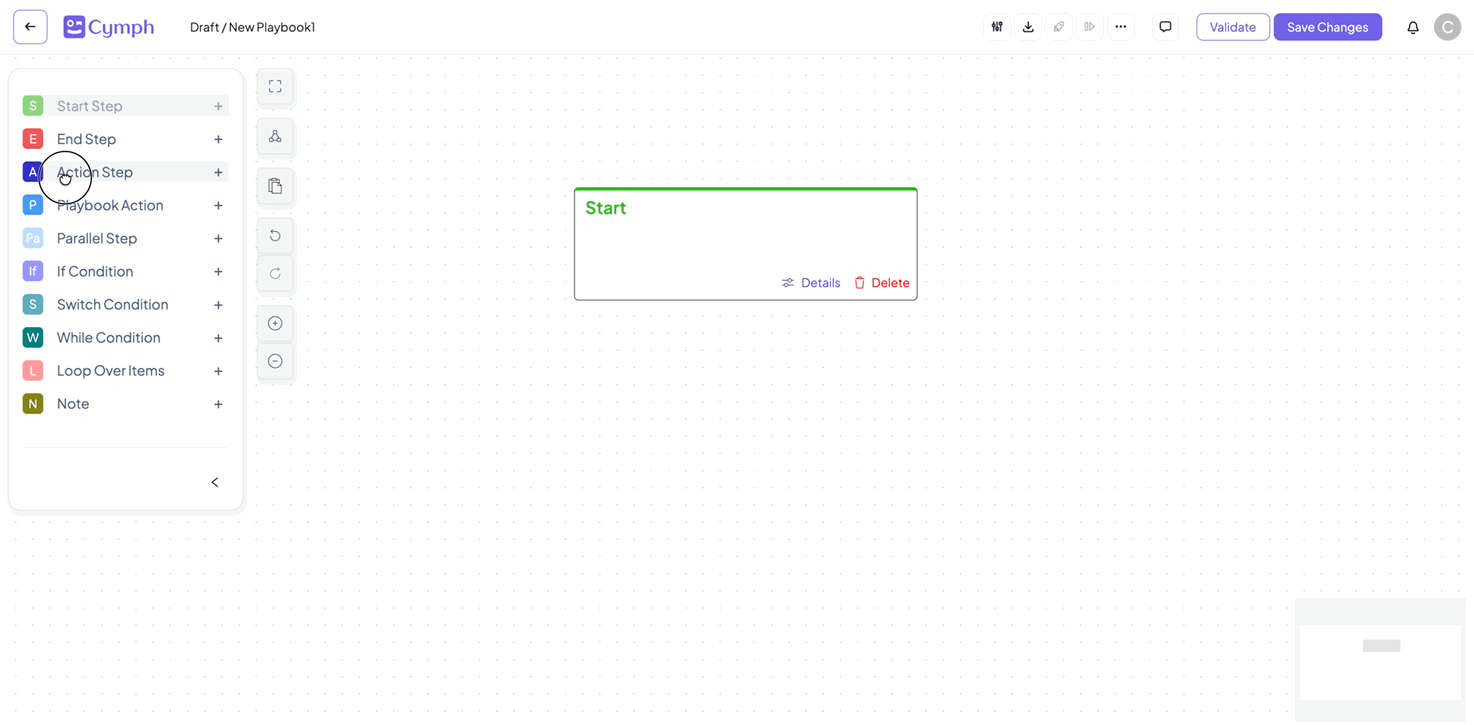
- Edit the step properties.
- Fill in properties with the desired information.
- Mandatory fields are marked with an asterisk (*).
- Properties are automatically saved.
Note: Playbooks can only have one start step. Once a start step is created, the Start Step option will be disabled from the node panel.
Deleting a step
- Select the node you want to delete
- Click on the Delete option at the bottom right corner of the step
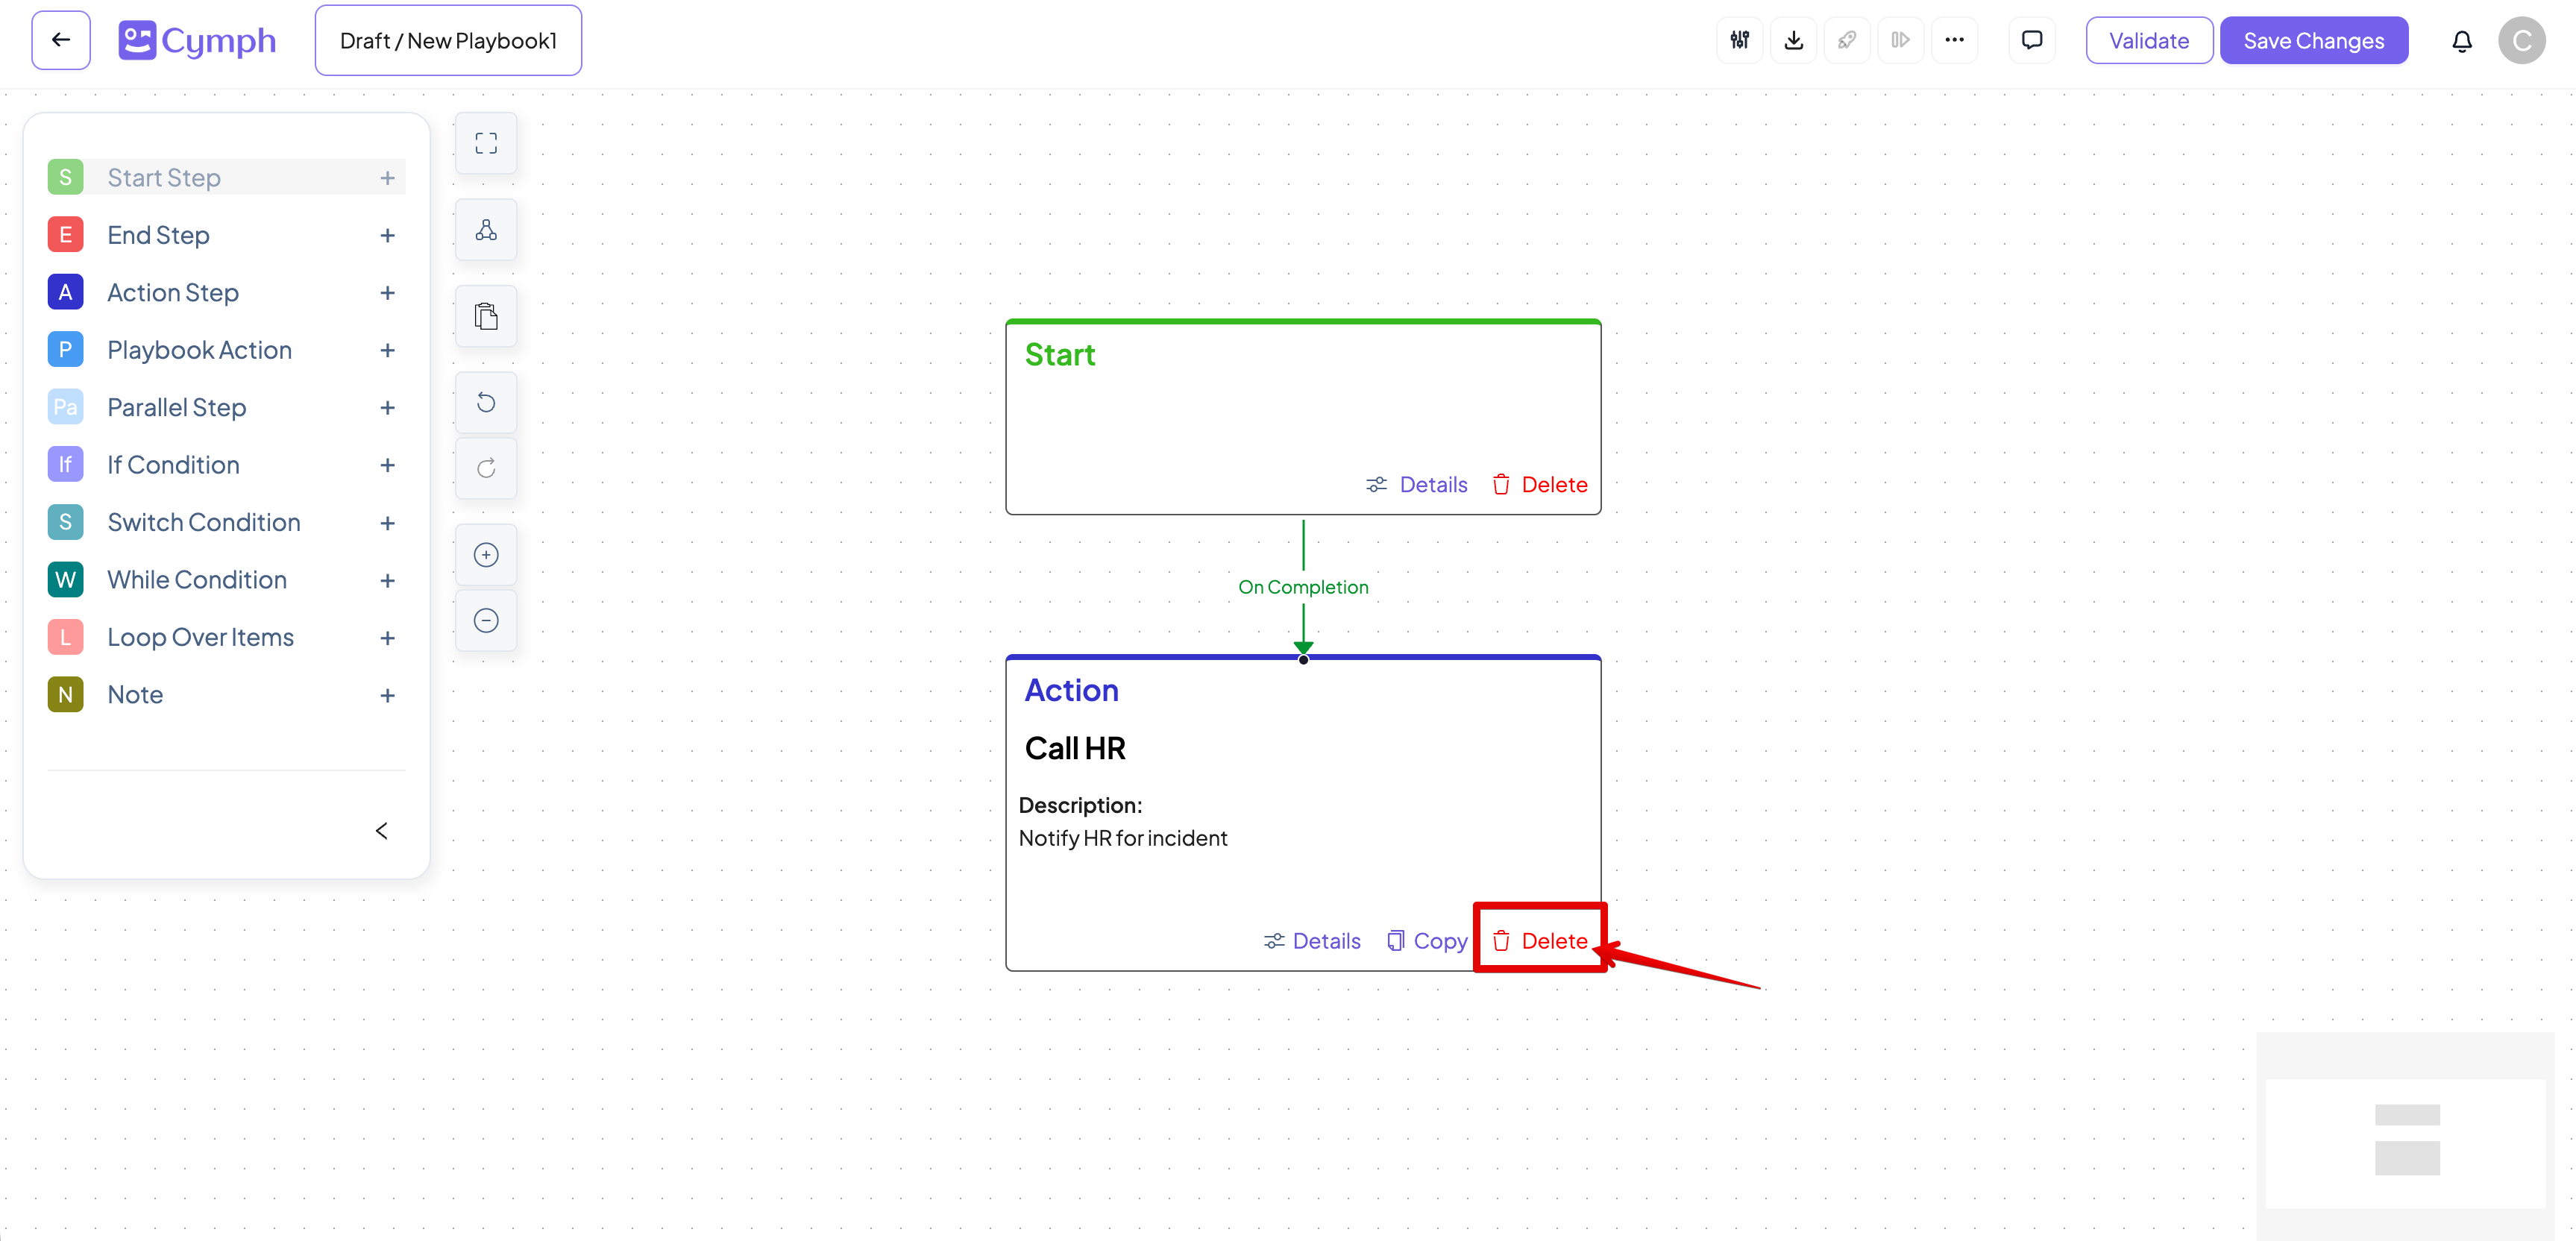
- Confirm that you want to delete the node.
- The node and its connections (both incoming and outgoing) will be deleted
You can also press the delete key to perform the same action. However, no confirmation is displayed in this case
Connecting steps
Once you have created a step, you can connect it to other steps. Different step types have different connection options:- Start and playbook action steps have only on completion connections.
- End step has no connection options.
- Action steps have on completion, on success and on failure connections.
- If condition step has on completion, on true and on false connections.
- Switch condition step has on completion and cases (multiple) connections.
- Parallel step has next steps (multiple) and on completion connections.
- While condition step has on completion and on true connections.
- Click on the source step.
- The available connections will be displayed at the bottom of the step.
- Click on the connection type tag and it will transform into a connecting line.
- Drag to the destination step and release to connect it.

How to delete a connection
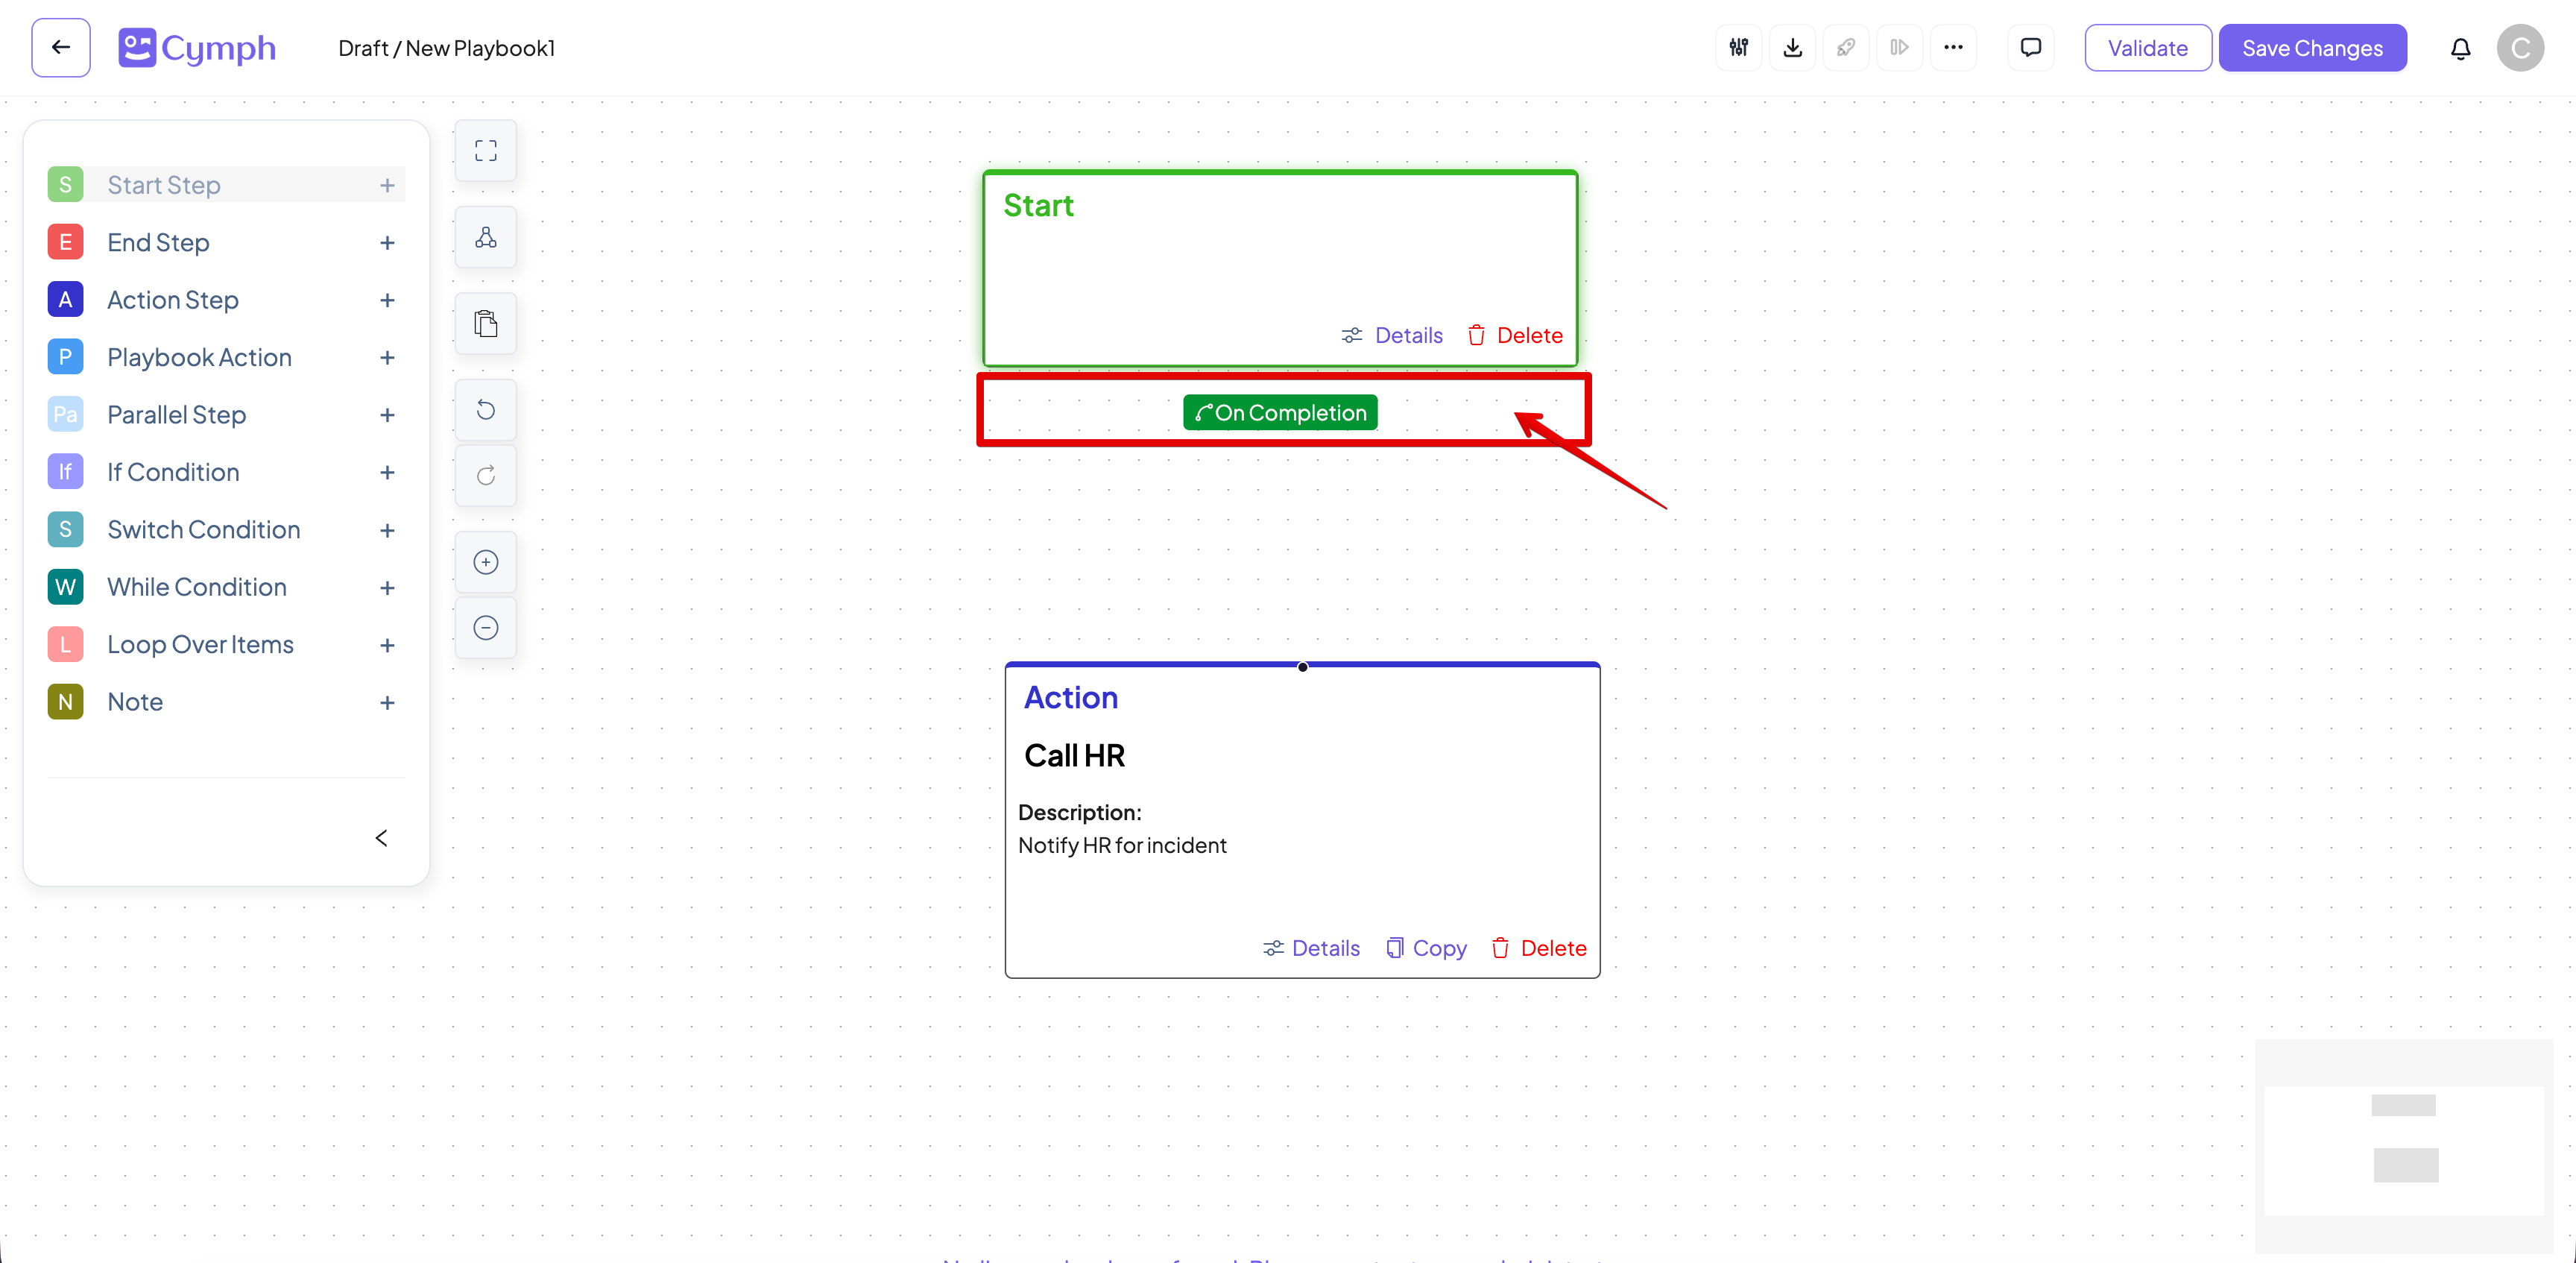
- Select the connection.
- Click on the connection you want to delete. The connection will be highlighted.
- A Delete icon will appear next to the connection name.
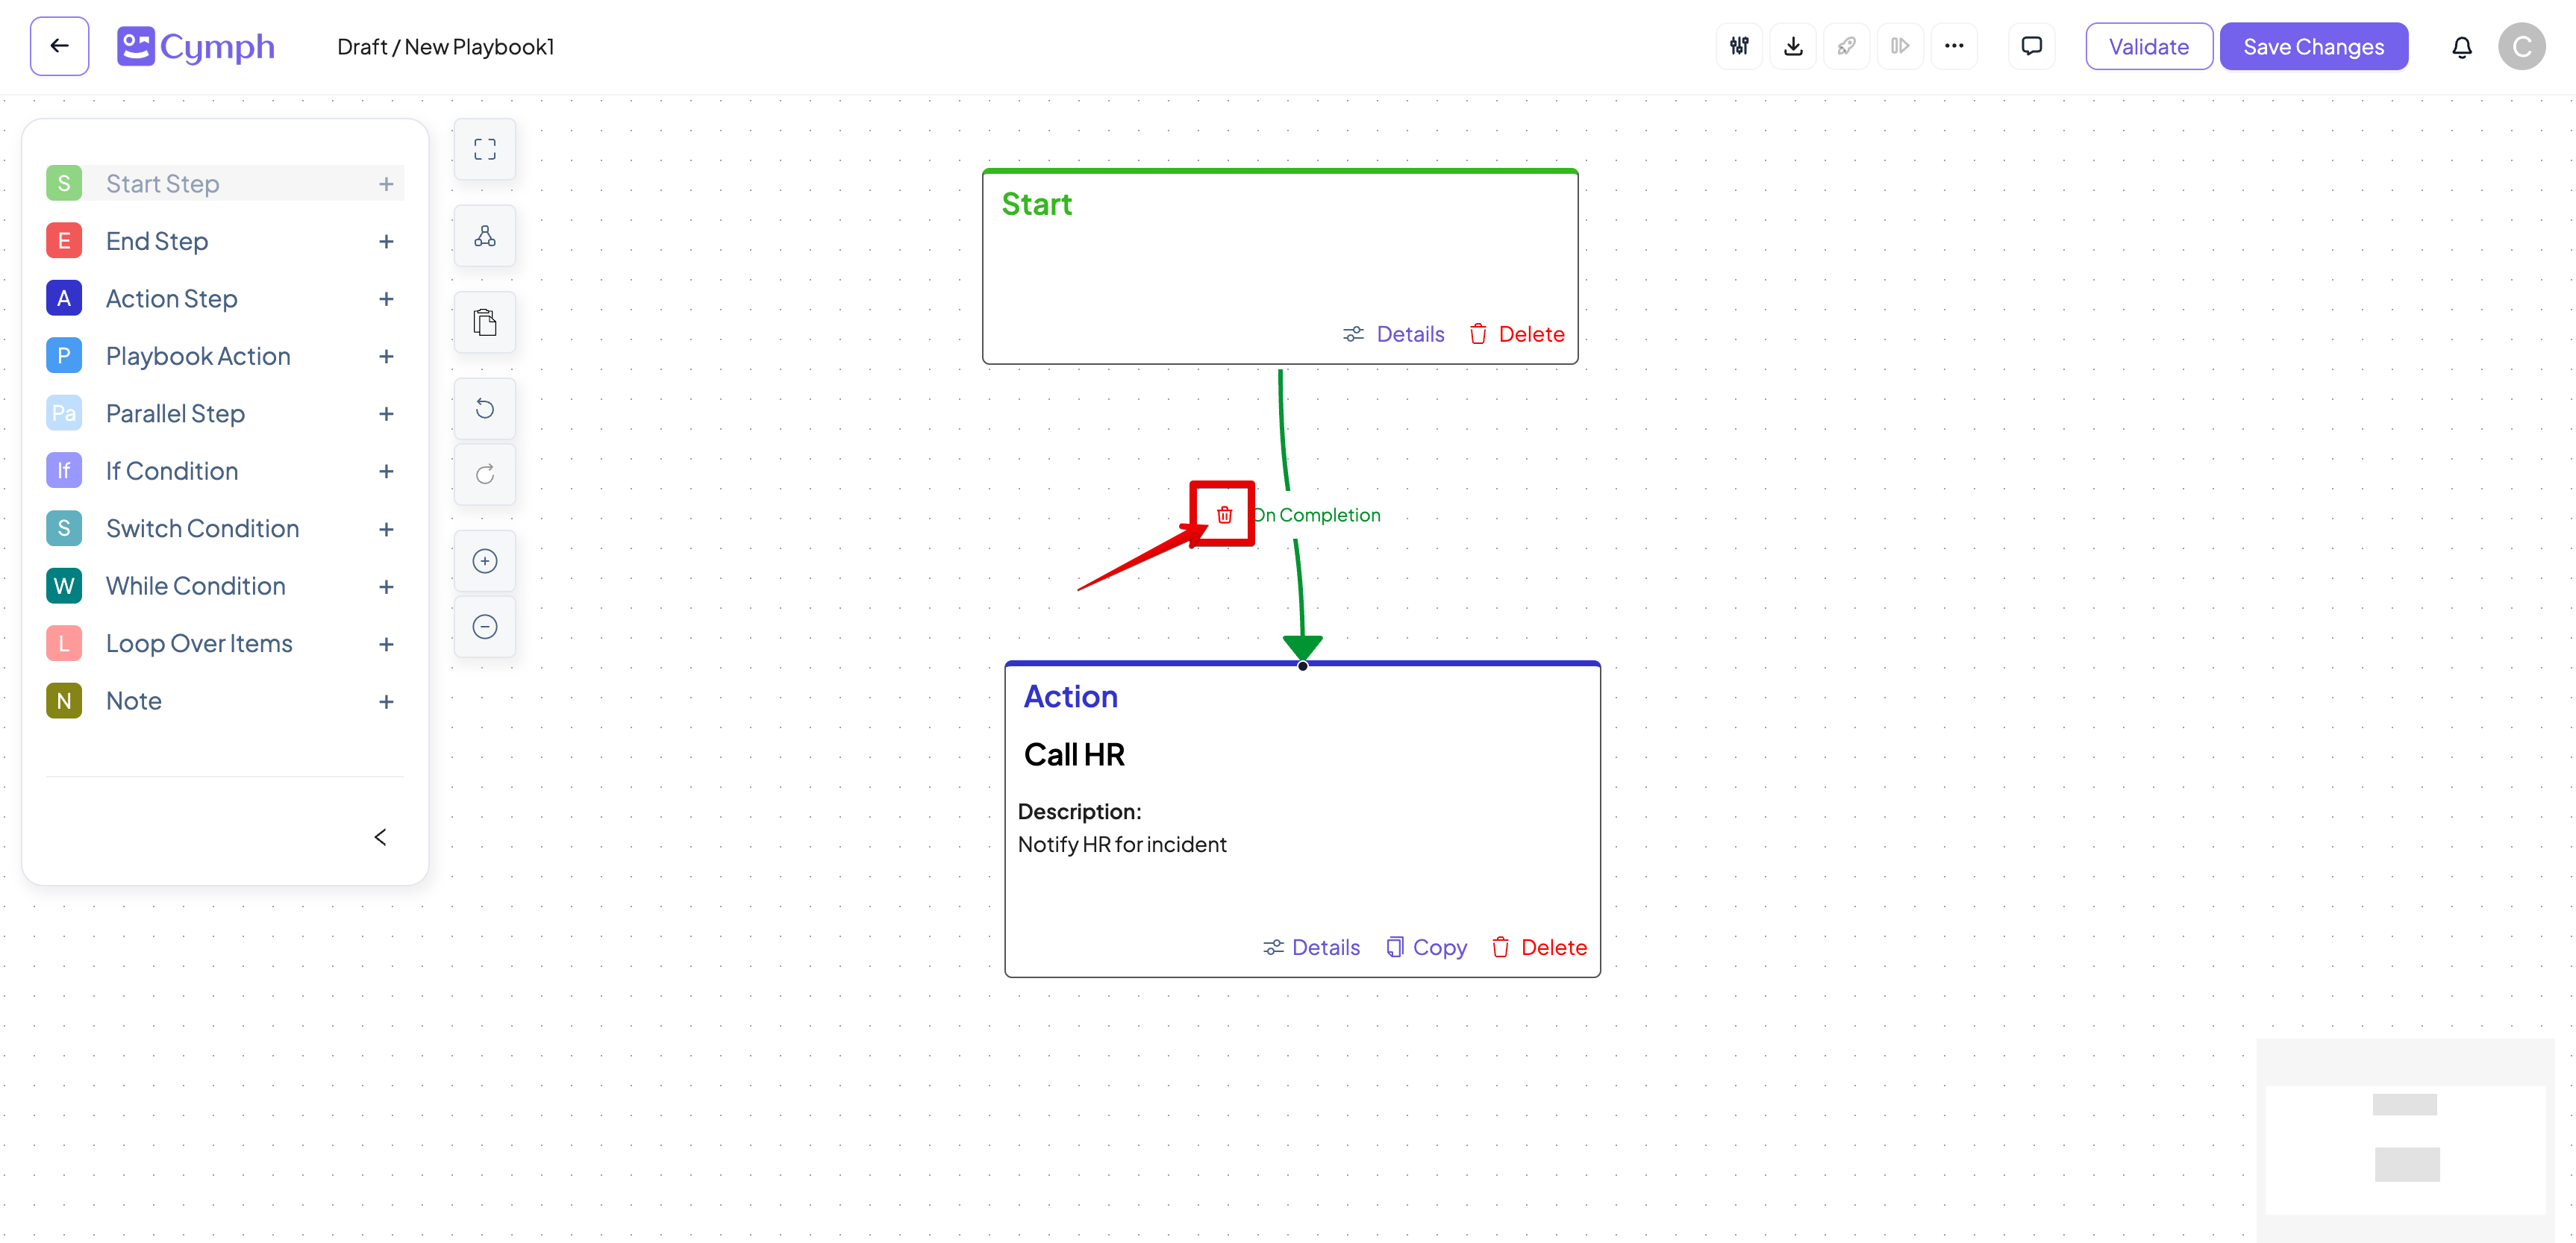
- Delete the connection.
- Click on the Delete icon.
- Confirm the deletion on the confirmation dialog that appears.
- Alternatively, you can press the delete on your keyboard to delete the connection without confirmation.
How to edit step properties
- Click on Details for the step you want to edit the properties for.
- The step properties drawer panel will appear.
- Alternatively, you can double click on the step.
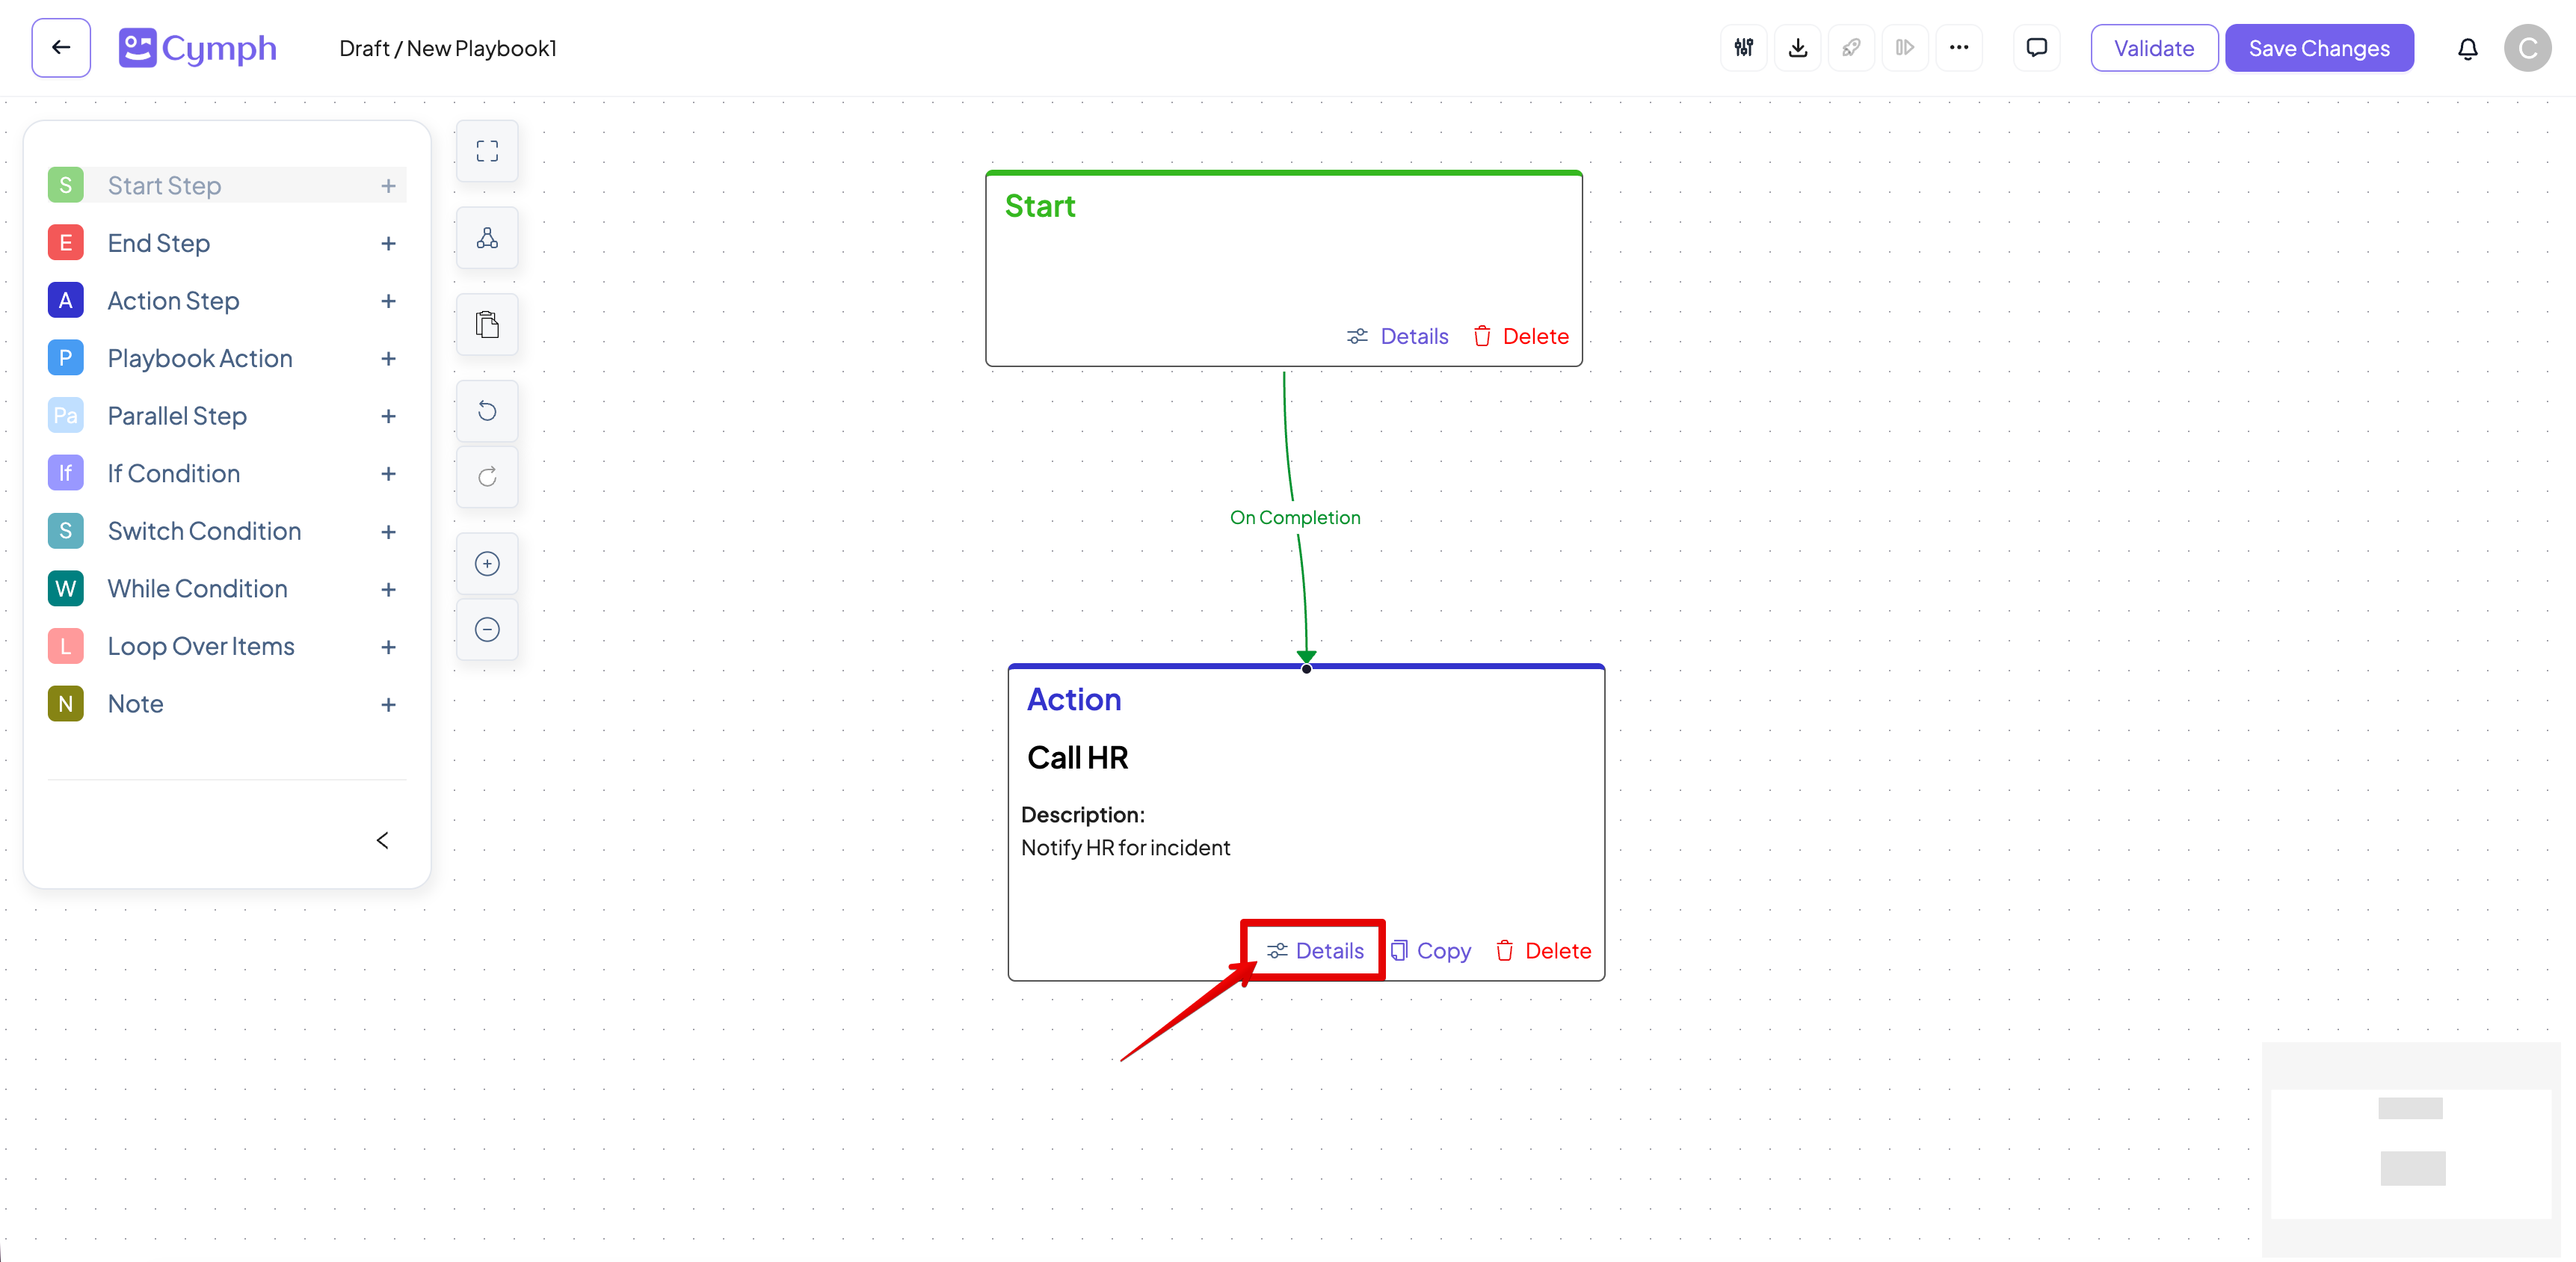
- Edit step properties.
- Close the properties panel.
- Click on the X button on the top left corner of the properties panel.
- Alternatively, press the escape (
Esc)key on your keyboard.
How to edit playbook properties
Playbook properties include key metadata, like ID, name, date created and modified among others.- Open playbook properties.
- Click on the playbook properties icon on the editor action bar.
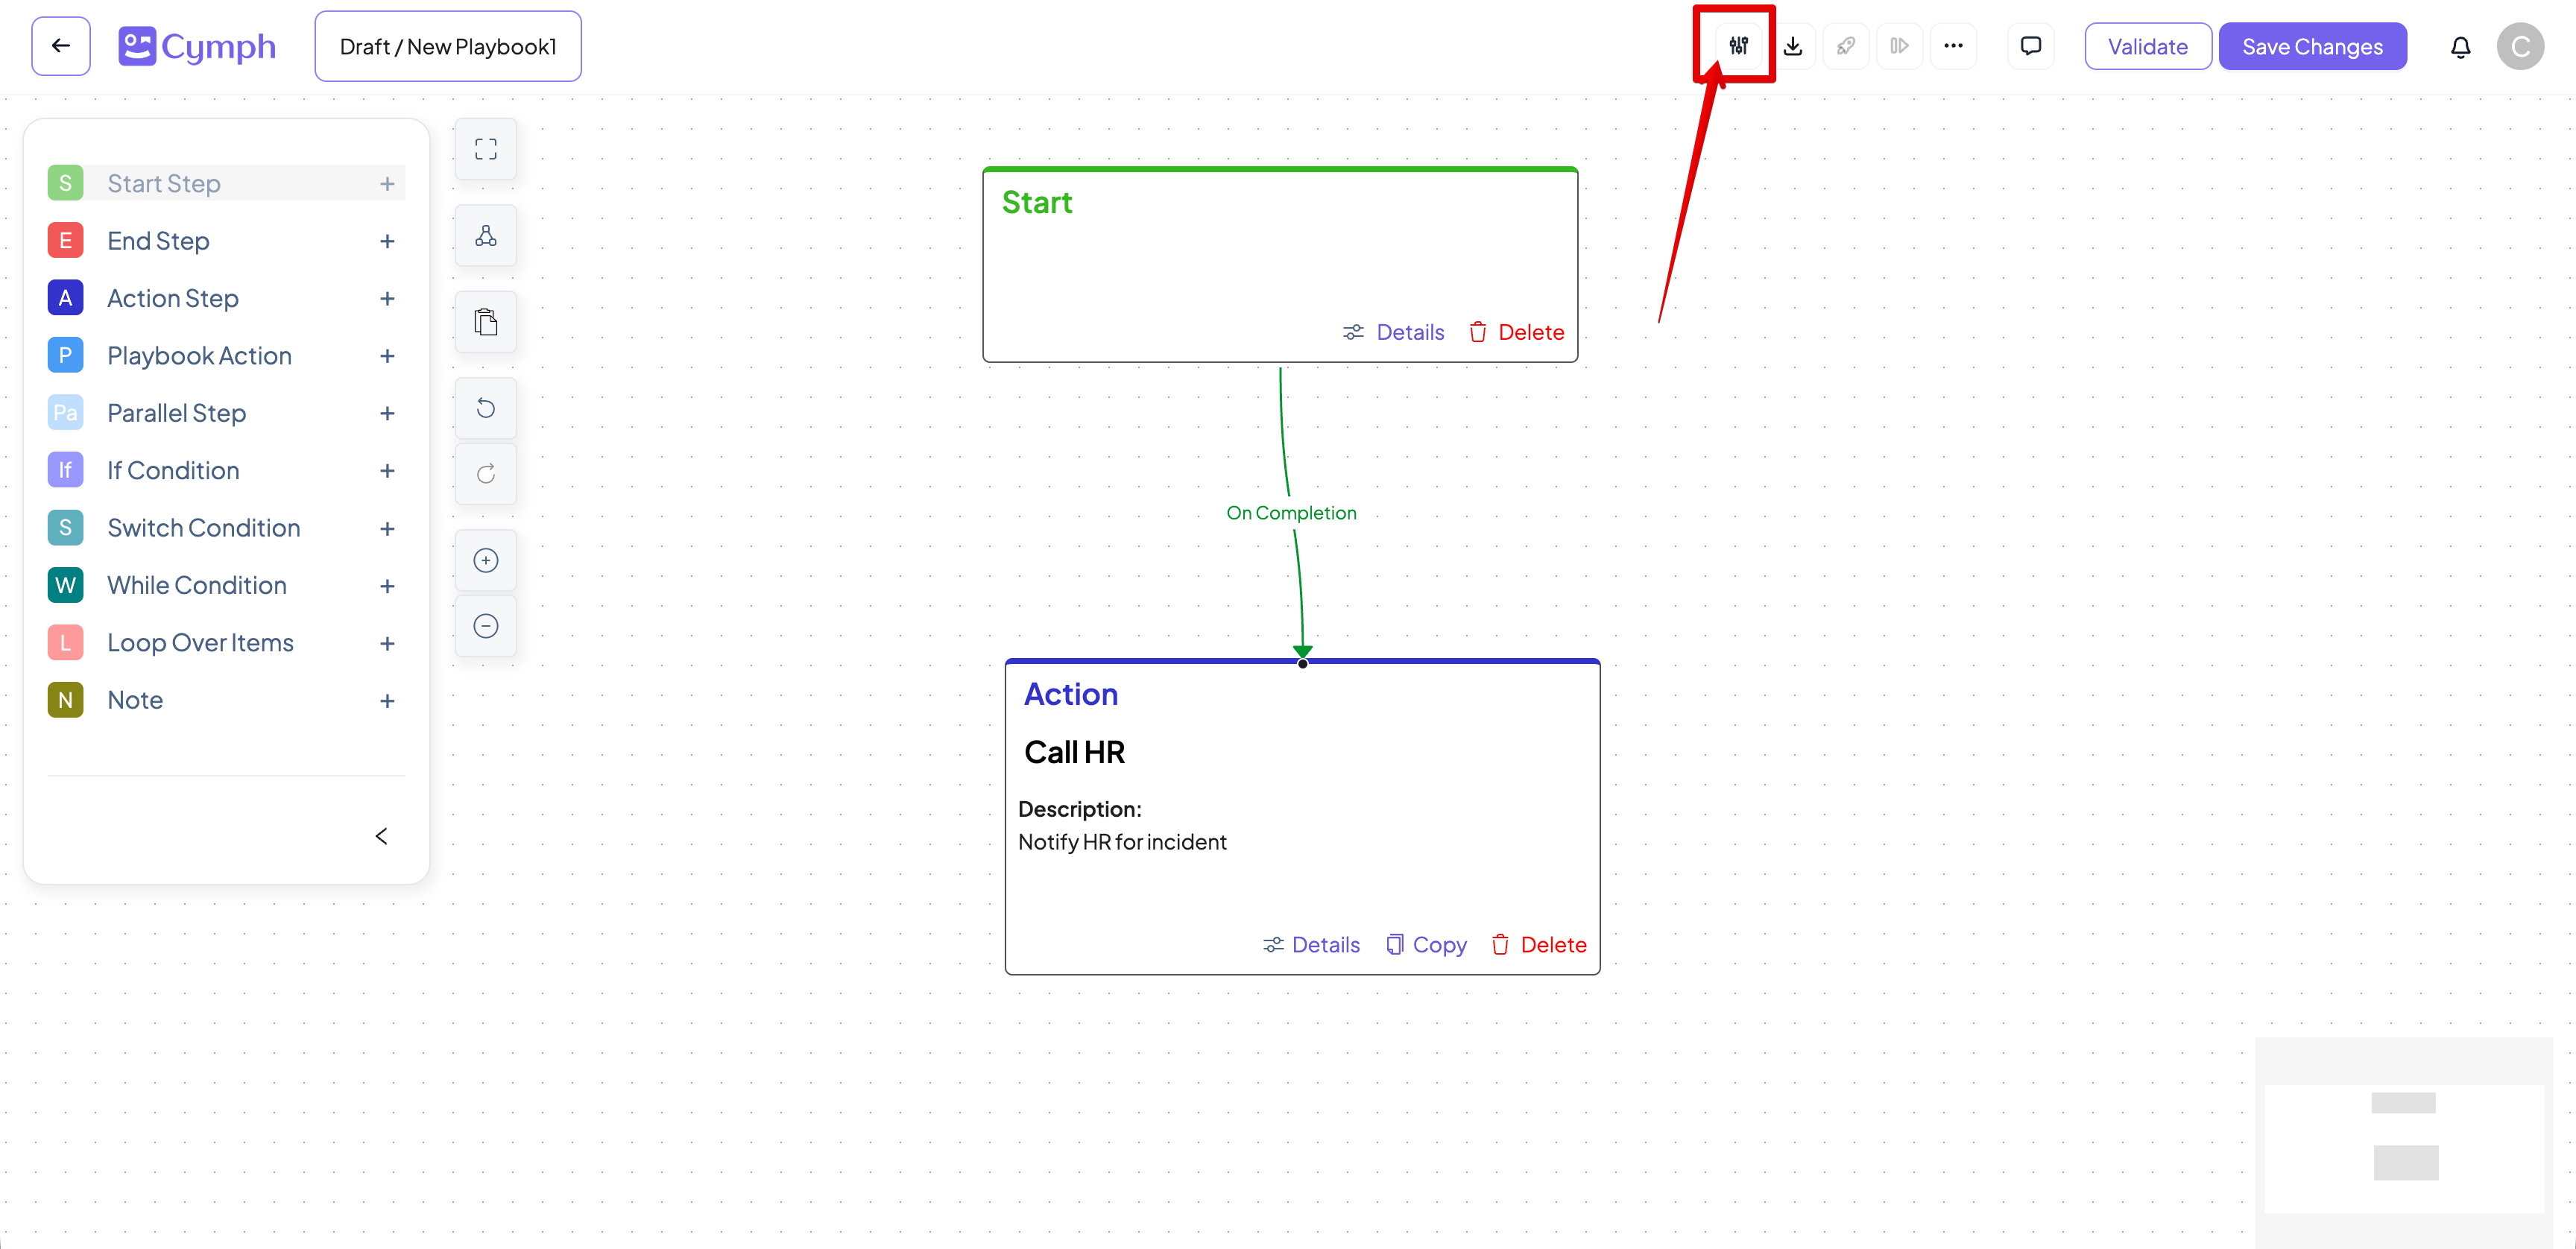
- Edit playbook properties.
- Mandatory fields are marked with an asterisk (*).
- Close the properties panel.
- Click on the X button on the top left corner of the properties panel.
- Alternatively, press the escape key.
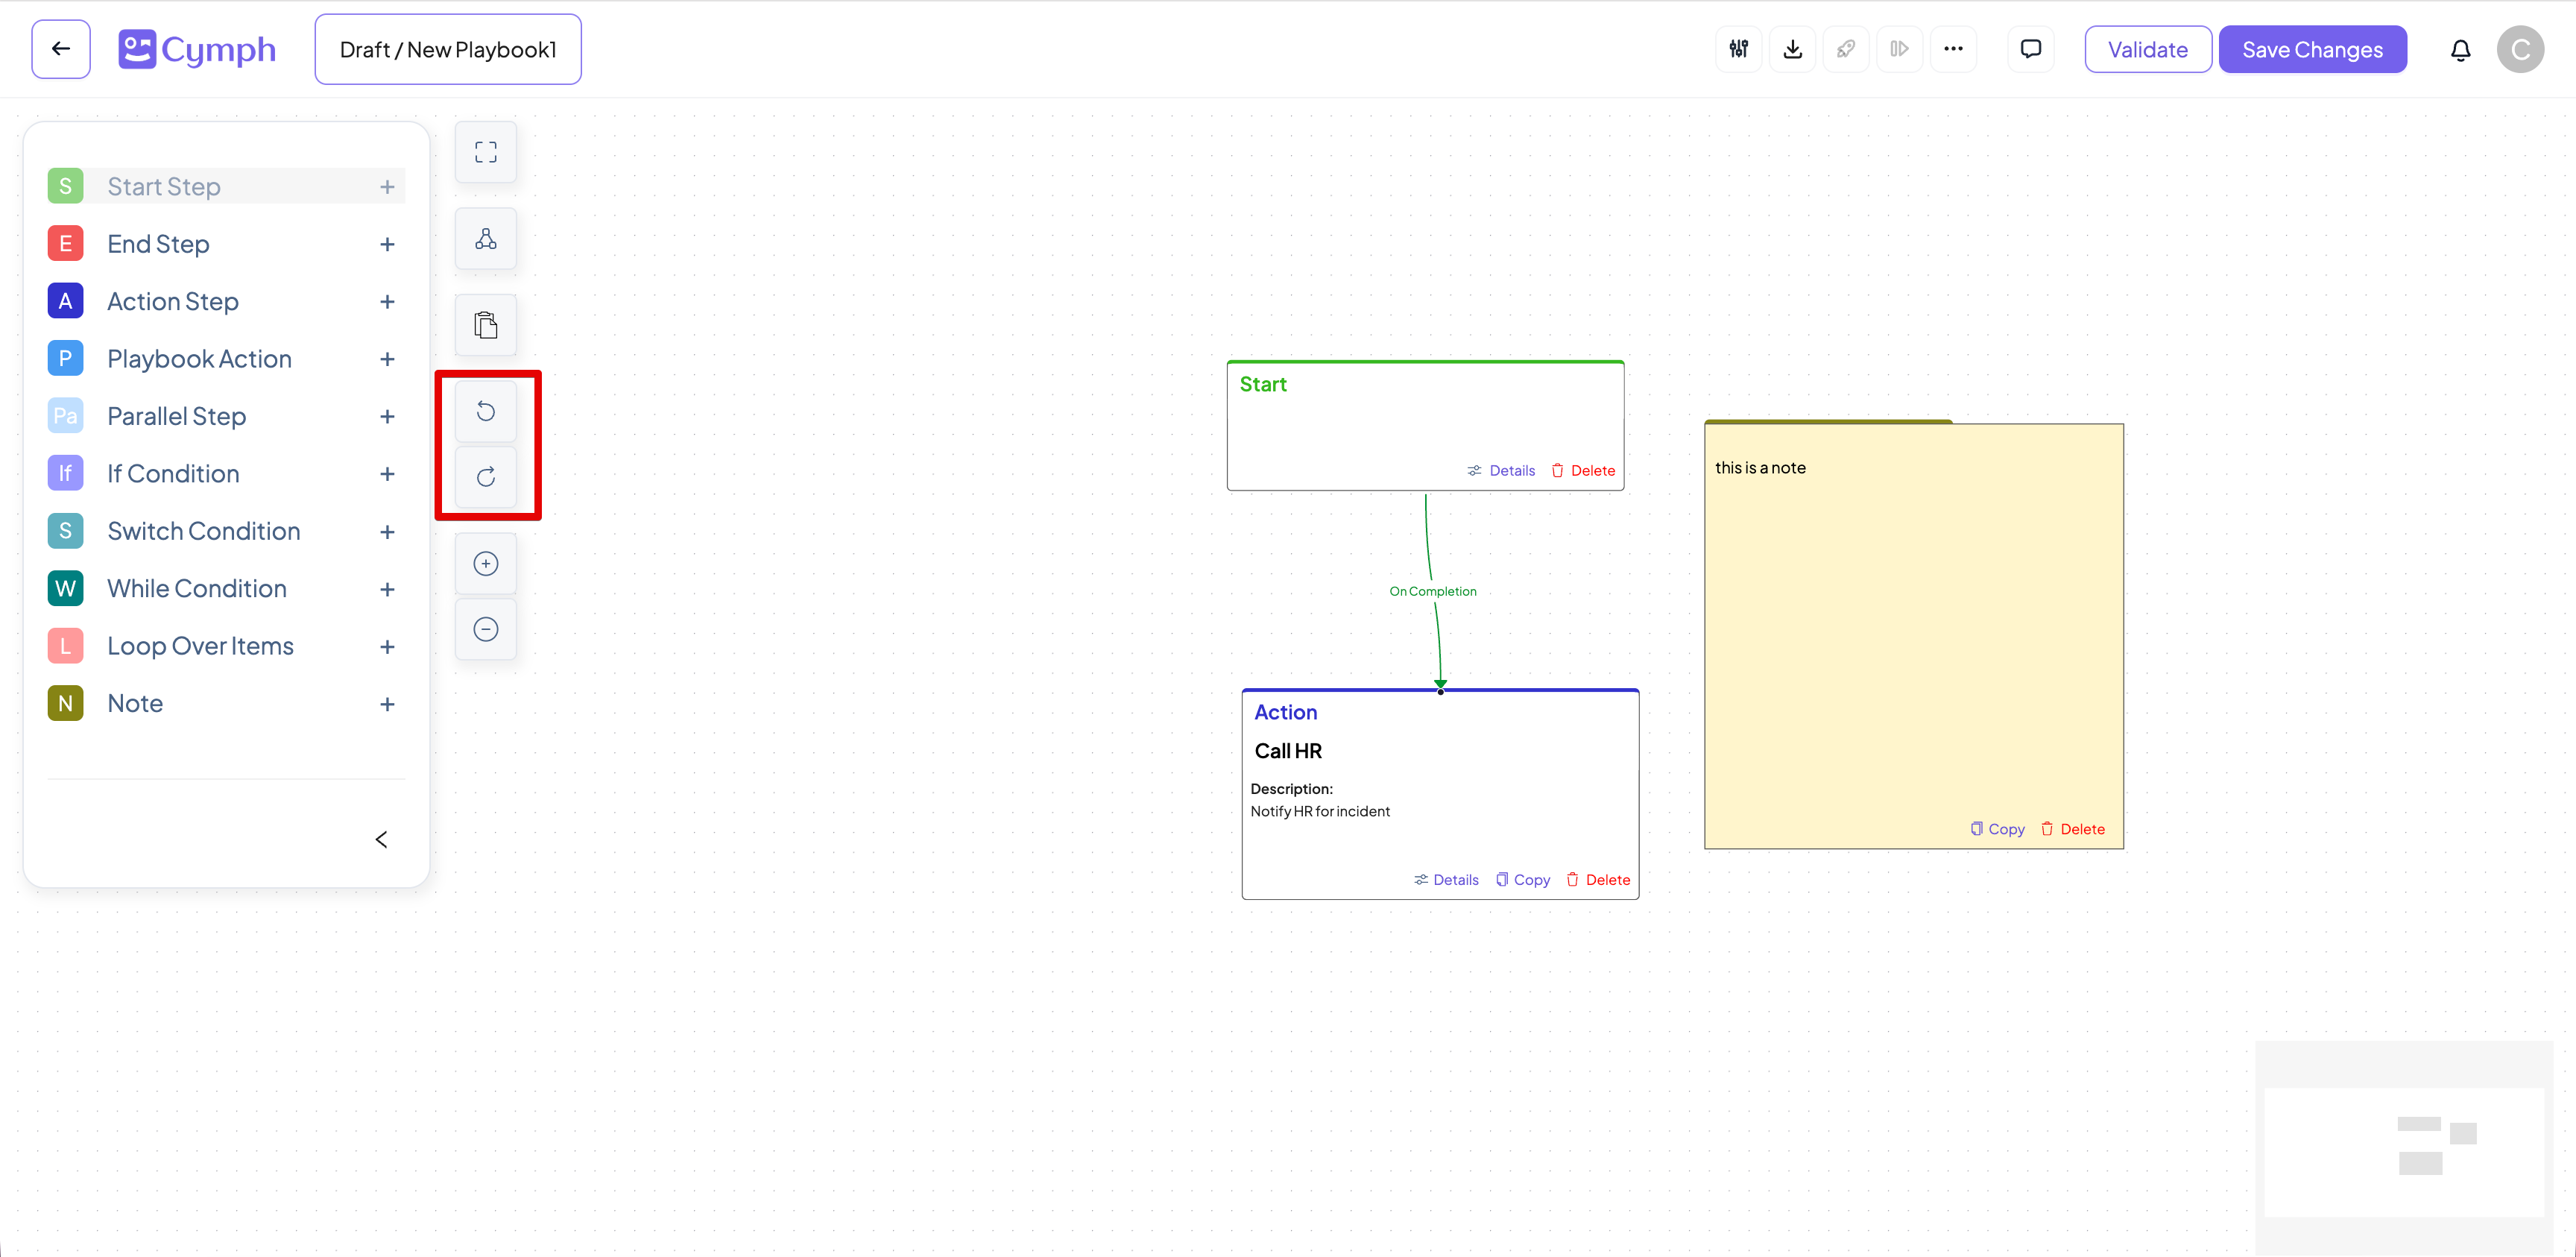
Adding notes
You can add notes to your playbook. You can drag and drop the Note node. Once you click inside it, you will be able to start editing the contents of your notesUndoing and redoing actions
You can undo or redo the following actions on the editor:- Adding a node
- Deleting a node
- Adding a connection
- Deleting a connection
How to handle validation errors
There are two possible places where validation errors can happen:- Playbook properties: There errors relate to the playbook metadata. The details about these errors will appear on the playbook properties panel. A counter will also appear on the playbook properties indicating the number of validation errors.
- Playbook steps: There errors concern the properties of the individual steps. The details about these errors will appear on the step properties panel. A warning message will also appear on the step node in the canvas area indicating the number of validation errors.
How to check for playbook properties validation errors
- Check for error counter on the playbook properties icon.
- If there are any errors, a red error counter will appear.
- Open playbook properties panel.
- Hover over the error message.
- An error message in the format of “# validation errors” appears on the top right corner of the properties panel.
- A detailed list of validation errors will appear when you hover over the warning message.
How to check for playbook step validation errors
- Check if an error message appears in the step.
- If there are any errors, a red warning message in the format “# Validation errors” will appear.
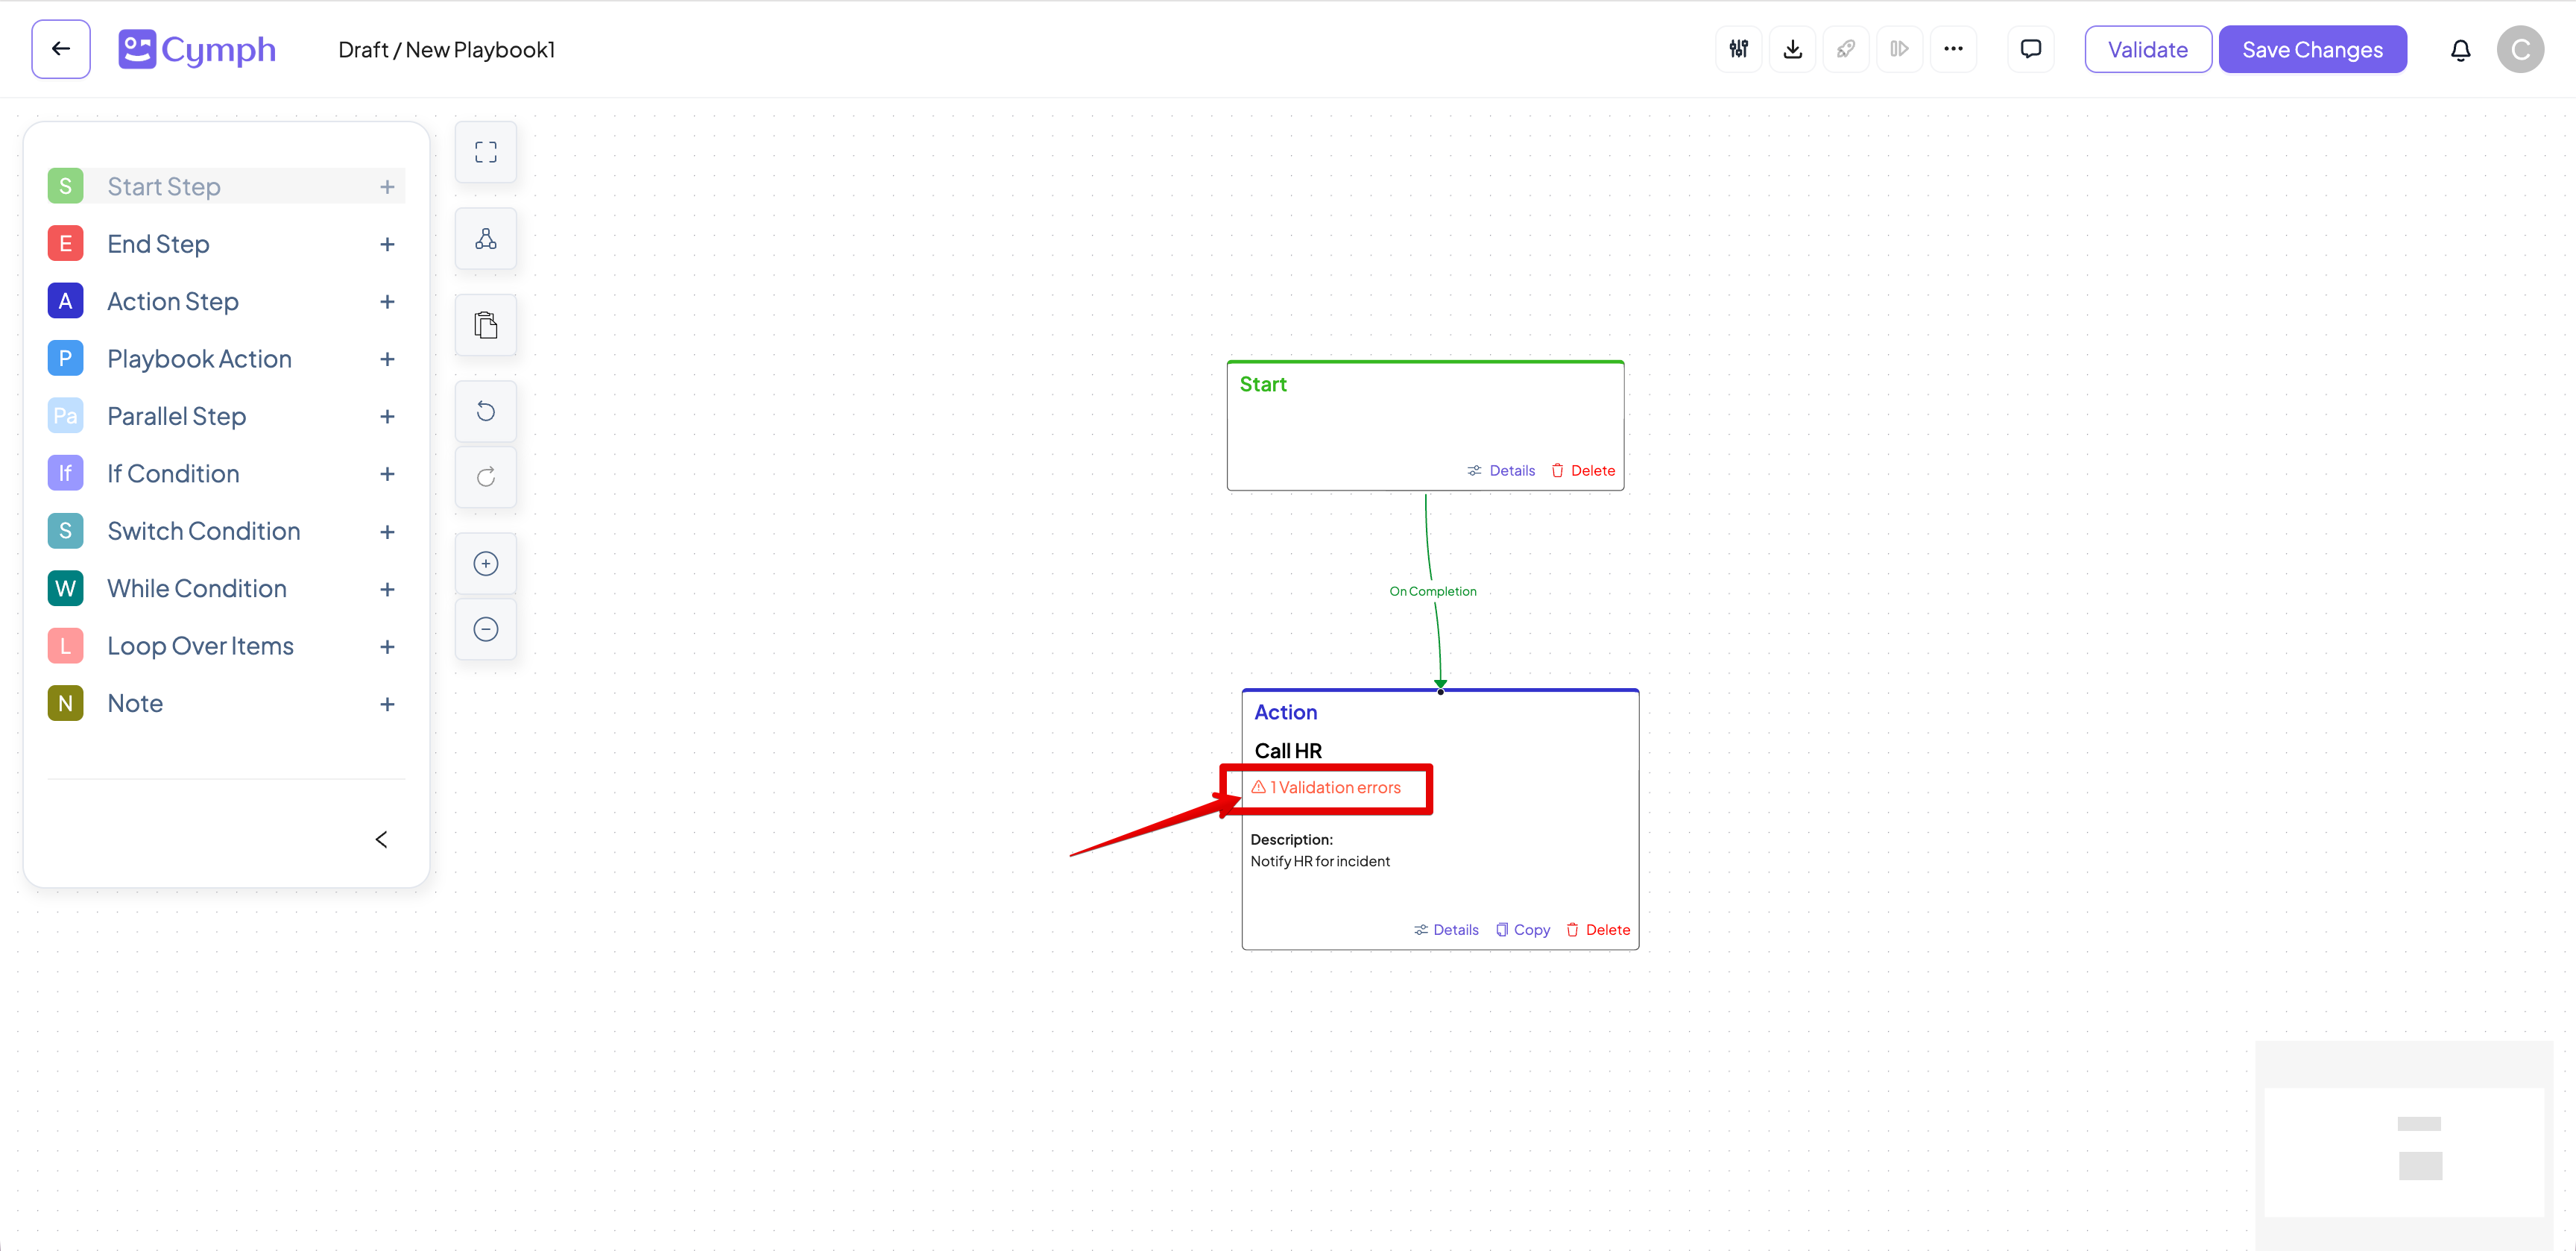
- Open step properties panel.
- Hover over the error message.
- An error message in the format of “# Validation errors” appears on the top right corner of the properties panel.
- A detailed list of validation errors will appear when you hover over the warning message.
How to validate a workflow
Although playbook steps and properties are validated continuously, you can still manually trigger validation when desired.- Trigger playbook validation.
- Click on the Validate button on the workflow action bar.
- Validation errors, if any, will appear on individual steps and/or playbook properties panel.
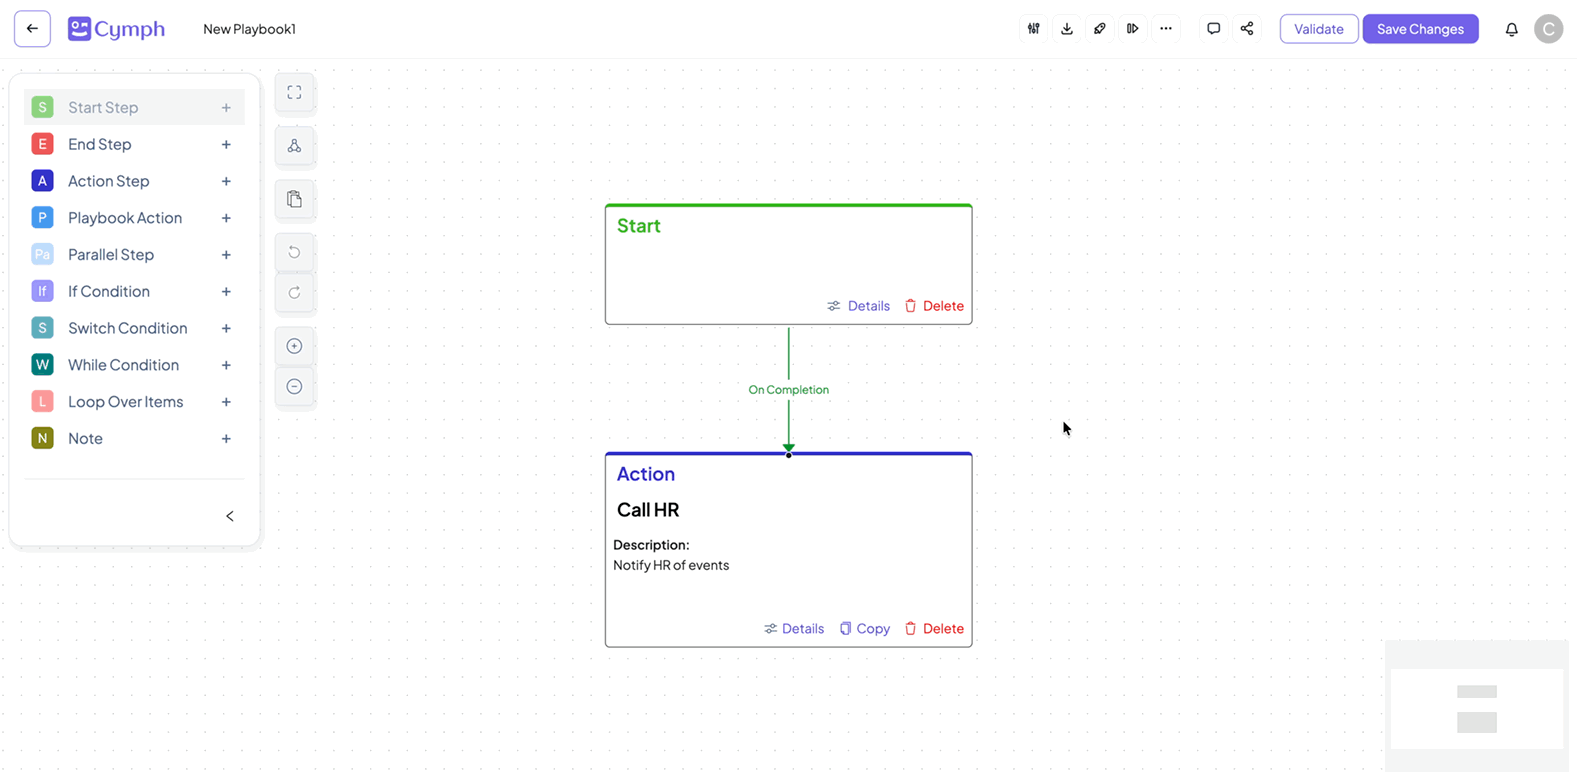
How to copy and paste steps
- Select the step you want to copy.
- Click on the step. The step will be highlighted.
- Copy the step.
- Click on Copy link of the step. Alternatively you can press CTRL-C (Cmd+C for MacOS) on your keyboard
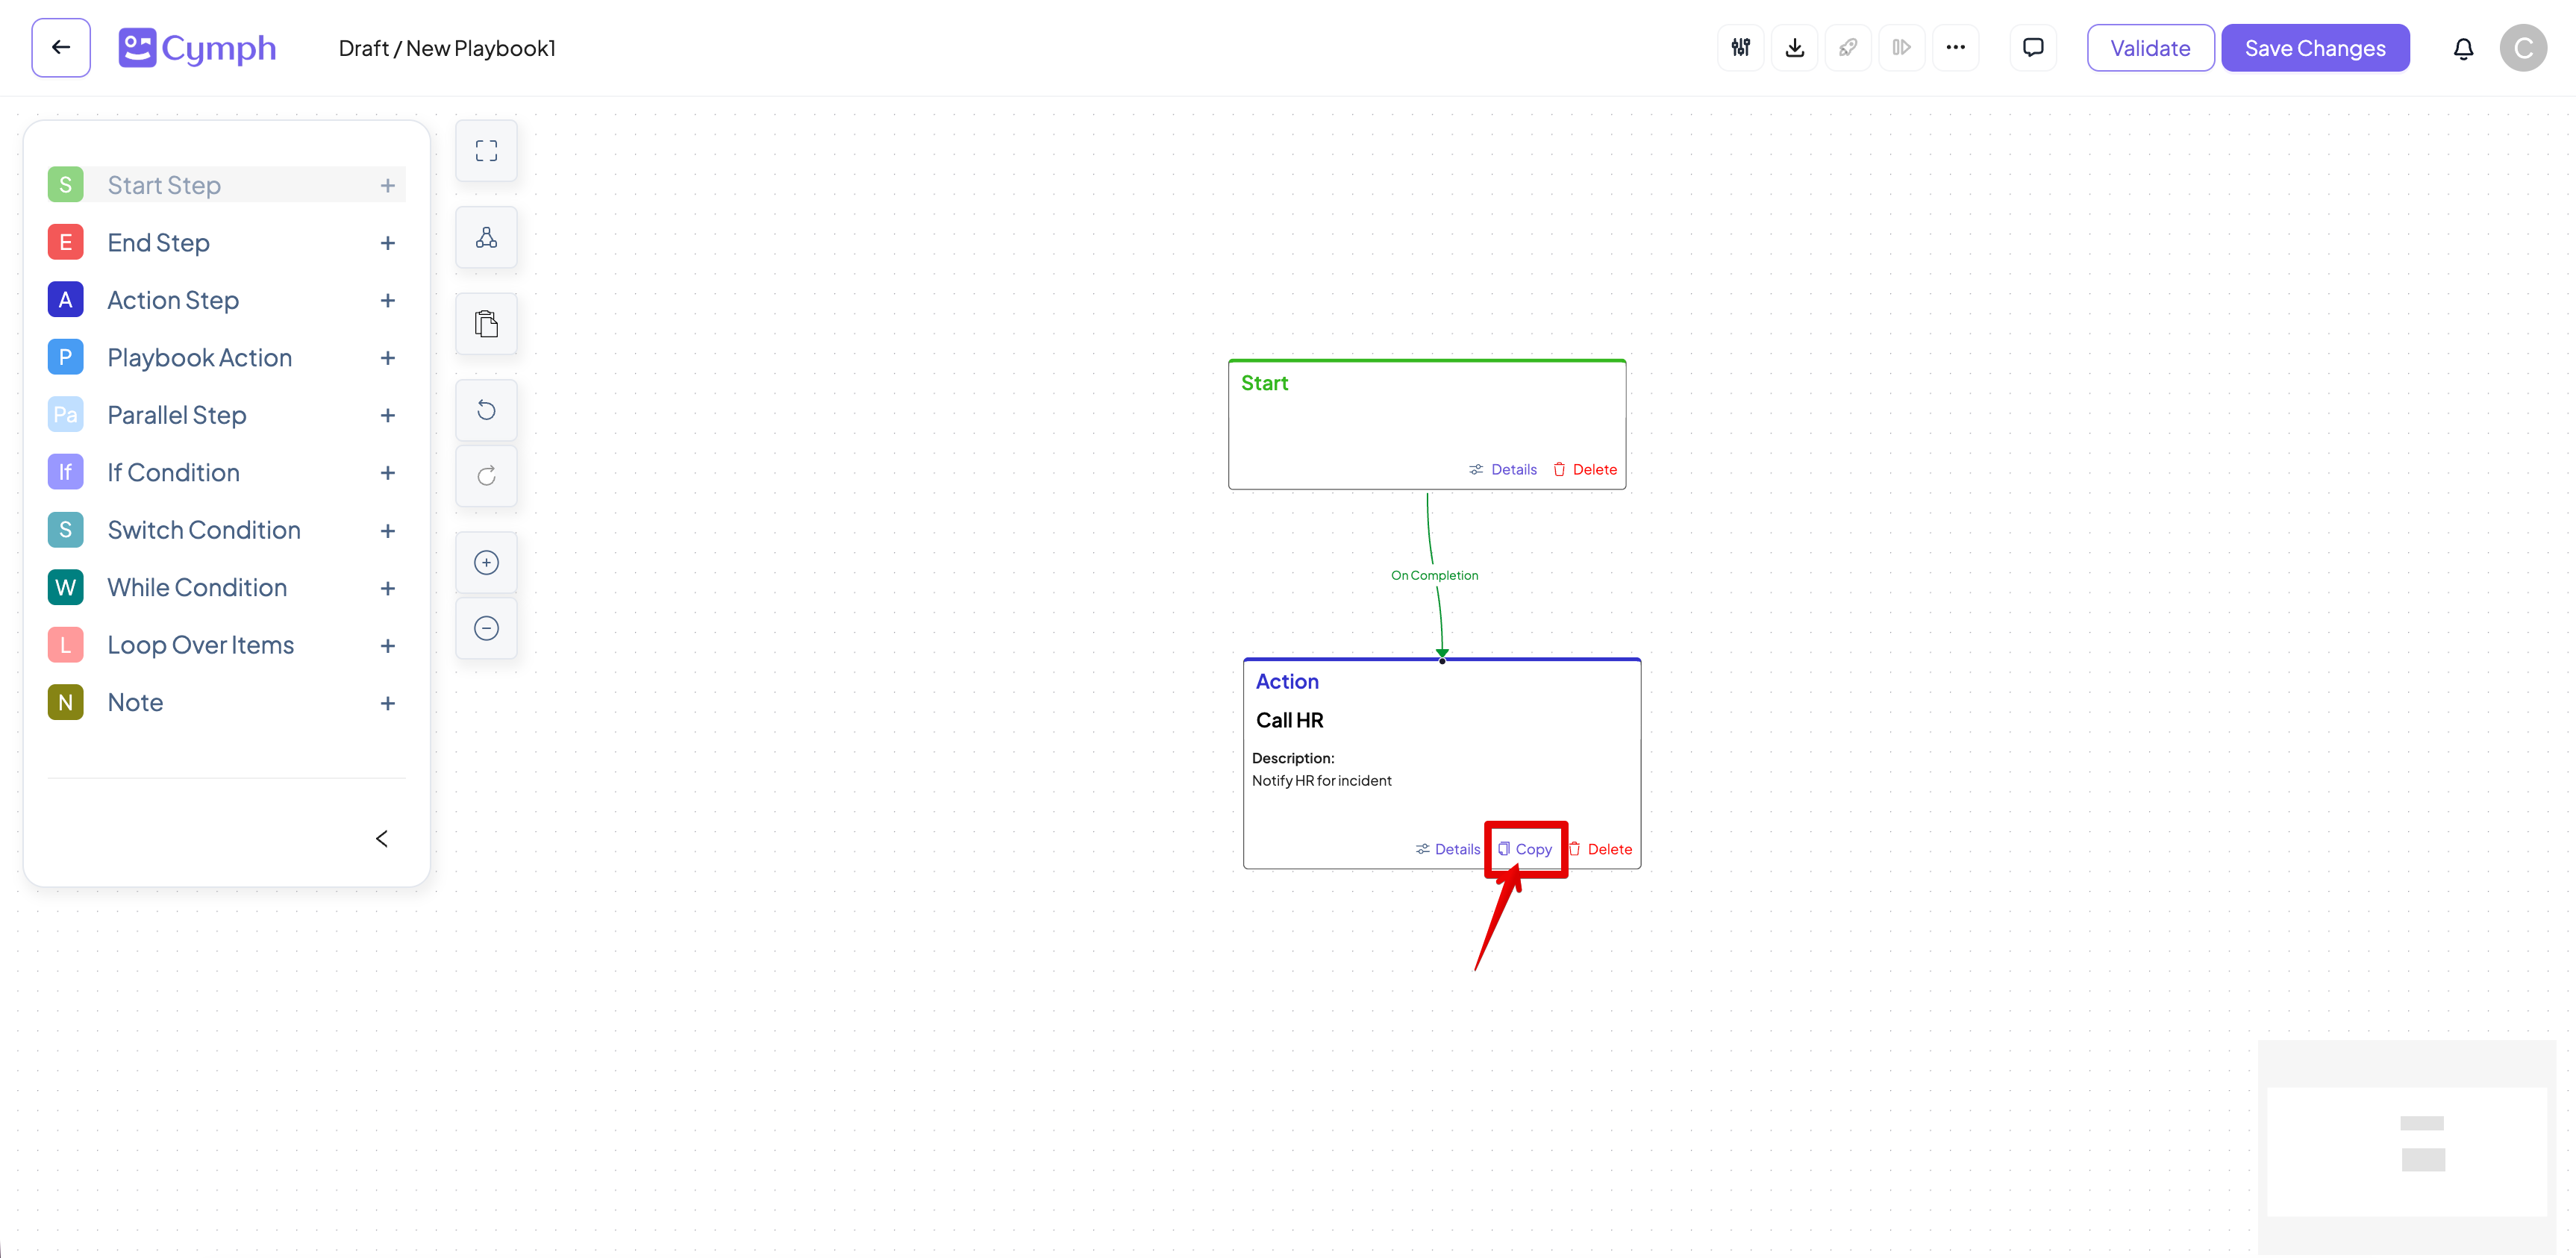
- Paste the step.
- Option 1: click on the Paste icon in the controls buttons area.
- Option 2: press CTRL-V (Cmd+V for MacOS) on your keyboard

- A new step will appear.
- A step with the same properties but without any connections will appear next to the source step.
How to align, fit view and zoom
The control buttons area contains three main controls:- Fit view: The canvas is zoomed out until all steps of the playbook are visible.
- Align: Steps are aligned in such a way that do not overlap.
- Zoom in/out: Canvas is zoomed in/out.
- You can also click and drag anywhere that is empty in the canvas area to move your viewport.
How to view and manage comments
- Open the comments panel.
- Click on the Comment icon on the action bar of the editor.
- The comments panel will appear and existing comments will be displayed.
- Add your comment (optional).
- Write your comment in the text area on the bottom of the panel.
- Click Submit to add your comment.
- Reply to an existing comment (optional).
- Click the Reply icon next the comment you want to reply.
- Write your comment in the text area on the bottom of the panel.
- Click Submit to add your comment.
- Delete an existing comment (optional).
- Click on the Delete icon next to the comment you want to delete.
- The comment and all its replies will be deleted.
- Only the author of the comment can delete it.
- Edit an existing comment (optional).
- Click on the Edit icon next to the comment you want to edit.
- Enter the new text and click Submit to save your changes.
- The suffix “(edited)” will appear next to the edited comment.
- Only the authors of the comment can edit it.
How to translate a playbook
A playbook can be translated on the fly on 45 languages. The description and title of the playbook properties and its nodes are translated into the target language. All other fields are left untouched.- From the Action menu, go to the Language option
- Select the language you want to translate the playbook to
- Playbook will be translated automatically
How to save changes
- Click the Save Playbook button.
- An informational message will appear when the playbook is saved.
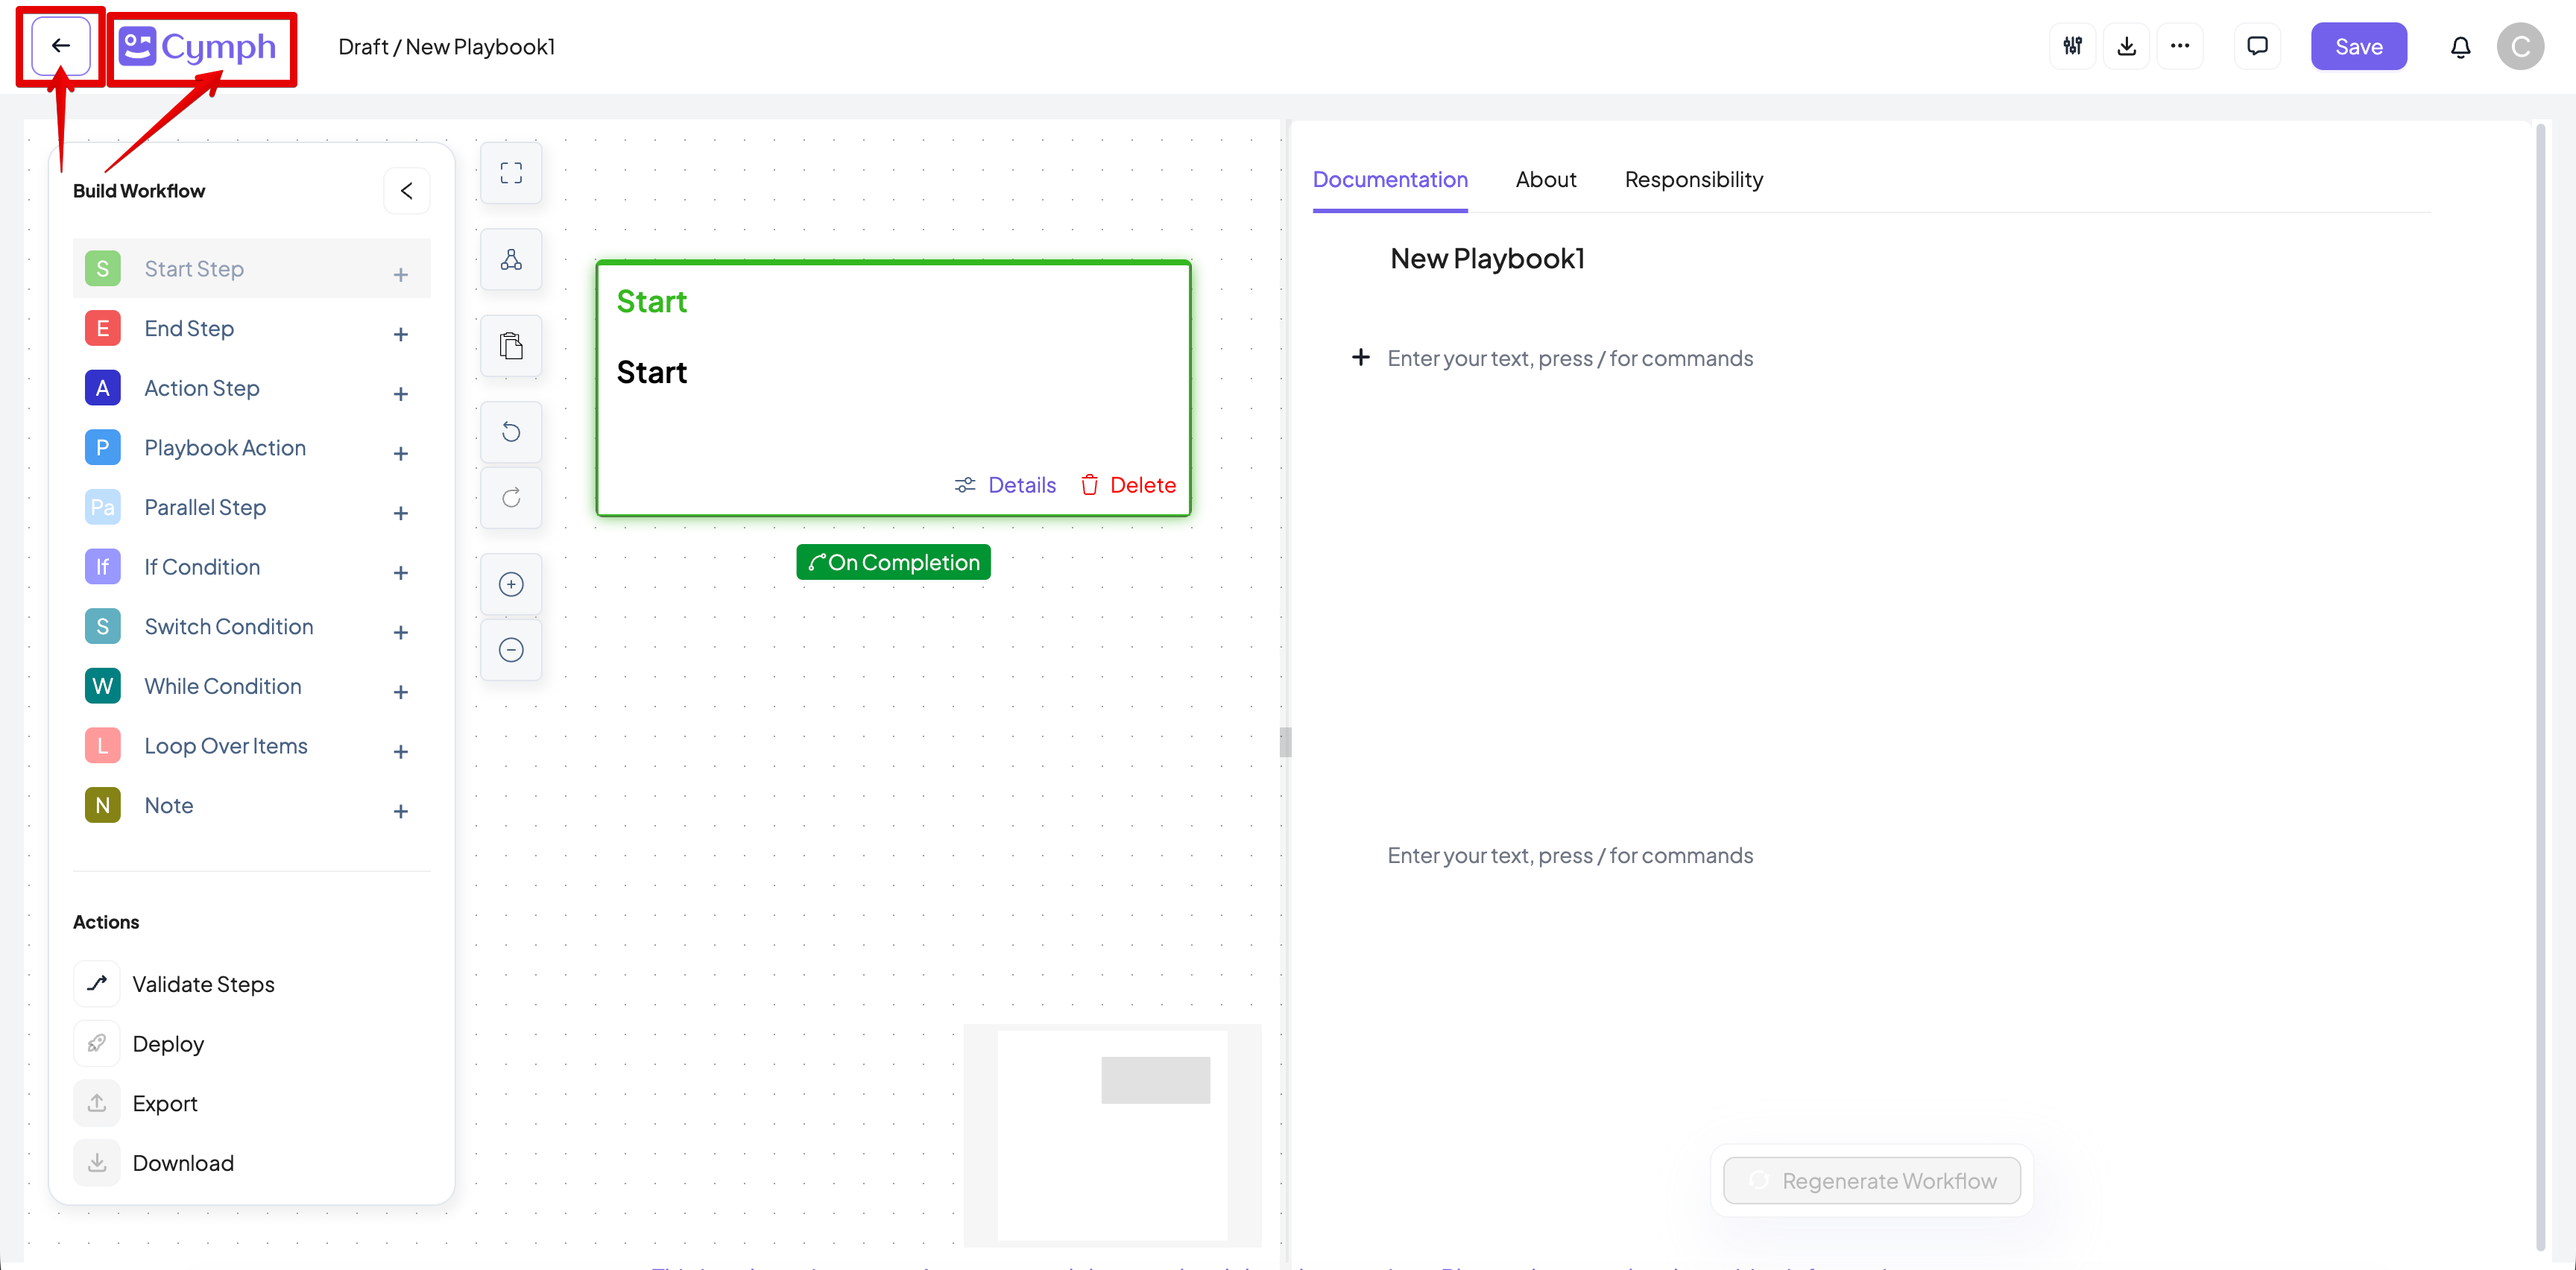
How to exit the editor
There are two options to exit the editor:- Click the Cymph logo.
- It is located on the top left corner of the editor.
- Click the Back to main page button.
- Save: Save changes and exit the editor.
- Discard changes: Do not save changes and exit the editor.
- Cancel: Ignore and return back to the editor.