> ## Documentation Index
> Fetch the complete documentation index at: https://docs.cymph.io/llms.txt
> Use this file to discover all available pages before exploring further.
# Manage members
## Overview
The **Organisation page** provides a view of the **Active** and **Invited** members.
The **Members** **table** that gives you an overview of all members (both active and invited) in your organisation:
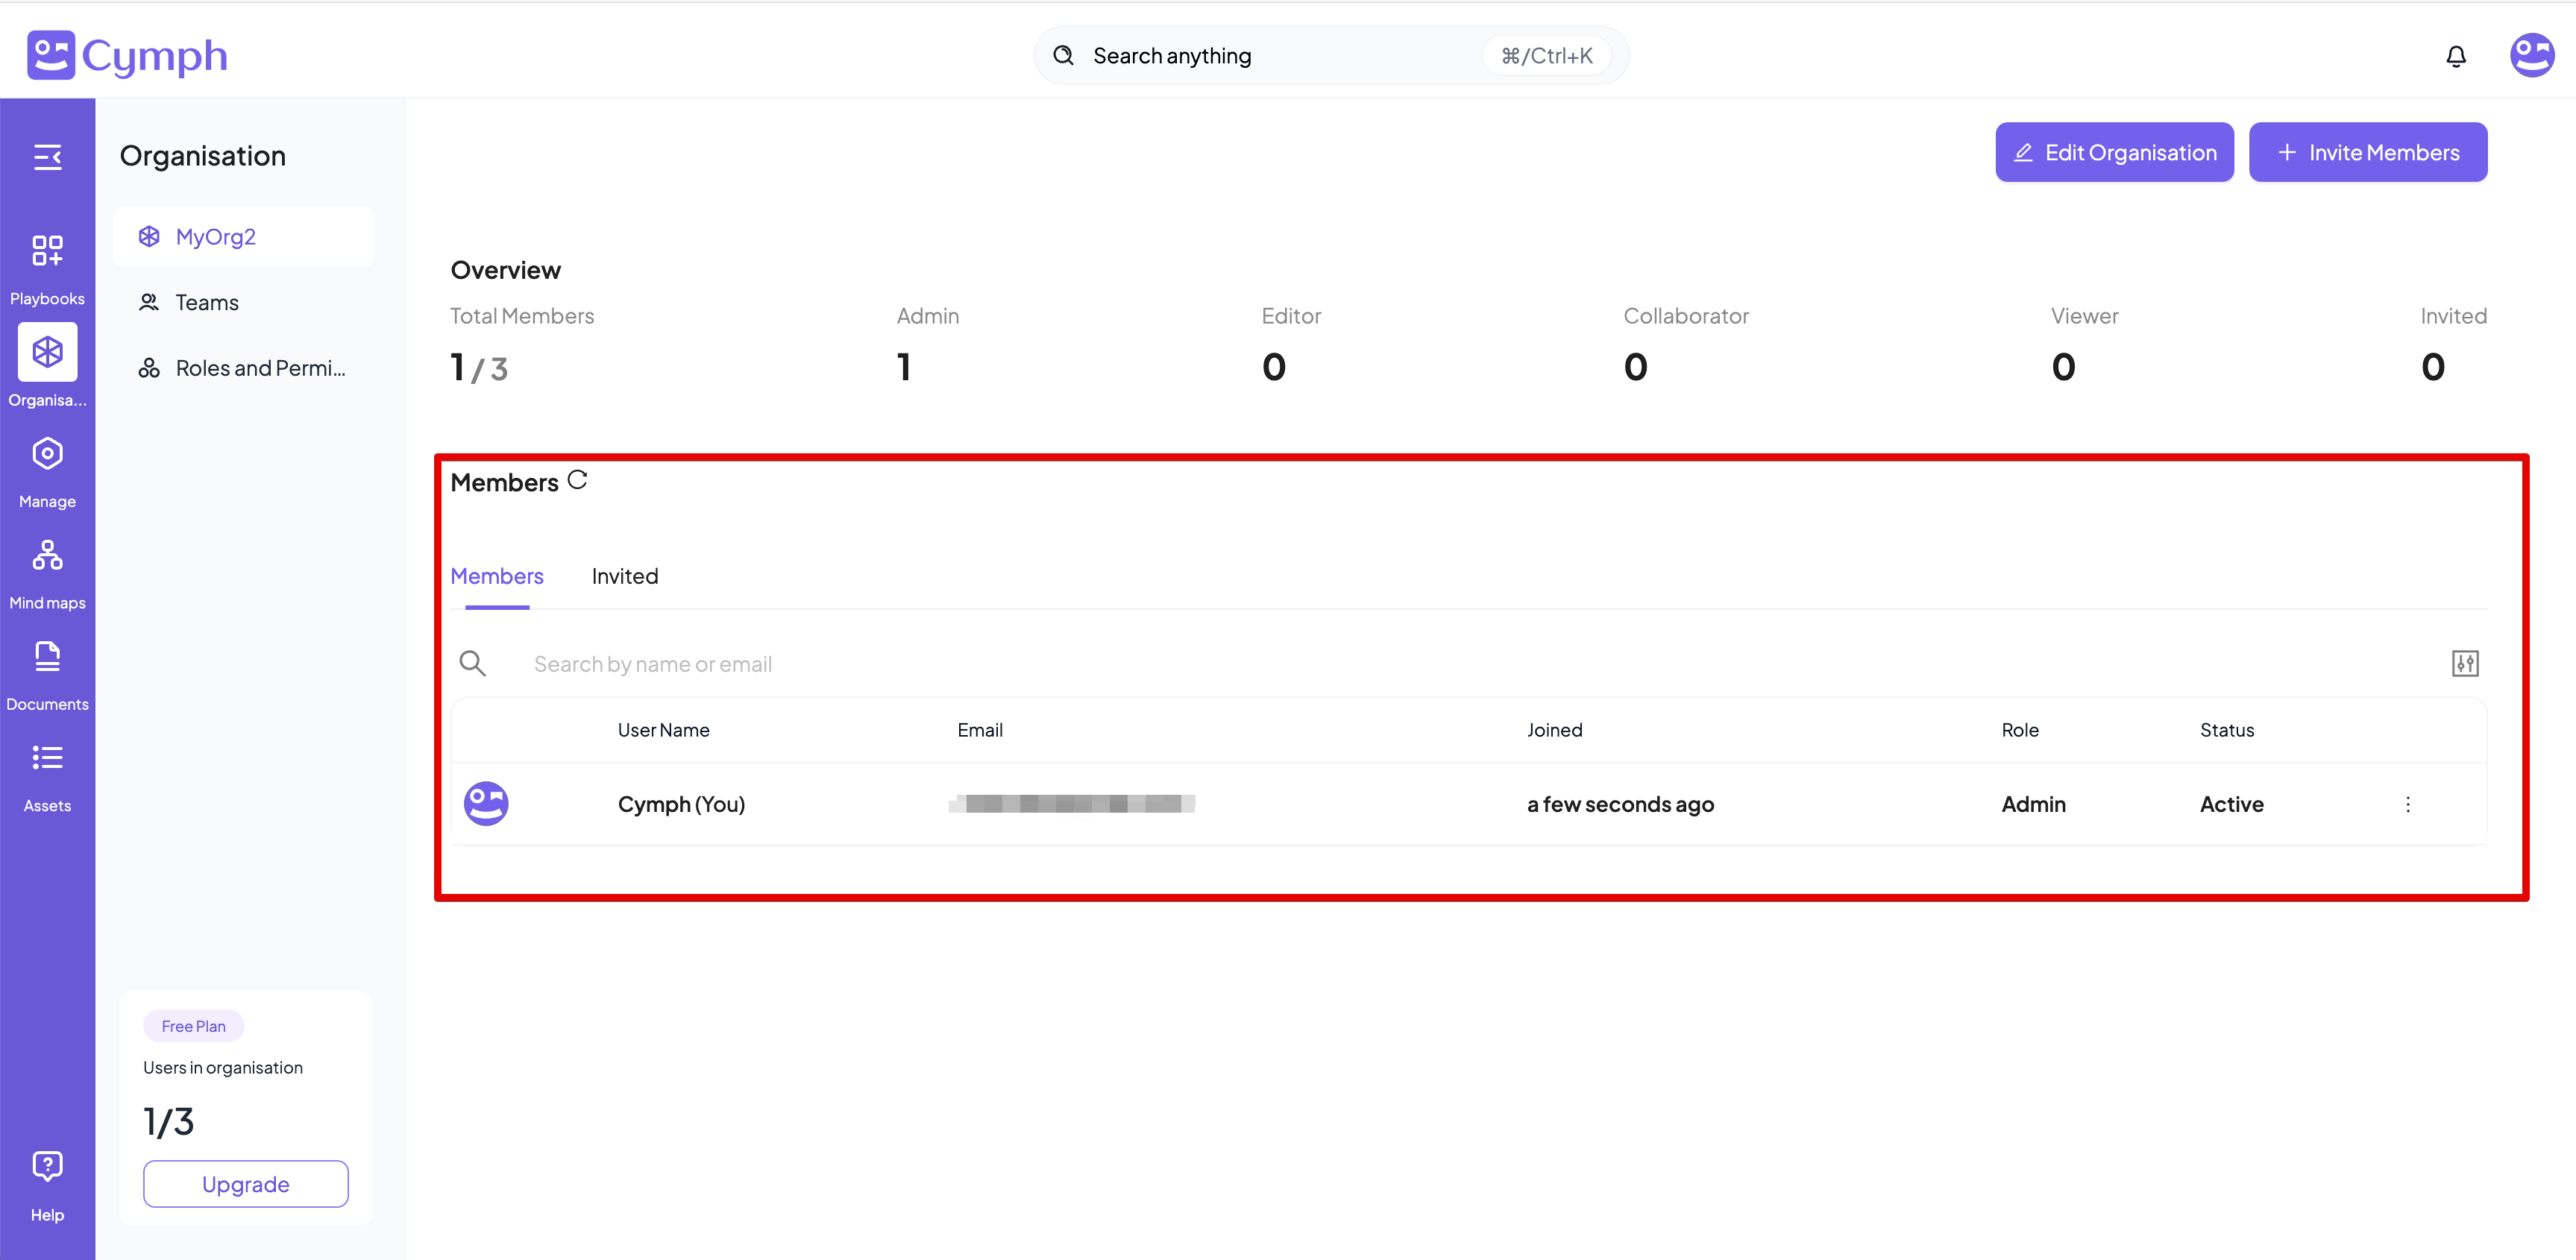 The **Members** **table** contains seven columns:
1. **Avatar**: the member’s avatar, if uploaded, else their initials.
2. **User Name**: the name and surname of the member, as declared during their registration process. This column is empty for invited members.
3. **Email**: the email address of the member.
4. **Joined**: the time elapsed since the member joined your organisation. This column is empty for invited members, since they have not yet joined.
5. **Role**: their [role](https://www.notion.so/User-roles-15957edf20d4802b960efb01b0391fbf?pvs=21) in your organisation.
6. **Status**: “Active” if they have joined your organisation, “Invited” if they have been invited and their response is pending.
7. **An action column**: Actions appear by clicking the triple dot icon `⫶`
## Managing active members
### How to change the role of a member
1. Go to your Organisation page.
* From the main dashboard, navigate to the **Organisation** page.
2. Click the arrow next to the user’s role.
* A dropdown menu will appear with all the available [roles](https://www.notion.so/User-roles-15957edf20d4802b960efb01b0391fbf?pvs=21) (Admin, Editor, Collaborator, Viewer).
The **Members** **table** contains seven columns:
1. **Avatar**: the member’s avatar, if uploaded, else their initials.
2. **User Name**: the name and surname of the member, as declared during their registration process. This column is empty for invited members.
3. **Email**: the email address of the member.
4. **Joined**: the time elapsed since the member joined your organisation. This column is empty for invited members, since they have not yet joined.
5. **Role**: their [role](https://www.notion.so/User-roles-15957edf20d4802b960efb01b0391fbf?pvs=21) in your organisation.
6. **Status**: “Active” if they have joined your organisation, “Invited” if they have been invited and their response is pending.
7. **An action column**: Actions appear by clicking the triple dot icon `⫶`
## Managing active members
### How to change the role of a member
1. Go to your Organisation page.
* From the main dashboard, navigate to the **Organisation** page.
2. Click the arrow next to the user’s role.
* A dropdown menu will appear with all the available [roles](https://www.notion.so/User-roles-15957edf20d4802b960efb01b0391fbf?pvs=21) (Admin, Editor, Collaborator, Viewer).
 3. Select the desired role for the member.
* The corresponding member’s role will change and the Members table will be refreshed to reflect the changes.
3. Select the desired role for the member.
* The corresponding member’s role will change and the Members table will be refreshed to reflect the changes.
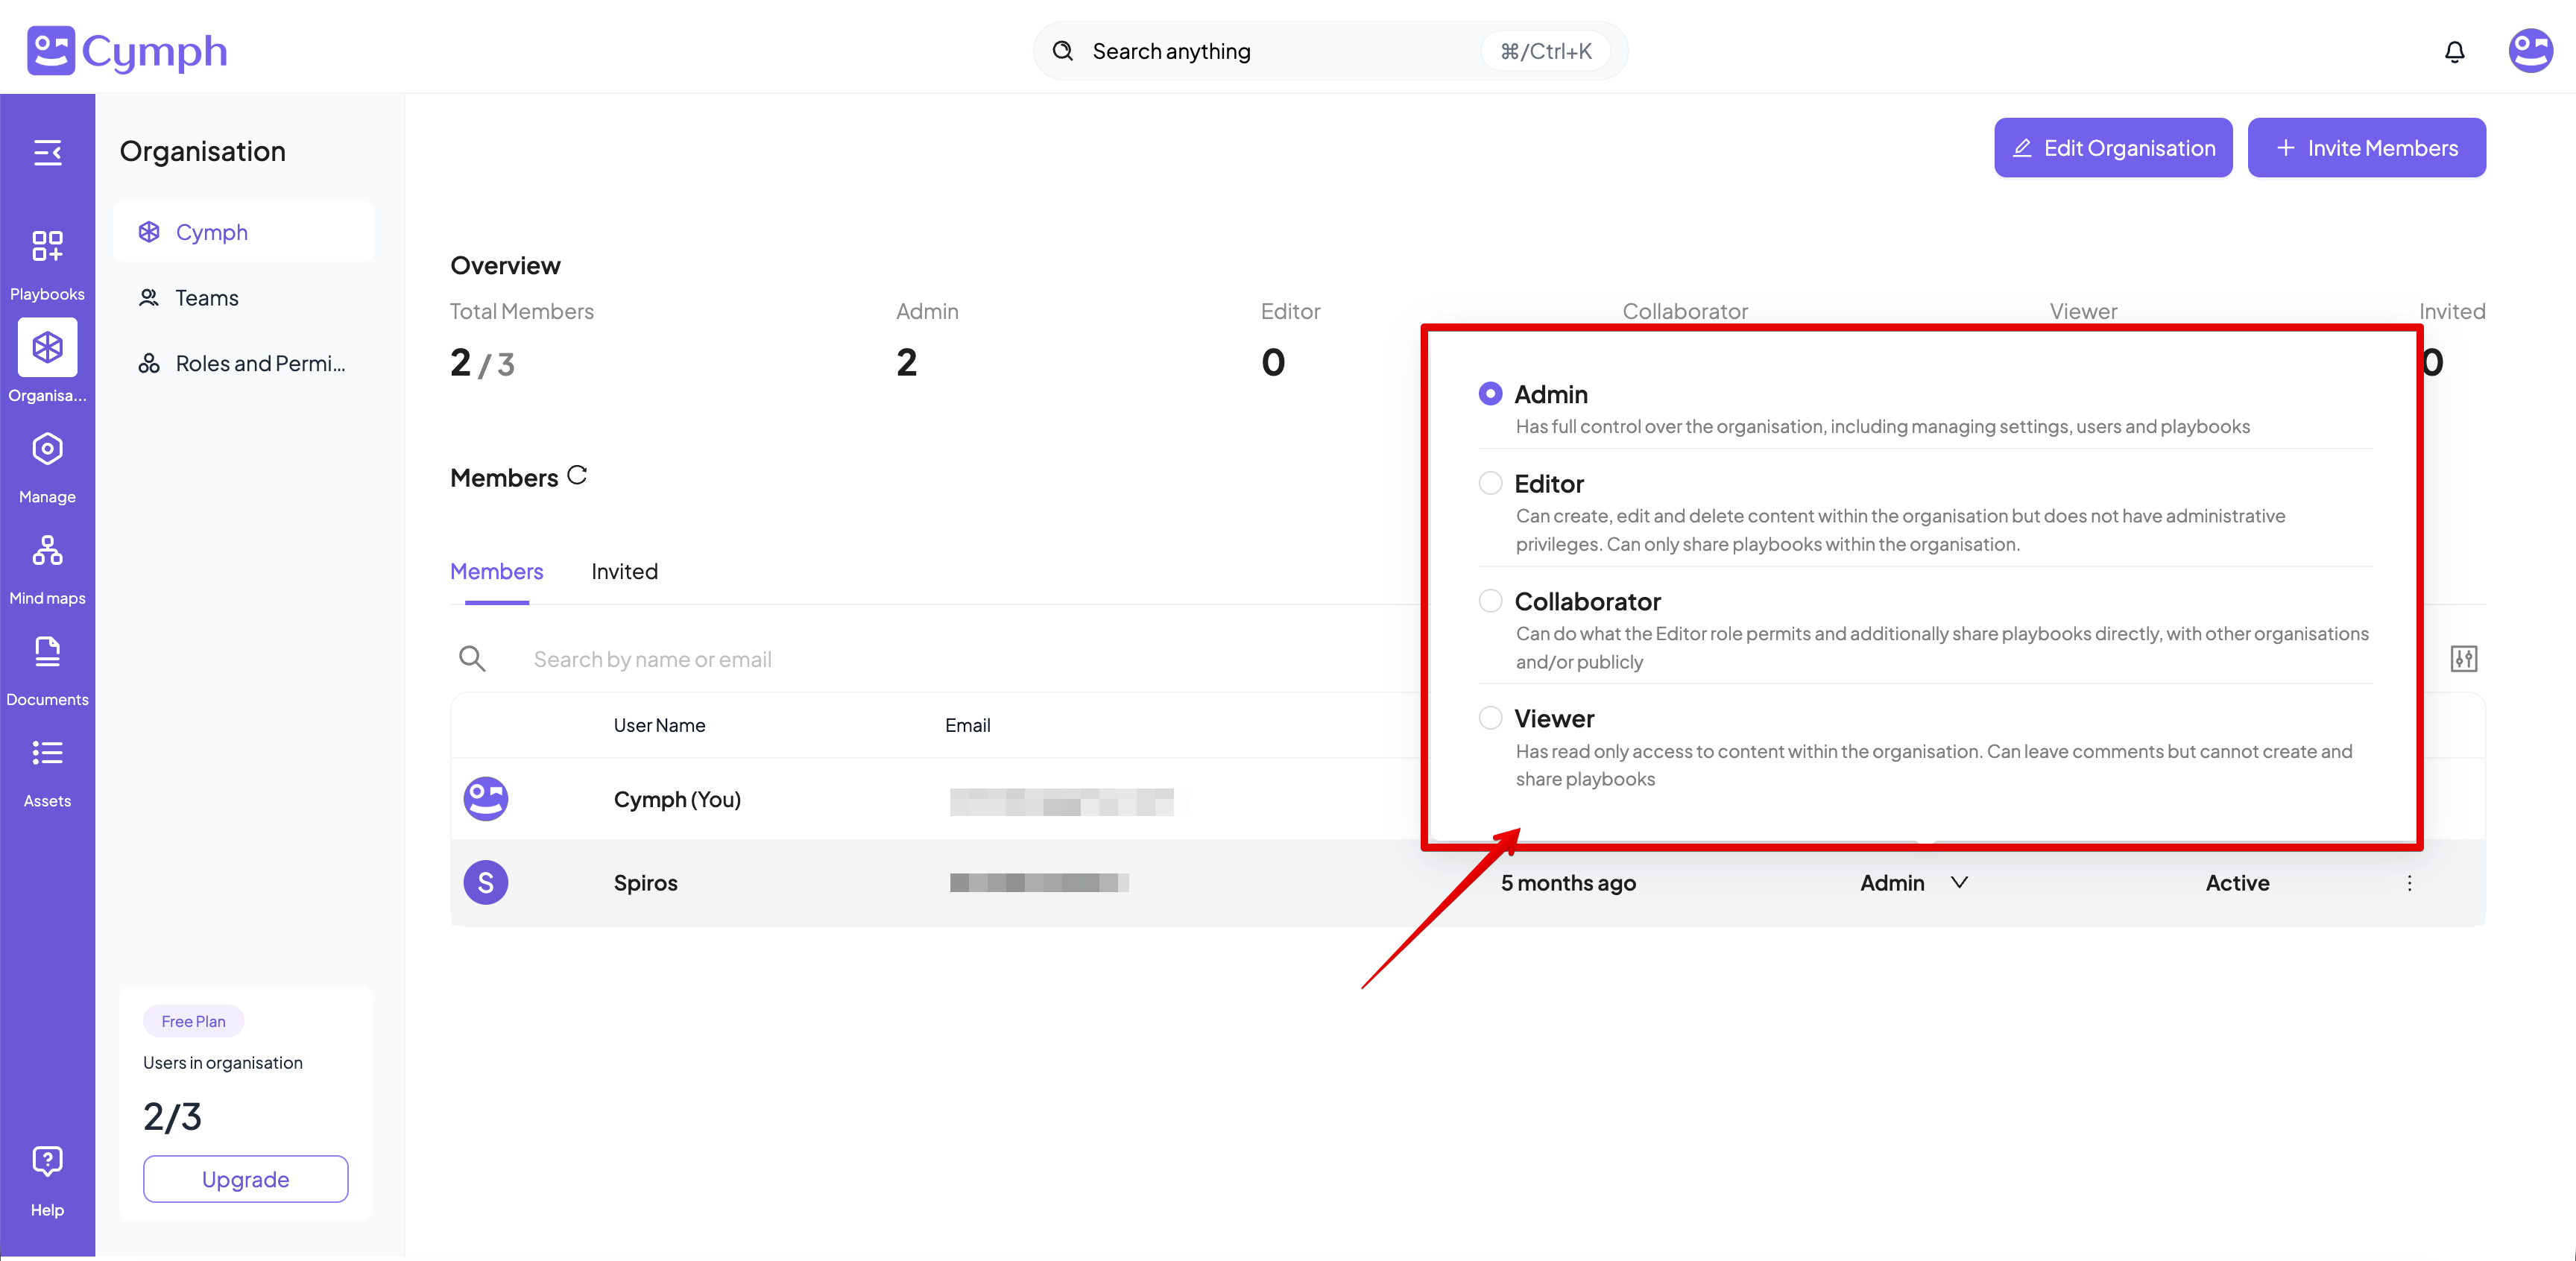 **Note**: Only members with the **Admin** **role** can change the role of other members. Admin users cannot change their own role.
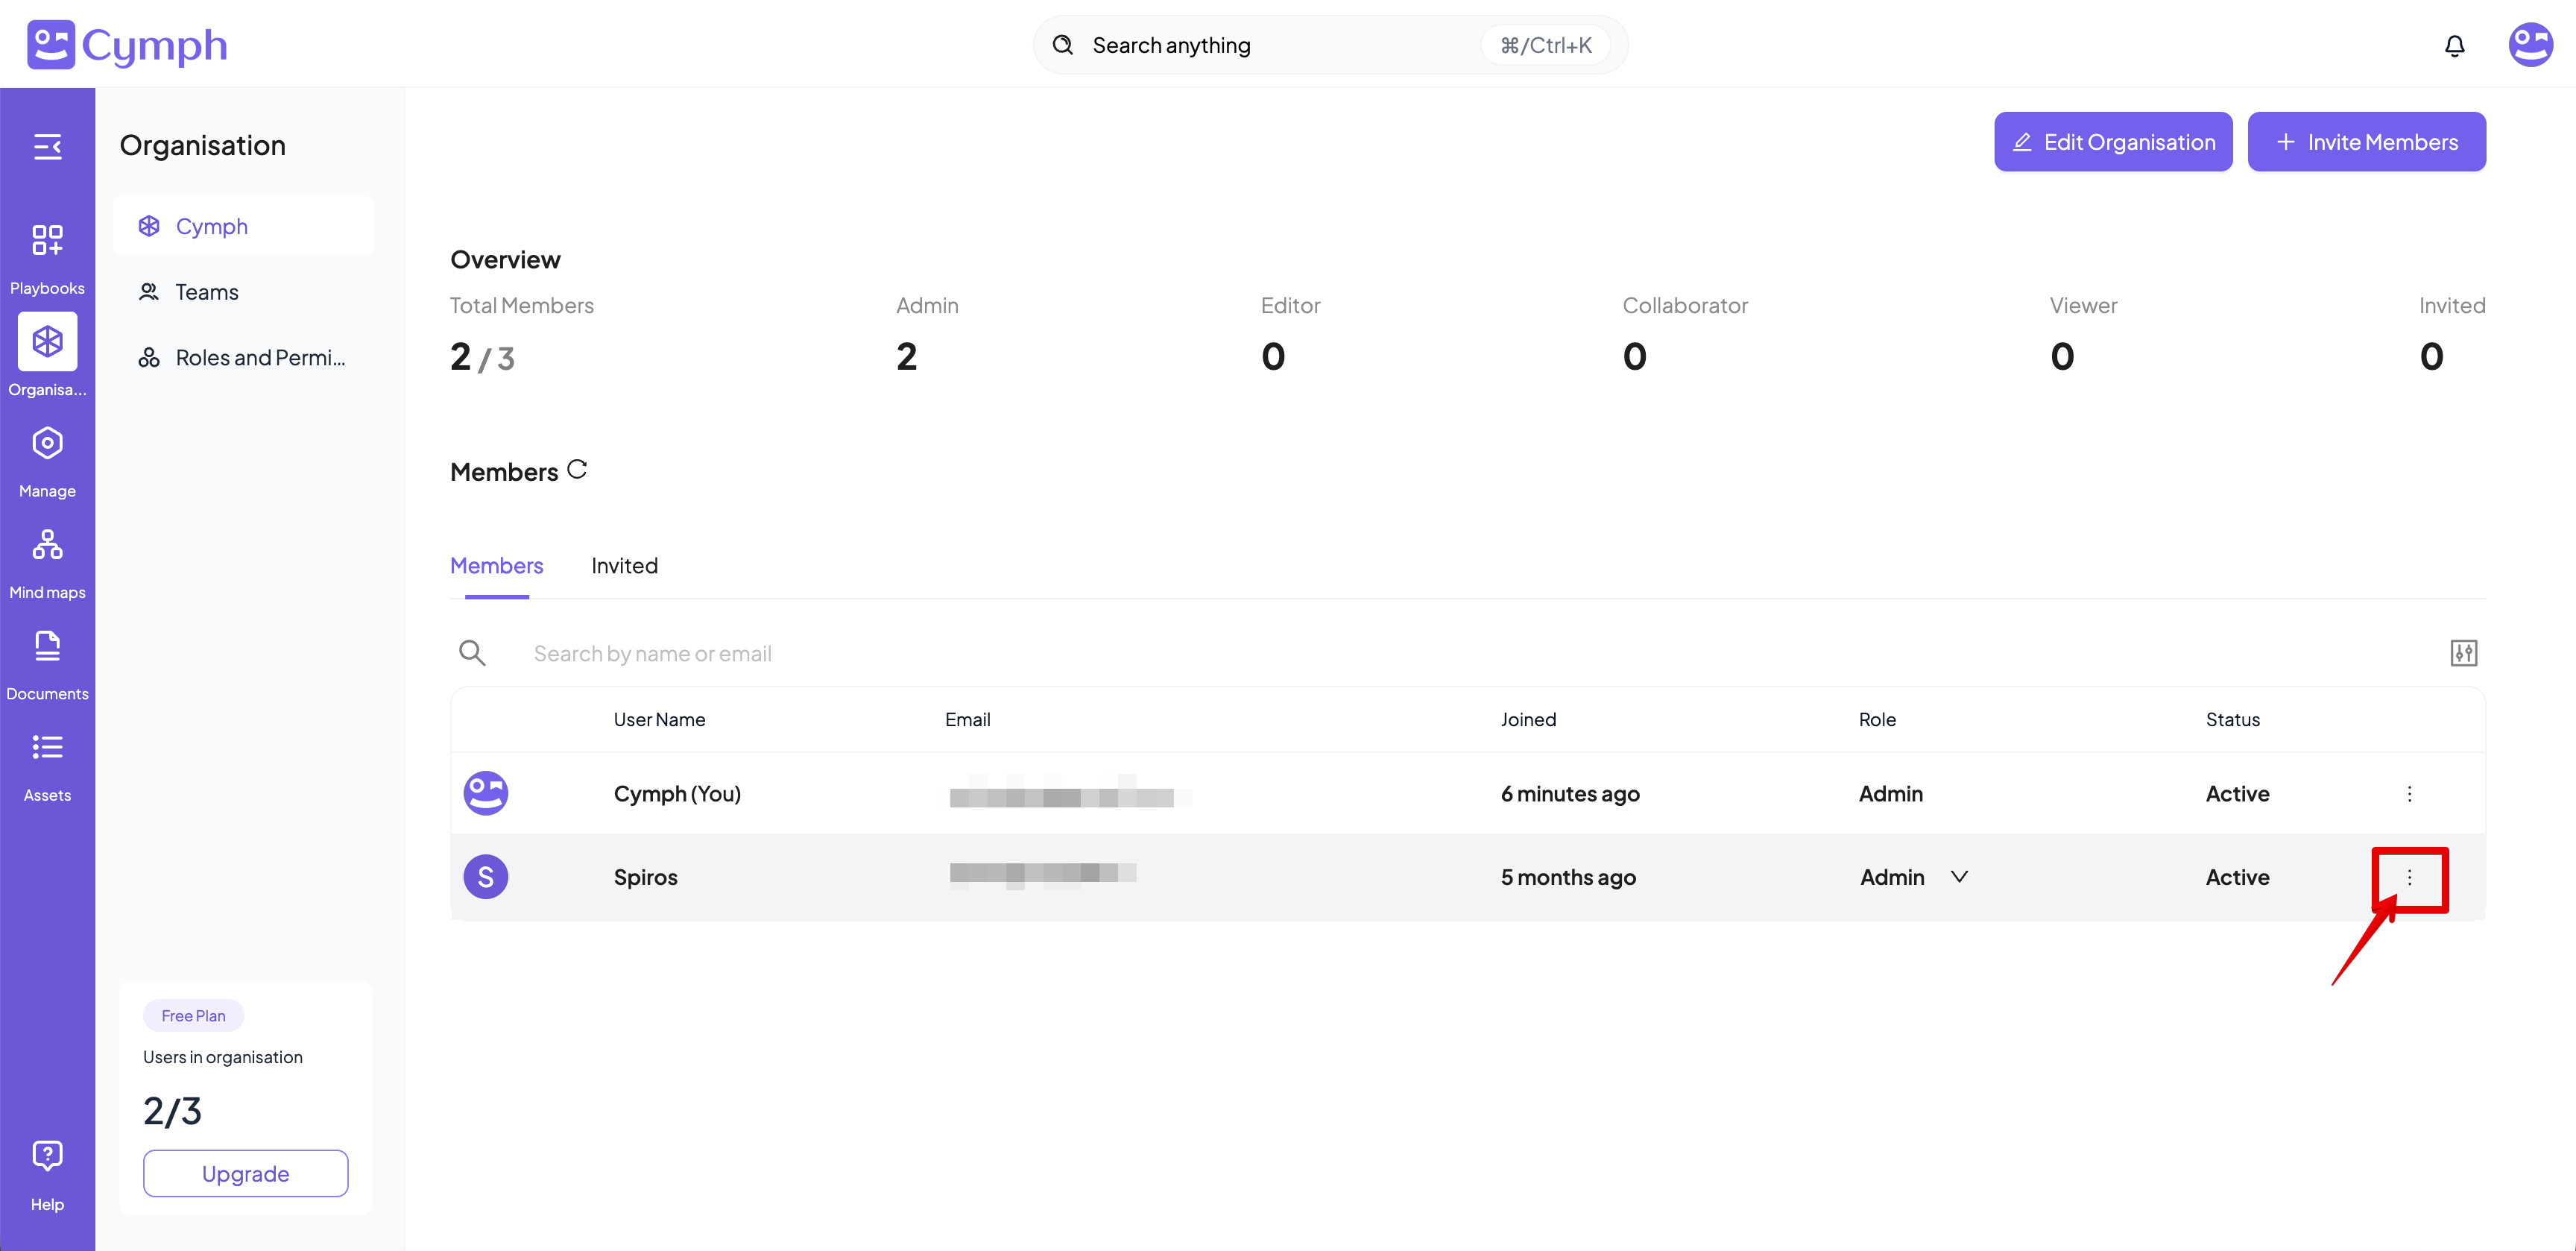
### How to edit a member
1. Go to your Organisation page.
* From the navigation menu, go to the **Organisation** page.
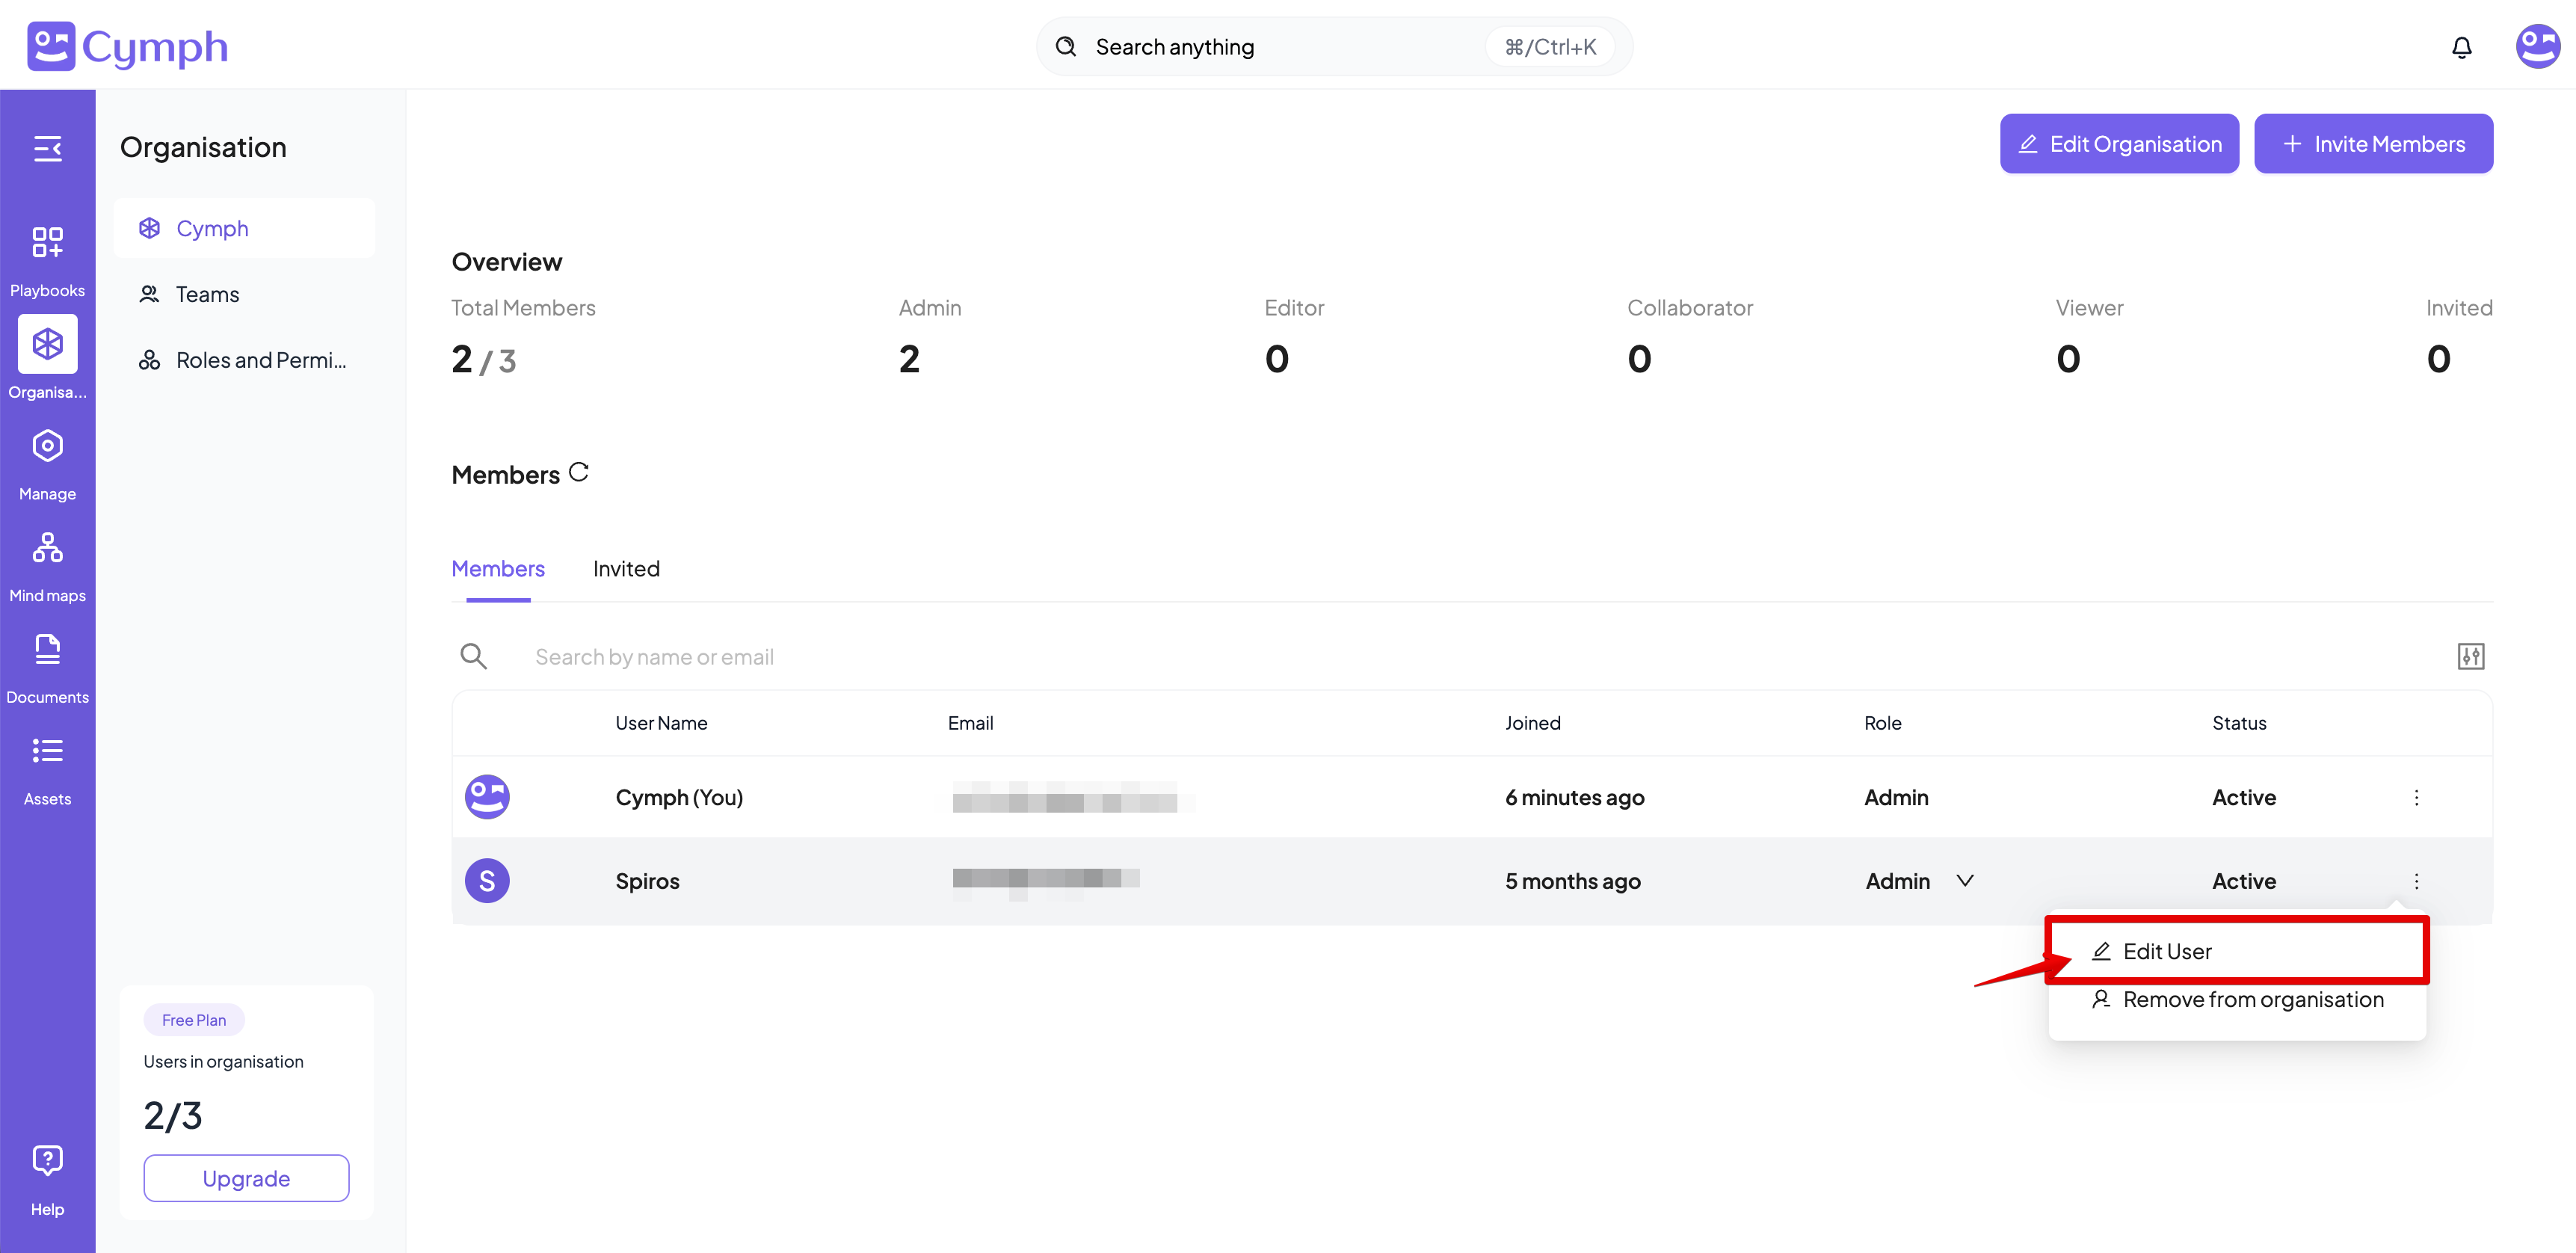
2. Click the **triple dot icon**`⫶` in the action column of the member you want to edit
* A dropdown menu will appear containing the actions that can be performed (Edit User, Remove from organisation).
**Note**: Only members with the **Admin** **role** can change the role of other members. Admin users cannot change their own role.
### How to edit a member
1. Go to your Organisation page.
* From the navigation menu, go to the **Organisation** page.
2. Click the **triple dot icon**`⫶` in the action column of the member you want to edit
* A dropdown menu will appear containing the actions that can be performed (Edit User, Remove from organisation).
 3. Click the **Edit User** option.
* The **Edit User panel** will appear.
3. Click the **Edit User** option.
* The **Edit User panel** will appear.
 4. Change the visibility status of the user (optional).
* Click the visibility toggle next to “Visible to others”.
* Grey toggle means the user is invisible, purple toggle means they are visible. Visible users are searchable by all Cymph users in the platform.
5. Ask user to reset their password (optional).
* Click **Ask user to reset their password**.
* A notification will appear on the user notification centre to ask them to reset their password.
**Note**: Only members with the **Admin** **role** can edit the role of other members.
### How to remove a member from the organisation
1. Go to your **Organisation** page.
* From the main dashboard, navigate to the **Organisation** page.
2. Click the \*\*triple dot icon \*\*`⫶` in the action column of the user you want to edit.
3. Click the **Remove from organisation** option .
* A confirmation dialog will appear.
4. Change the visibility status of the user (optional).
* Click the visibility toggle next to “Visible to others”.
* Grey toggle means the user is invisible, purple toggle means they are visible. Visible users are searchable by all Cymph users in the platform.
5. Ask user to reset their password (optional).
* Click **Ask user to reset their password**.
* A notification will appear on the user notification centre to ask them to reset their password.
**Note**: Only members with the **Admin** **role** can edit the role of other members.
### How to remove a member from the organisation
1. Go to your **Organisation** page.
* From the main dashboard, navigate to the **Organisation** page.
2. Click the \*\*triple dot icon \*\*`⫶` in the action column of the user you want to edit.
3. Click the **Remove from organisation** option .
* A confirmation dialog will appear.
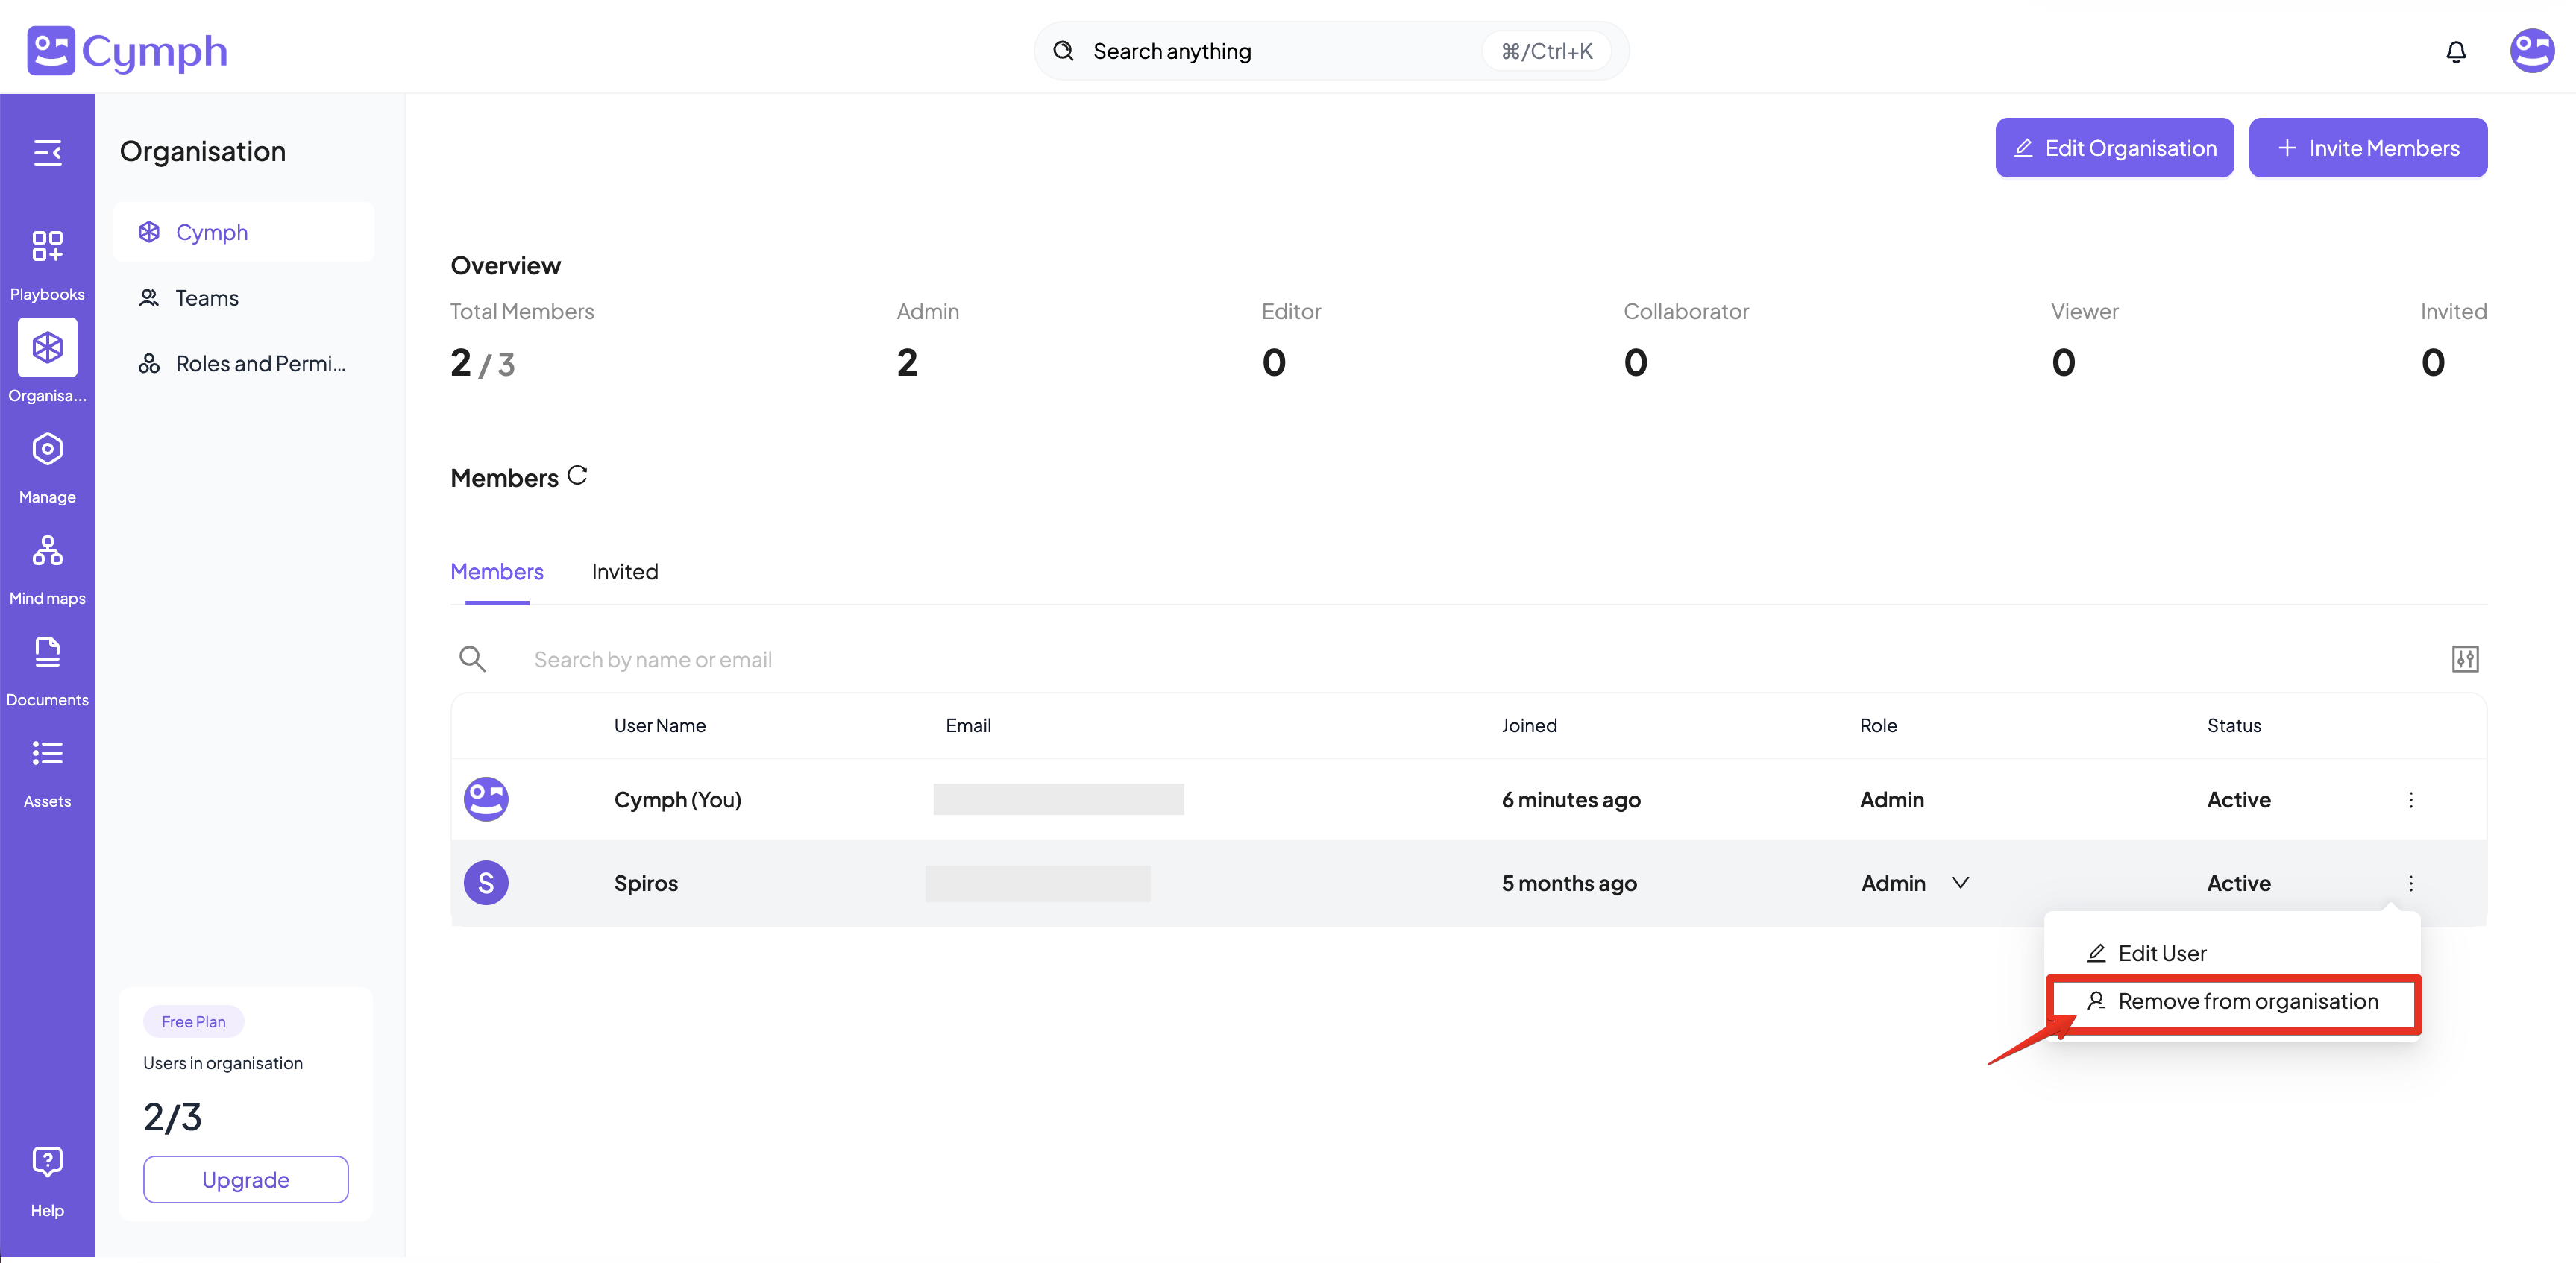 4. Confirm the removal of the user.
* Click **Remove User** to remove the user from the organisation.
* The user will be removed from the organisation and will no longer appear in the Members table.
* Only members with the **Admin** **role** can remove other members.
* All the playbooks created by the users while they were members of the organisation **will be transferred** to the administrator of the organisation.
* **An administrator cannot remove themselves from the organisation**.
## Managing invited users
Users that have been invited to your organisation but have not yet responded to your invite will appear in \*\*Invited \*\*table.
### How to re-send an invite
1. Go to your **Organisation** page.
2. Click on the **Invited** table
3. Click the **Re-send invite** option.
* The invitation email will be re-sent to the provided e-mail address.
4. Confirm the removal of the user.
* Click **Remove User** to remove the user from the organisation.
* The user will be removed from the organisation and will no longer appear in the Members table.
* Only members with the **Admin** **role** can remove other members.
* All the playbooks created by the users while they were members of the organisation **will be transferred** to the administrator of the organisation.
* **An administrator cannot remove themselves from the organisation**.
## Managing invited users
Users that have been invited to your organisation but have not yet responded to your invite will appear in \*\*Invited \*\*table.
### How to re-send an invite
1. Go to your **Organisation** page.
2. Click on the **Invited** table
3. Click the **Re-send invite** option.
* The invitation email will be re-sent to the provided e-mail address.
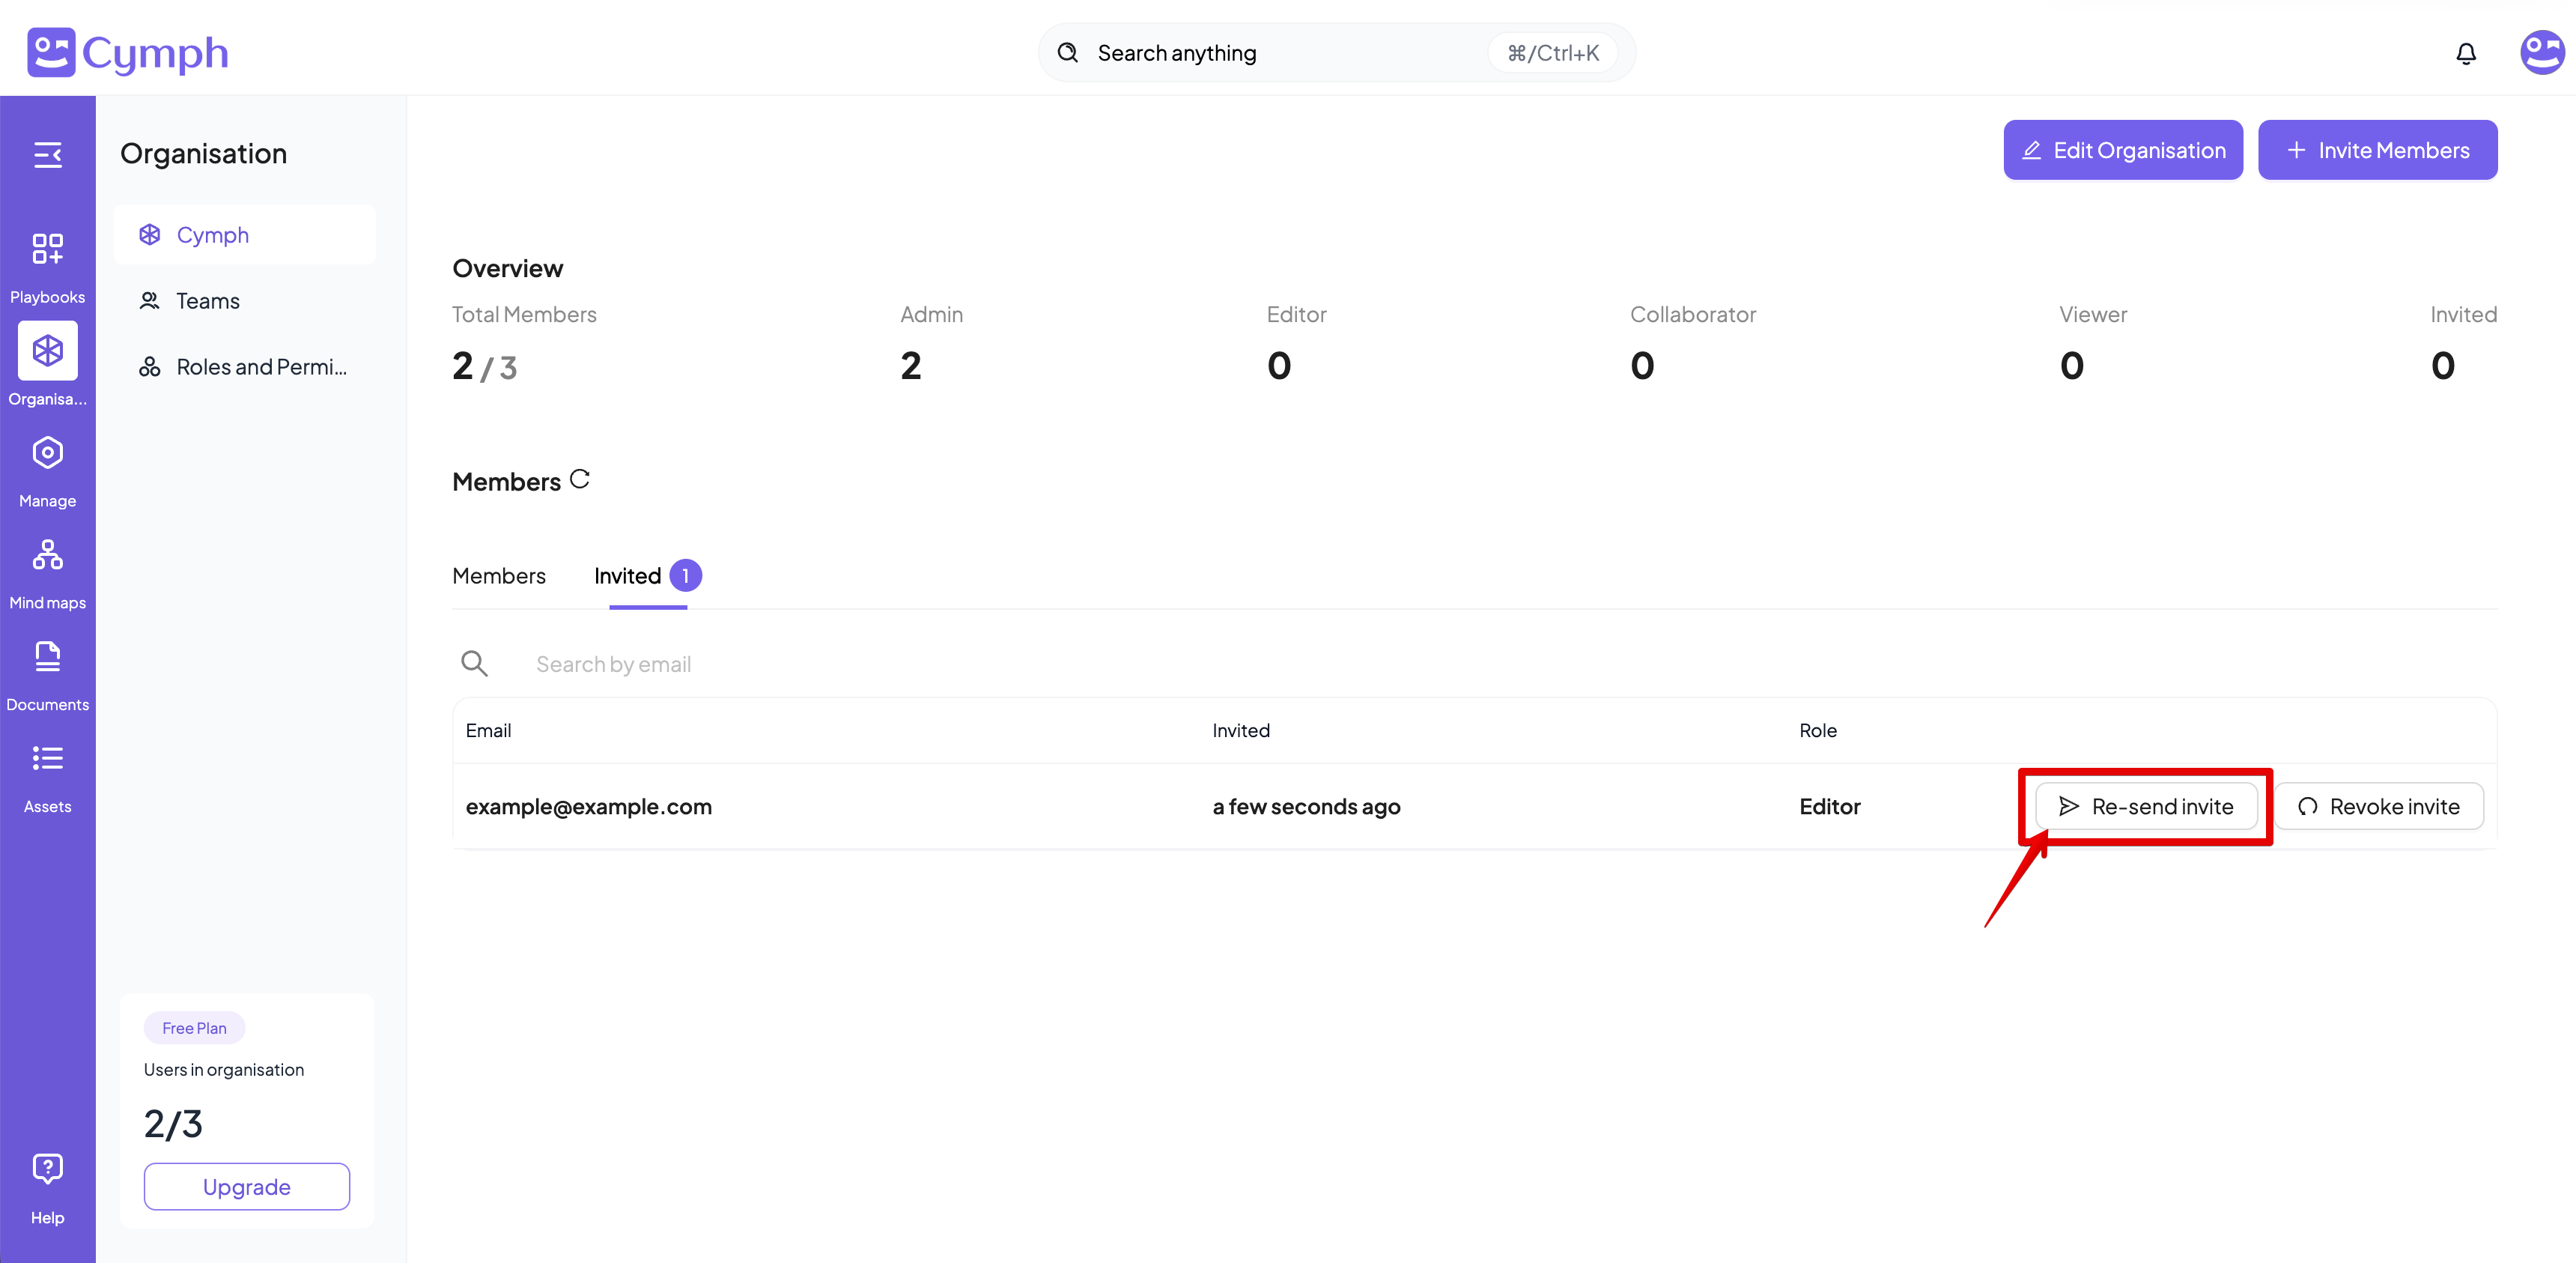 ### How to revoke an invite
1. Go to your **Organisation** page.
* From the main dashboard, navigate to the **Organisation** page.
2. Go the **Invited** tab
3. Click **Revoke invite** option.
* A confirmation dialog will appear.
4. Confirm the revocation.
* Click **OK** to revoke the invitation.
* The invitation will be revoked and the invited user will no longer appear in the members table.
**Note**: Only users with the **Admin** **role** can re-send or revoke invites
### How to revoke an invite
1. Go to your **Organisation** page.
* From the main dashboard, navigate to the **Organisation** page.
2. Go the **Invited** tab
3. Click **Revoke invite** option.
* A confirmation dialog will appear.
4. Confirm the revocation.
* Click **OK** to revoke the invitation.
* The invitation will be revoked and the invited user will no longer appear in the members table.
**Note**: Only users with the **Admin** **role** can re-send or revoke invites